Authentication
Biometric
Proximity Card
Username and Password
Biometric
Features
The biometric authentication type can be configured as a primary or secondary authentication technology to sign into ExactAccess SSO. During enrollment, the user will provide their directory service password to maintain pass-through authentication scenarios.
Warning
Proximity cards cannot be used when Biometric is configured for primary authentication.
Log-in as a Local Administrator to the workstation you would like to make changes on.
The Client Configuration Tool will only run under an account with Local Administrator privileges.
Navigate to the Windows® Start menu> All Programs > HealthCast > ExactAccess > Utilities > Configuration > Client Configuration.
and choose Kiosk Mode.
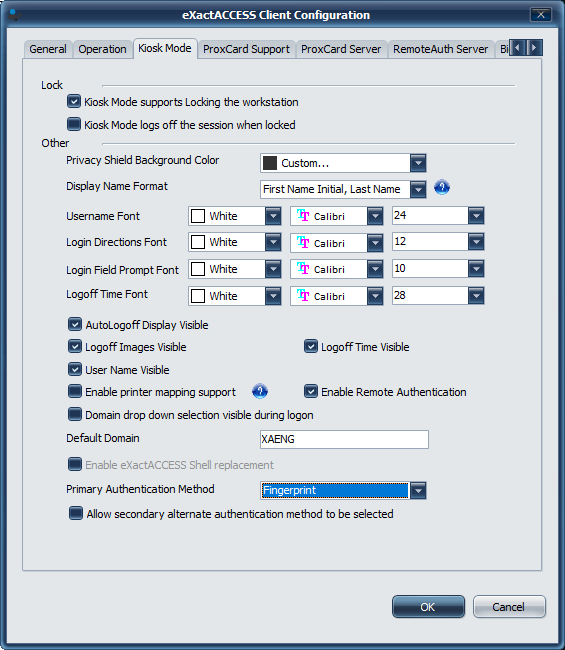
To enable fingerprint support, select "Fingerprint" from the Primary Authentication Method drop-down box located in the section titled Other .
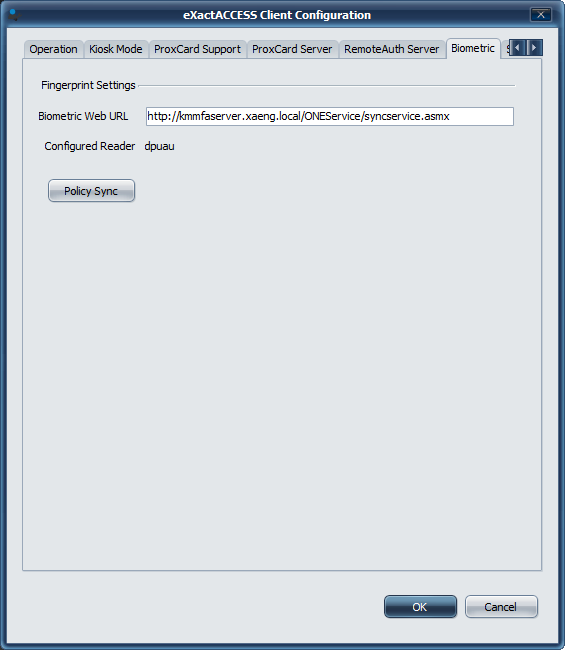
To change server or refresh policies, select the Biometric tab and configure as needed.
Important
This setting should already have a value present after running the RapidIdentity plug-in for Biometrics installation, but can be updated here. If this value is blank, ensure the RapidIdentity plug-in for Biometrics installation has been completed.
Here, you can select to enable the fingerprint support. Biometric readers supported include the EikonTouch-710 and IMP-1C.
It will be necessary to synchronize the policies configured on the MFA server for the workstation to the MFA client components used for authentication with Biometrics. This includes the device driver name, the MFA server name, and server timeout values. Other values may be retrieved as needed. See MFA Policies for more information.
Note
Not all policies are applicable, or will be used by the XA Client.
Click OK.
Lock or Logoff of ExactAccess for this setting to take effect.
See RapidIdentity MFA Client for installation and MFA Enrollment Workstation for information on enrolling users in the Biometric Solution.
To manually set the primary authentication method to biometric, set the following registry value:
HKEY_LOCAL_MACHINE\SOFTWARE\HealthCast\ExactAccess\XAServerManager
ClientDSProgID: reg_sz = "XAPWENCShell.clsXAPWENCShell"
Possible Values:
NTKMDSUser.clsNTKMDSUser - prompt for user name and password
XAPWENCShell.clsXAPWENCShell - prompt for fingerprint biometric
ClientDSProgIDAlt: reg_sz = "XAPWENCShell.clsXAPWENCShell"
KioskPlugin: reg_sz = "IA.XA.Biometric"
Proximity Card
Features
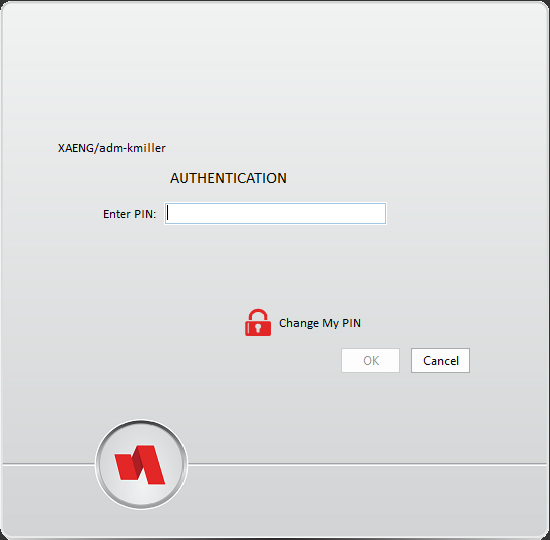
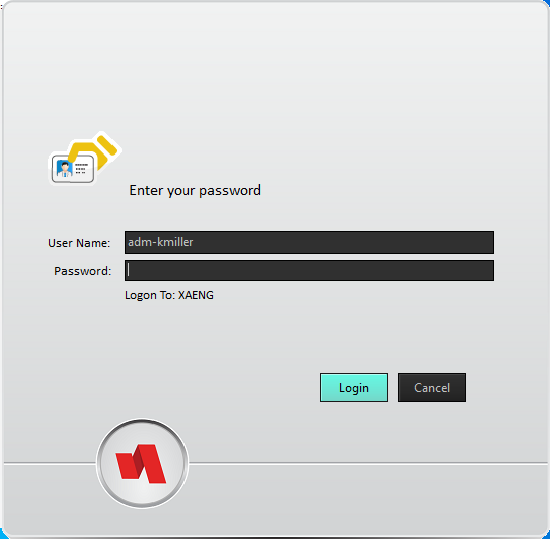
Proximity card login is used in conjunction with the Username and Password login dialog. In addition to Proximity Card authentication, the user can be required to type a PIN in response to a badge tap to complete the login to the ExactAccess SSO solution. The user interface may be customized by changing the background images, the font face, color and size for various prompts, as well as the layout of the dialog utilizing a mask image.
Card Type | RFIdeas Reader Models 1 | HID Global/OmniKey | |||||
|---|---|---|---|---|---|---|---|
HID® cards |
|
| |||||
iCLASS® cards |
|
| |||||
Indala® cards |
| ||||||
MiFARE® cards |
|
1 Reader models cannot be mixed in the same environment.
2 Card serial number (CSN) do not support Parity Checking, Facility ID filtering, or Badge ID range checking features provided by ExactAccess.
Warning
Card readers that only read the card serial number (CSN) cannot be configured with advanced features such as Parity Checking, Facility ID filtering, and Badge ID range checking.
Note
Card readers supporting card serial number (CSN) typically read 64-bit serial number values.
3 Reader must be pre-configured for compatibility with card type and data type, as the reader supports dual band communications. Only a single band can be utilized at a time 1.
4 Parity Checking, Facility ID filtering, or Badge ID range checking features are not available with this reader model.
Log-in as a Local Administrator to the workstation you would like to make changes on.
The Client Configuration Tool will only run under an account with Local Administrator privileges.
Navigate to the Windows® Start menu> All Programs > HealthCast > ExactAccess > Utilities > Configuration > Client Configuration.
and choose ProxCard Support.
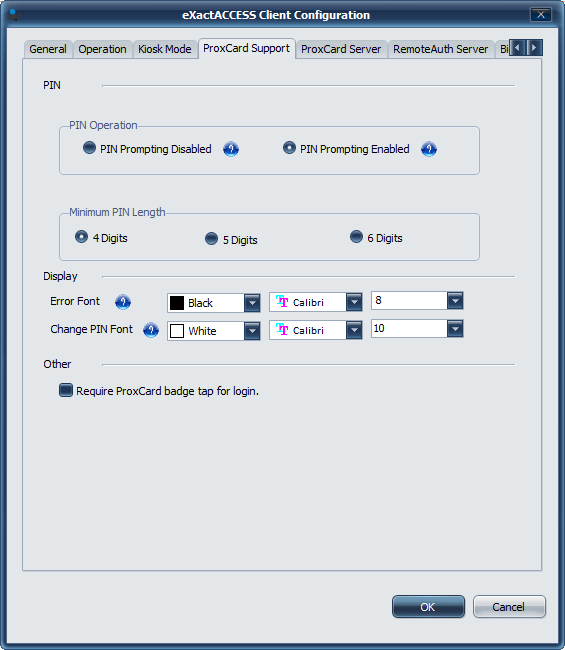
In the PIN Operation section select to either enable or disable prompting for PIN during authentication.
Set the minimum length PIN a user must choose during enrollment.
Click OK.
The PIN functionality is now set and will take effect without a reboot.
Using RFIdeas Readers
HKLM\Software\HealthCast\ProxCardClient
ReaderType: reg_sz = USB
HKLM\Software\HealthCast\ProxCardClient
ReaderType: reg_sz = SCARD
HKLM\Software\HealthCast\ProxCardClient\Indy
The following registry settings must also be present and configured
CompressionClass: reg_sz = one of the following values:
NONE
VCLZIP
EncryptionClass: reg_sz = one of the following values:
RIJNDAEL
RIJNDAEL128
RIJNDAEL256
BLOWFISH
0000: reg_sz = The sferver DNS name or IP address where HealthCast ProxCard Server has been installed and configured.
EnabledServerIDs: reg_sz = "0000" - this must contain at least one active server number
Port: reg_dword = 30000 - the default port for communications. If you have altered the default listening port during the server installation, update this for the correct port number.
If you have client side fail over configured for Remote Authentication, you may also want to configure fail over for ProxCard. This is accomplished the same way as for Remote Authentication.
Add a new entry:
0001: reg_sz - add the secondary server DNS name or IP address
Update the EnabledServerIDs as a comma separated list of active servers:
EnabledServerIDs: reg_sz = "0000,0001"
Tip
When using client side fail-over, DNS lookup failure could cause excessive time for failure detection. If this happens, the client will not test all available servers. Use the following setting to extend the detection time (setting is specified in seconds):
HKEY_LOCAL_MACHINE\SOFTWARE\HealthCast\ProxCardClient
ConnectionTimeout: reg_dword = 8
If the setting doesn't exist, the default timeout is 1 second, so if DNS takes longer than this, secondary servers won't be attempted.
HKLM\Software\HealthCast\ProxCardClient\PIN
The following registry settings can be configured for PIN support
AllowPinEnrollment: reg_dword = 1
A setting of 0 will disable PIN enrollment
MinPinLength: reg_dword = 4
Minimum PIN length is 4, but can be as long as 6
PinPromptInMinutes: reg_dword = 0
PIN Prompting can be disabled by setting this to hex: 0xFFFFFF or decimal: 4294967295. The setting is either enabled or disabled.
Open regedit and navigate to the following key:
HKEY_LOCAL_MACHINE\SOFTWARE\HealthCast\ProxCardClient
BlankBadgeScan: reg_dword = 0
The setting "SelfEnrollmentDisabledMessage" may also be modified to give users a message that self-enrollment has been disabled.
Tip
If self enrollment is disabled, then the ProxCard Administrator must be used to pre-enroll cards before they are issued to users.
Caution
Not all badge readers or IDs will function with this feature. See System requirements for details.
These instructions are intended for XA solutions utilizing badge tap functionality. You must have badges and compatible badge readers in your environment in order to successfully monitor the bit count.
You can set the bit count in the registry to reflect the number of bits in your proximity card identification data. This is advisable if you wish to minimize the possibility that badge reads will be in error.
This is a custom security measure that will minimize the possibility that bad badge reads will cause unwanted outcomes in your environment.
Once the bit count has been set to a specific value, all cards with values that are not specified will be rejected and will not be able to create or connect to a user session. They will NOT be allowed.
Go to Start >Run >Regedit.
In the Registry Editor, locate the ValidBitCount value located at:
HKLM\Software\HealthCast\ProxCardClientThe ValidBitcount value may not be present. You may need to add this value as a string in the ProxCardClient folder located in the directory path above.
Modify the value to indicate the allowed bit count(s): 26, 35, or 37.
Multiple values may be used. Please put a comma between each value to separate them. We do support values other than 26, 35, or 37. If you have a bit count value that is not one of the standards listed above, please follow the instructions in the next section, Creating a New Bit Count Value.
Example: If the bitcount for your card type is 26, your final registry setting will look like this:
ValidBitCount:reg_sz="26"
If you have multiple cards with varying bit counts, your final registry setting may look similar to this:
ValidBitCount:reg_sz="26,35,37"
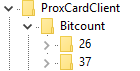
In the Registry Editor, locate the Bitcount key located at: HKLM\Software\HealthCast\ProxCardClient\Bitcount.
Create a new key within the Bitcount key. Use the number of your badges bits as the name of the new key.
Because there are other configuration options based on the bit count of your badges, you will need to create some additional keys.
In the newly created key (this key should be named with the number of bit counts contained in your badges), you must create another key. Please name this key Facility.
The facility validation feature is explained in more detail on the Facility Validation section.
Example
If the bitcount for your card type is 36, you would create the following registry structure:
HKLM\Software\HealthCast\ProxCardClient\Bitcount\36\facility
You would then modify the ValidBitcount value found in in HKLM\Software\HealthCast\ProxCardClient, adding your value of 36 by either replacing all other data in this value, or by appending ",36" to the end of the current list specified within the value.
The final registry setting would be similar to this:
ValidBitCount:reg_sz="36"
or
ValidBitCount:reg_sz="26,35,37,36"
This is a custom setting that will minimize the possibility that bad badge reads will cause unwanted outcomes in your environment.
Parity stripping is turned OFF by default. The default setting ( 0 ) allows your system to collect data regarding the parity bits contained in your proximity badge identification data. Leave this setting as is if you are installing XA Client in your environment for the first time. It will allow for advanced troubleshooting and quicker resolution to proximity badge issues if they occur.
Changing this setting will strip the desired number of bits from your proximity badge identification data. This changes the number of bits that is stored in the ProxCard Server database to reflect the identification data minus the number designated to be stripped.
Upgrade
Change this setting if you are upgrading and have a ProxCard Server database that is already populated with user data from workstations that had this setting ON (1).
Users will need to re-enroll their badges when this setting is changed.
Go to Start >Run >Regedit.
In the Registry Editor, locate the ParityStripcountLeading and ParityStripCoundTrailing values located at:
HKLM\Software\HealthCast\ProxCardClient
Modify them to indicate the value of 1.
One bit stripped from the front and back of the data sequence is the most common scenario. If you feel your parity settings may be different, please contact your HealthCast Project Manager for assistance.
If you use the parity stripping setting, please ensure that your final bit count is 24 bits or more. A bit count of less than 24 bits will make badges unusable.
This is a custom setting that functions as a way to limit access to workstations based on the facility portion of a user's badge code. Validating facility code will minimize the possibility that bad badge reads will cause unwanted outcomes in your environment. This includes prohibiting the use of unauthorized proxcards.
Configuring the facility code validation feature requires adding new keys and values to the workstation's registry. This can be done via a transform or batch file during install or upgrade, or post-install/upgrade using the Registry Editor.
Instructions for configuring the facility validation feature will differ depending on your method of deployment, if you are installing XA for the first time, and if you are configuring your environment for parity stripping. Please contact your HealthCast representative before configuring facility validation if your scenario differs from those described below.
Go to Start >Run >Regedit.
Verify that the correct number of bits is specified in the ValidBitCount value located in the registry under: HKEY_LOCAL_MACHINE\SOFTWARE\HealthCast\ProxCardClient
If the ValidBitCount key has not been configured, follow the Bit Count Monitoring instructions to configure it.
Select one of the sub-keys under the BitCount key which reflect the bit count of the badge. The options are 26 and 37 bits.
If your bit count is not one of the default counts provided, please follow the instructions in Creating a New Bit Count Value to create the appropriate bit count for your badges.
Tip
Please ensure that your final bit count is 24 bits or more. A bit count of less than 24 bits will make badges unusable.
In the sub-key under Bitcount which reflects the number of bits in your badge (our defaults are 26, 35, and 37 you may have created another key with the appropriate number for your environment) create the following value:
FacilityMask: reg_binary
Enter the appropriate hexadecimal value of your facility mask in the FacilityMask value.
This should be set in hexadecimal.
Example
Example: If you have a bit count of 36, you would create the following keys in the registry:
HKLM\Software\HealthCast\ProxCardClient\Bitcount\36
Under the 36 key, you would create the following value: Facility Mask as a binary value.
FacilityMask:reg_binary=00 00 00 01 ff e0 00 00
Continue by setting the accepted facility codes.
Have the appropriate facility codes ready before continuing. The facility codes entered in this section will be the only allowable codes once this configuration is finished.
In the Facility key, create a new reg_dword value.
Name the value 1..
Right-click the new value and select Modify.
Select the appropriate Base category.
Choose Decimal if your facility code was provided by the manufacturer of your card and it is in decimal notation. Choose Hexadecimal if you have calculated the facility mask in hexadecimal notation.
In the Edit DWORD Value box enter one of the facility codes in the Value data box.
Verify that the information in the box is correct, and select OK.
Repeat these steps for each facility code that you would like to authorize. Name the values sequentially.
Required
Warning
If you already have a proxcard database in place and are using parity stripping, then it is critical that your bit count settings, and other badge related registry settings, are correct.
First, verify the state of your parity settings.
You can do this by reading the parity settings instructions and following the instructions there
If your settings indicate that you are stripping bits (leading or trailing), then you must adjust your bit count to match the number of bits present AFTER parity bits have been removed.
Example: If you are removing 1 leading parity bit and 1 trailing parity bit and you have 26 bit cards, you would calculate the final bit count as 24. If you have 35 bit cards and are stripping 2 leading bits and 1 trailing bit you would calculate the final bit count as 32.
Follow the Enable Bit Count instructions to set the correct bit count in the registry.
You may need to create new keys and sub-keys that reflect the bit count in your environment.
Recalculate your facility mask using the final bit count derived from the bits remaining after parity stripping.
Follow the directions above in the fresh installation/non-parity stripping section to configure the facility code validation.
Display Settings
There are several registry keys associated with the display of the privacy shield and its contests. The values below describe those intended to be changed for the Login display PIN dialog.
HKEY_LOCAL_MACHINE\SOFTWARE\HealthCast\ExactAccess\display
Login Directions - e.g. tap your card, enter your username, enter your PIN, etc.
LoginDirectionsFontColor: reg_dword - the NBGR (none,blue,green,red values from left to right) color the text for the login directions will be displayed in.
LoginDirectionsFontSize: reg_dword - the size of the font in points for the login directions.
LoginDirectionsFontFontFace: reg_sz - the font face name of the login directions display.
Login Fields - e.g. username, password, PIN, etc.
LoginFieldPromptFontColor: reg_dword - the NBGR (none,blue,green,red values from left to right) color the text for the field prompts will be displayed in.
LoginFieldPromptFontSize: reg_dword - the size of the font in points for the field prompts.
LoginFieldPromptFontFontFace: reg_sz - the font face name of the field prompts.
Change PIN - e.g. instructional text for changing PIN if the user desires to choose a new PIN.
ChangePINFontColor: reg_dword - the NBGR (none,blue,green,red values from left to right) color the text for the "change pin" text will be displayed in.
ChangePINFontSize: reg_dword - the size of the font in points for the "change pin" text.
ChangePINFontFace: reg_sz - the font face name of the "change pin" text.
Error text - e.g. In the case of a PIN error, text describing the problem.
ErrorFontColor: reg_dword - the NBGR (none,blue,green,red values from left to right) color the text for error.
ErrorFontSize: reg_dword - the size of the font in points for the error text.
ErrorFontFace: reg_sz - the font face name of the error text.
Display styles will apply color to the input boxes and the login buttons. Other colors must be configured with the settings listed on this page.
Setting a Style/Theme
To set a particular style or theme for display:
HKLM\Software\HealthCast\ExactAccess\Display
LoginFormStyle: reg_sz = "<a valid style file name or full path and file name, including .VSF extension>"
Tip
For a full list of available styles, look in the following installation folder:
C:\Program Files (x86)\Common Files\HealthCast\themes
 |
Amakrits.vsf
Windows10Blue.vsf
Windows10Dark.vsf
Graphical Customization
In C:\program files\HealthCast\ExactAccess, there are two image files.
PinBackground_FORE.png
PinBackground_MASK.bmp
The default background (fore) image is a 500x311 image containing the complete background image including border.
Tip
Both images must be the same size for proper operation of the PIN dialog.
The PinBackground_MASK.bmp is used to position the user interface elements to accommodate the layout of the *_FORE image graphic.
The simplest approach to designing a new image is to copy the PinBackground_MASK.bmp to a file named PinBackground_FORE.bmp, then convert it to a PNG image.
Open the PinBackground_FORE.png and make desired changes, taking into account the positioning of the elements. The design can be placed over any open, white space around the element location sections as found in PinBackground_MASK.bmp.
The default login dialog background is a PNG image
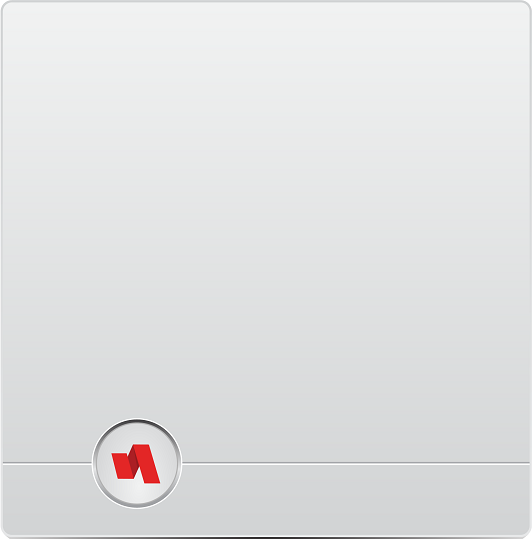 |
Note
When editing and saving the _MASK file, be sure that pure colors are used and no anti-aliasing is performed on this image. Tools other than Microsoft Paint automatically blend borders into the background color, effectively shrinking the desired display area.
These sections correspond to the following user interface elements:
numbers in ( ) correspond to Red, Green, Blue (RGB) values in that order.
Magenta (255,0,255) - Holds the title of the PIN prompt (either indicating enrollment or verification)
Yellow (255,255,0) - Help text describing what the user should do (such as tap a proximity card)
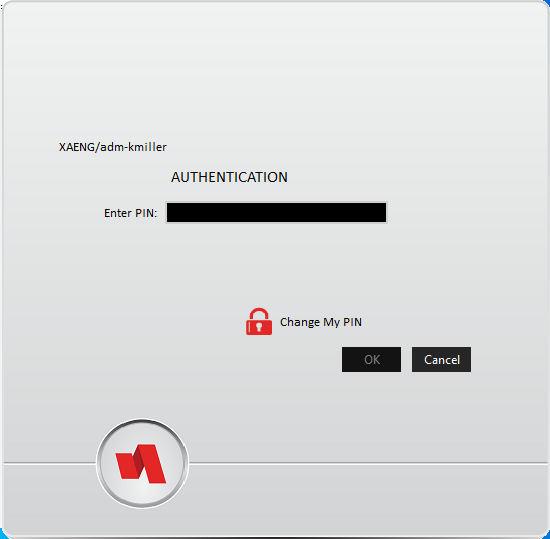
Black (0,0,0) - Holds the entry fields for both enrollment and verification.
It is important that the dimensions of this box remain relatively unchanged so as to not inadvertently clip the user interface elements to be displayed in this area.
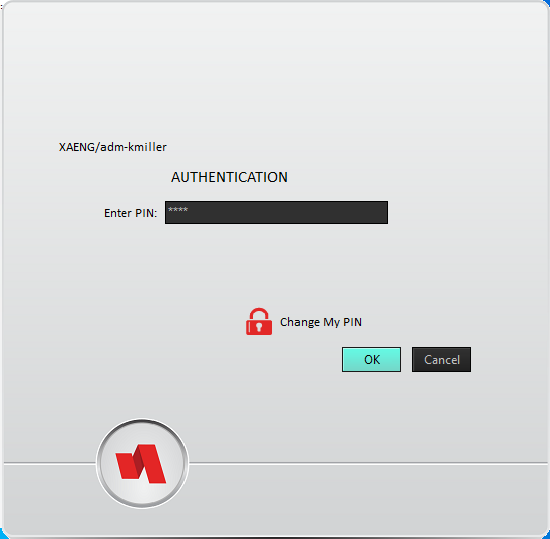
Gray (128,128,128) - The position and size of the "Change PIN" button (both for UP [ChangeButtonUp.png] and DOWN [ChangeButtonDown.png])
Plum (128,0,128) - The title/text for changing PIN.
Aqua (0,255,255) - The position and size of the warning icon (WarningImage.png) in the case of an error.
Green (0,255,0) - The text describing the error condition.
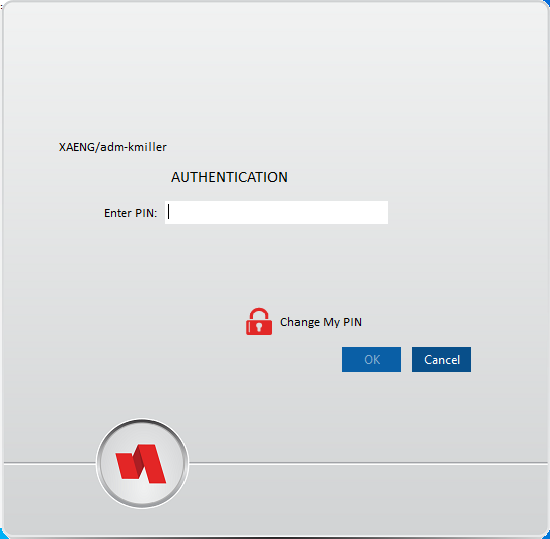
Blue (0,0,255) - the Login button position.
Red (255,0,0) - the Cancel/Reset button position.
The mask determines where the login elements will be displayed over the top of the login background
 |
Warning
The mask colors should not overlap one another, as the coordinates of the top-left and bottom-right are used to calculate the location and size of the elements they represent.
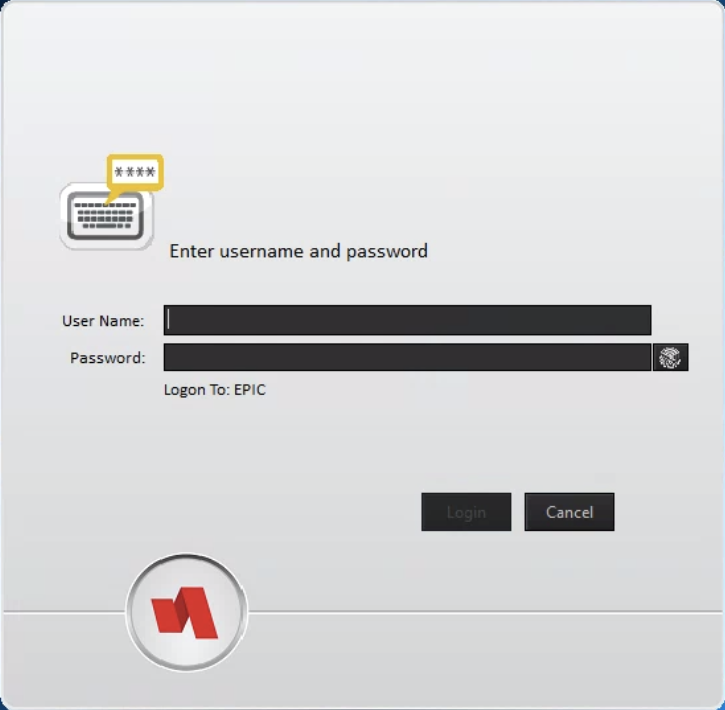
Username and Password
Features
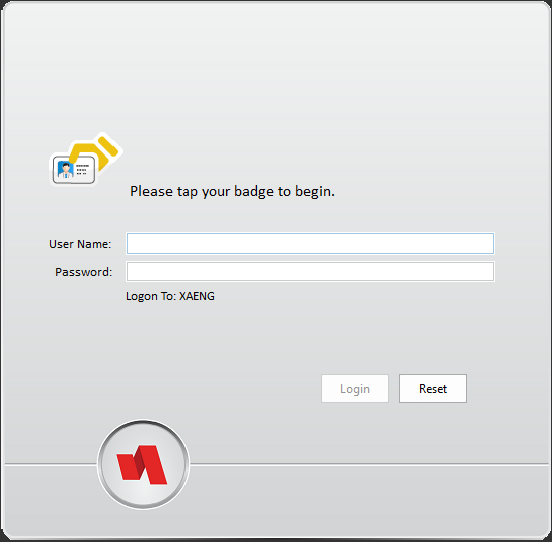
The Username and Password dialog for kiosk mode allows the user to type login credentials or tap a badge to initiate the login to the ExactAccess SSO solution. Focusing on the manual login process, the user interface may be customized by changing the background images, the font face, color and size for various prompts, as well as the layout of the dialog utilizing a mask image.
It may be desirable to configure Kiosk Mode to authenticate with a remote source if you have workstations that are configured as non-domain-joined workstations. This feature requires that HealthCast ExactAccess Server be available and configured on a server that is a member of the domain to authenticate with. It also requires additional configuration on each ExactAccess Client as detailed below. If the registry key does not exist, create the key and set the appropriate values.
To use proximity cards in conjunction with the dialog, the ProxCard server must be configured, and the proxcard device service "HCI ProxCard Client" must be running. A supported reader must also be attached to the workstation.
HKLM\Software\HealthCast\HCCitrixSessionDirectory
RemoteLogon: reg_dword = 0 (set to 1 to enable)
The following registry settings must also be present and configured
CompressionClass: reg_sz = one of the following values:
NONE
VCLZIP
EncryptionClass: reg_sz = one of the following values:
RIJNDAEL
BLOWFISH
ID: reg_sz = an encryption key that must match the server configuration key.
Default server install key is "EA12G54"
This key is in addition to the connection key generated on each connection, and is not the only piece of information necessary to encrypt/decrypt the communication requests.
HKLM\Software\HealthCast\HCCitrixSessionDirectory\Indy
0000: reg_sz = The server DNS name or IP address where HealthCast Remote Session Directory has been installed and configured.
EnabledServerIDs: reg_sz = "0000" - this must contain at least one active server number
Port: reg_dword = 20000 - the default port for communications. If you have altered the default listening port during the server installation, update this for the correct port number.
If you have client side fail over configured for ProxCard, you may also want to configure fail over for Remote Authentication. This is accomplished the same way as for ProxCard.
Add a new entry:
0001: reg_sz - add the secondary server DNS name or IP address
Update the EnabledServerIDs as a comma separated list of active servers:
EnabledServerIDs: reg_sz = "0000,0001"
HKEY_LOCAL_MACHINE\SOFTWARE\HealthCast\ExactAccess\domainlist\exclusions
0001: reg_sz = "excluded domain name 1"
0002: reg_sz = "excluded domain name 2"
Continue to add numbers in order for other domain names to be excluded - these exclusion values should exactly match the text as shown in the dropdown prior to being added to the exclusion list.
HKEY_LOCAL_MACHINE\SOFTWARE\HealthCast\ExactAccess\Override
ExcludeLocalComputerFromDomainList: reg_dword = 1
HKLM\Software\HealthCast\PasswordReset
ResetLinkText: reg_sz = "new reset text"
If the key does not exist, or is not set, and a password reset URL is present, the default text "Forgot your password? Click here to reset it." will be used.
XA_MODE=KM
XA_SRV=<server name>
XA_AUDIT_SRV=<server name>
XA_PRX_SRV=<server name>
X_D_SRV=<server name>
X_RA_SRV=<server name>
X_KM_DOMVIS=0 (domain drop down visible)
X_KM_DRVMAP=0 (drive mapping enabled)
X_KM_PRTMAP=0 (print mapping enabled)
X_LUPE=0 (last user prompt enabled)
X_RARL=1 (remote authentication enabled)
X_RAID=EA12G54 (remote authentication shared key header)
XAD_ENABLED=0 (Full SSO enabled=0, Passthrough enabled=1)
Display styles will apply color to the input boxes and the login buttons. Other colors must be configured with the settings listed on this page.
Setting a Style/Theme
To set a particular style or theme for display:
HKLM\Software\HealthCast\ExactAccess\Display
LoginFormStyle: reg_sz = "<a valid style file name or full path and file name, including .VSF extension>"
Tip
For a full list of available styles, look in the following installation folder:
C:\Program Files (x86)\Common Files\HealthCast\themes
 |
Amakrits.vsf
Windows10Blue.vsf
 |
Windows10Dark.vsf
 |
Display Settings
When editing and saving the _MASK file, be sure that pure colors are used and no anti-aliasing is performed on this image. Tools other than Microsoft Paint automatically blend borders into the background color, effectively shrinking the desired display area.
HKEY_LOCAL_MACHINE\SOFTWARE\HealthCast\ExactAccess\display
Login Directions - e.g. tap your card, enter your username, enter your PIN, etc.
LoginDirectionsFontColor: reg_dword - the NBGR (none,blue,green,red values from left to right) color the text for the login directions will be displayed in.
LoginDirectionsFontSize: reg_dword - the size of the font in points for the login directions.
LoginDirectionsFontFontFace: reg_sz - the font face name of the login directions display.
Login Fields - e.g. username, password, PIN, etc.
LoginFieldPromptFontColor: reg_dword - the NBGR (none,blue,green,red values from left to right) color the text for the field prompts will be displayed in.
LoginFieldPromptFontSize: reg_dword - the size of the font in points for the field prompts.
LoginFieldPromptFontFontFace: reg_sz - the font face name of the field prompts.
LoginFormStyle: reg_sz: the file name of the style to apply to the login display.
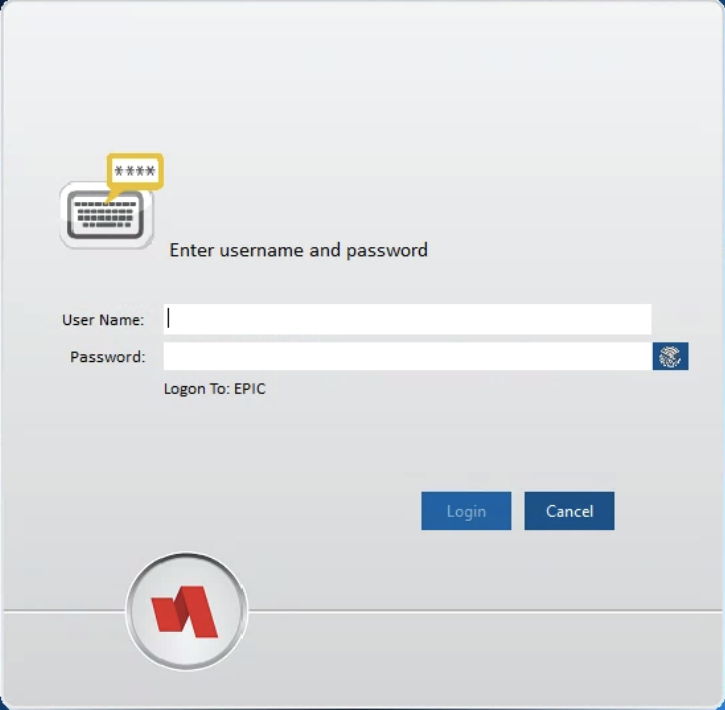
To enable biometrics as an alternate authentication method, the following registry key can be set.
HKEY_LOCAL_MACHINE\SOFTWARE\HealthCast\ExactAccess\OverrideAlternateLoginEnabled: reg_dword = 1 to enable alternate login button, 0 to disable alternate login button.Graphical Customization
Note
The background mask image must be in bitmap (BMP) format, but the LoginBackgroun_FORE image may be a PNG image. Placing both a *_FORE BMP and PNG in the directory, the authentication dialog will choose to use the PNG format.
In C:\program files\HealthCast\ExactAccess, there are two image files.
LoginBackground_FORE.bmp
LoginBackground_MASK.bmp
The default background (fore) image is a 500x311 image containing the complete background image including border.
Tip
Both images must be the same size for proper operation of the login dialog.
The loginBackground_MASK.bmp is used to position the user interface elements to accommodate the layout of the *_FORE image graphic.
The simplest approach to designing a new image is to copy the LoginBackground_MASK.bmp to a file named LoginBackground_FORE.png
Open the LoginBackground_FORE.png and make desired changes, taking into account the positioning of the elements. The design can be placed over any open, white space around the element location sections as found in the LoginBackgroun_MASK.bmp.
The default login dialog background is a PNG image.
 |
Note
When editing and saving the _MASK file, be sure that pure colors are used and no anti-aliasing is performed on this image. Tools other than Microsoft Paint automatically blend borders into the background color, effectively shrinking the desired display area.
These sections correspond to the following user interface elements:
numbers in ( ) correspond to Red, Green, Blue (RGB) values in that order.
Black (0,0,0) - this is the login portion of the dialog prompt, and will include the domain user name, domain password, and potentially, the domain drop down list. It is important that the dimensions of this box remain relatively unchanged so as to not inadvertently clip the user interface elements to be displayed in this area.
Blue (0,0,255) - the Login button position.
Red (255,0,0) - the Cancel/Reset button position.
Aqua (0,255,255) - the ProxCard indicator image position and size (both the prox [ProxImage.png] and keyboard [NoProxImage.png] images should be the same size, and match this dimension)
Yellow (255,255,0) - Help text describing what the user should do (such as tap a proximity card)
The mask determines where the login elements will be displayed over the top of the login background
 |
Once you have the design created around the user interface elements, you can remove those element markers by filling the rectangles with the chosen background color (it does not have to be white) to match your presentation.
To deploy this updated background, include it in a transform, or optionally, if you have HCIDeploy configured, add it to the a deployment package.
Other deployment methods (such as Microsoft SMS) may also be used. Simply deploy the updated bitmap or PNG to the correct location for the operating system (C:\Program Files\HealthCast\ExactAccess\)
Warning
The mask colors should not overlap one another, as the coordinates of the top-left and bottom-right are used to calculate the location and size of the elements they represent.