Troubleshooting
During start up, QwickACCESS encounters a severe error
When QwickACCESS starts up, it display this dialog box:
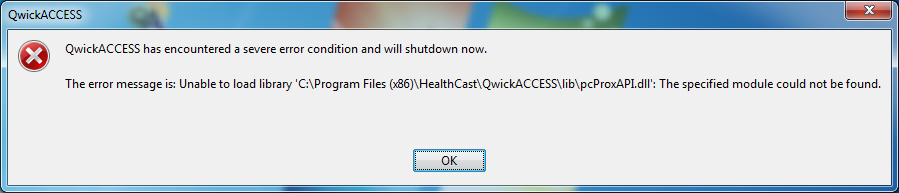 |
This error occurs when using QwickACCESS on a 64-bit system and the edition of Java being used is also 64-bit. QwickACCESS requires a 32-bit edition of Java even when running on a 64-bit system. To solve this problem, install a 32-bit edition of Java and then run QwickACCESS using the 32-bit edition of Java.
Firewall Blocks Communication
Firewall settings on thin clients can stop QwickACCESS from communicating with the server. Please ensure that your virus protection applications are set to allow the port numbers used by the Proximity Card Server and Authentication Services QwickACCESS is configured to use:
HC ProxAuth Server: ports 30001 and 20001 (Unless you have changed this setting in the Client Configuration Tool)
QwickACCESS Server: ports 8339 and 8340 (Unless you have changed this setting in the Client Configuration Tool)
Badge Problems
Occasionally, users may encounter situations like the following:
They tap their badge and nothing happens; the reader does not beep and the screen does not change.
They tap their badge and the reader beeps, but the screen does not change.
They tap their badge and are asked to register their badge even though the badge has been registered before.
These scenarios can often be remedied by following these steps:
If the reader is unplugged and plugged back in while QwickACCESS is running the reader will not be recognized until QwickACCESS is restarted. Therefore, ensure that the reader is plugged into an available usb port, then restart QwickACCESS to ensure it has acquired the reader.
Check that the reader is properly connected and powered up.
Disconnect and reconnect the reader and ensure that the light is on. If the reader is faulty, replace it. Make sure to restart QwickACCESS after you disconnect/reconnect the reader.
Check to ensure the card type is correct.
The card should be compatible with the reader and should have the proper bit-count for your environment.
If the user is being asked to register their card each time they tap it, the reader may be faulty and therefore is reading the badge incorrectly.
Try plugging in a different reader.
Check your firewall and virus protection applications.
Your firewall and virus protection applications should be set to allow communication with the ProxCard Server.
Check the QwickACCESS logs for errors or warnings that have come from QwickACCESS. This log is located in the directory which is listed in the Client Configuration Tool Support section
If there is an error or warning, it will identify if the client and server are communicating as expected.
Check the Client Configuration Tool and click the Test Connection button located in the Server section and ensure communication. Update the ProxCard Server name or IP Address if necessary.
Check to ensure that the network is operational.
If all of the above steps have been taken, and you are still experiencing problems, please check your network to ensure it is operating as expected. This should include checking your wireless network and wireless network components if applicable.
Unable to connect to the authentication server
With some networks, if the user is manually logging in or registering a proximity card and inputs a username that does not exist in the Windows Active Directory, users may experience a "QwickACCESS was unable to connect to the authentication server" error. This issue can be addressed by increasing the “Server connection timeout” setting for the Authentication Server. Follow these steps to increase the timeout:
Open the QAX Configuration tool
Select the "Server" tab
Click the "Advanced" check box (in the upper right)
Scroll down to the "Authentication services" section
Make sure the "Server type" is set to "HC ProxAuth Server"
In the "Server connection timeout" field, set it to something larger than 15 seconds, for example 30 seconds.
Click "Test Connection"
Click "OK" to save the changes