General
Windows domains
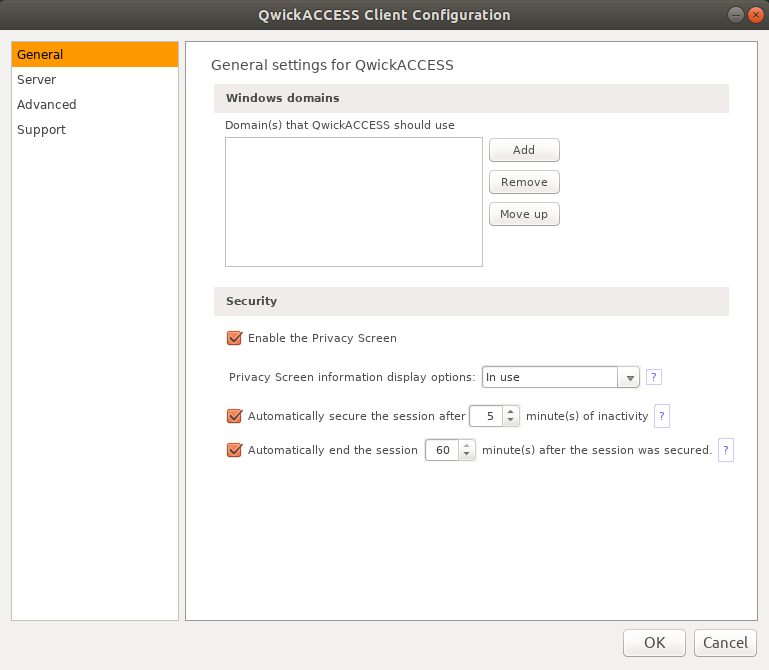
A valid domain must be set for user authentication and security purposes. To add a Windows domain select the Add button and type the domain name in the Domain Name pop-up panel then select the OK button to save it. To add and manage multiple Windows domains see the Windows domain page.
Security
The Security section of the General tab allows you to set the security options that are appropriate for your environment. Please see the Security settings page for details.
Advanced
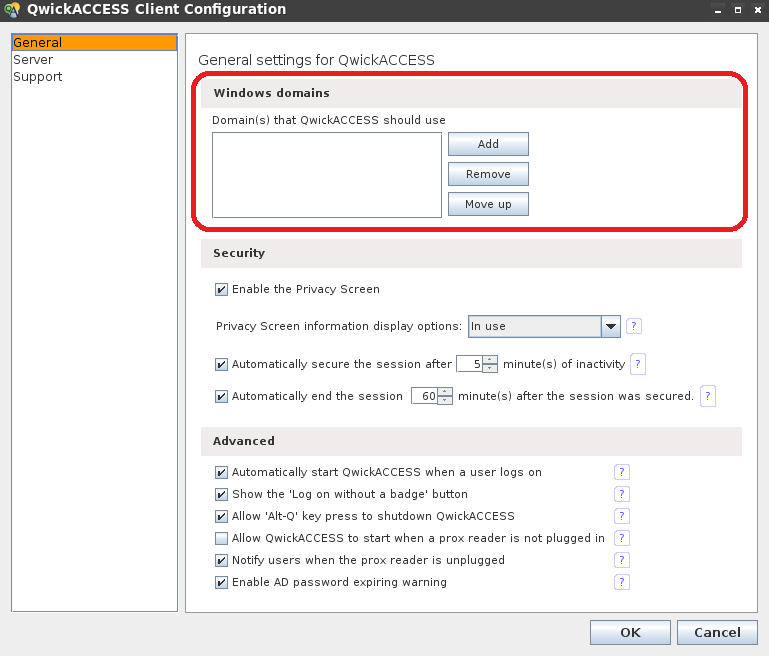
The Advanced section of the General tab allows you to set the advanced options that are appropriate for your environment. Please see the Advanced settings page for details.
Windows Domains
Windows Domain
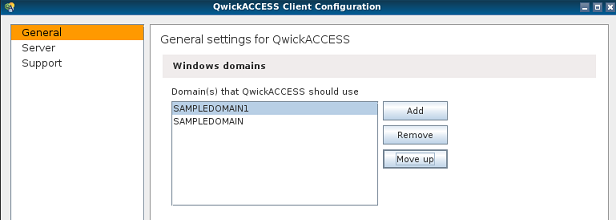
In the "Windows domains" section on the General tab of the QwickACCESS Client Configuration, enter the Windows domain (or domains) that QwickACCESS should display in a drop-down list when a user registers their proximity badge. Multiple domains are supported. If multiple domain names are used, they will be displayed in the order in which they are in the domain list. To force a domain name to be listed first move it to the top of the domain list.
Add Windows domain.
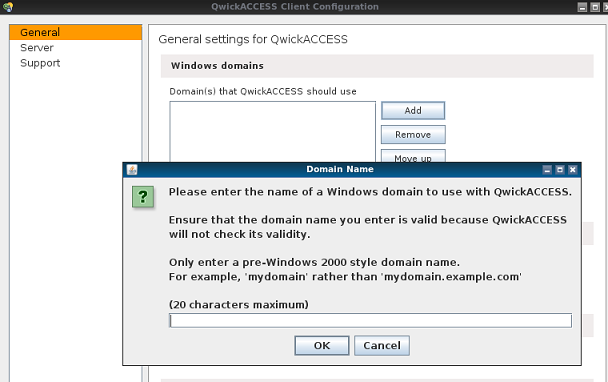
Click the Add button to specify the name of a domain to use.
Enter your domain name and click OK.
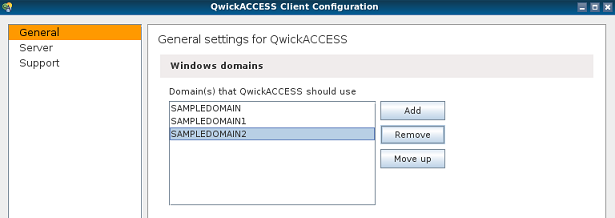
Your domain name should now be added to the domain list.
Remove Windows domain from list
Select the domain name you wish to remove.
Click Remove to delete the domain name from the list.
Change the display order of the domain names.
Select the domain name you wish to move and click Move up. The selected domain name will be moved up one position in the list.
Security
Security
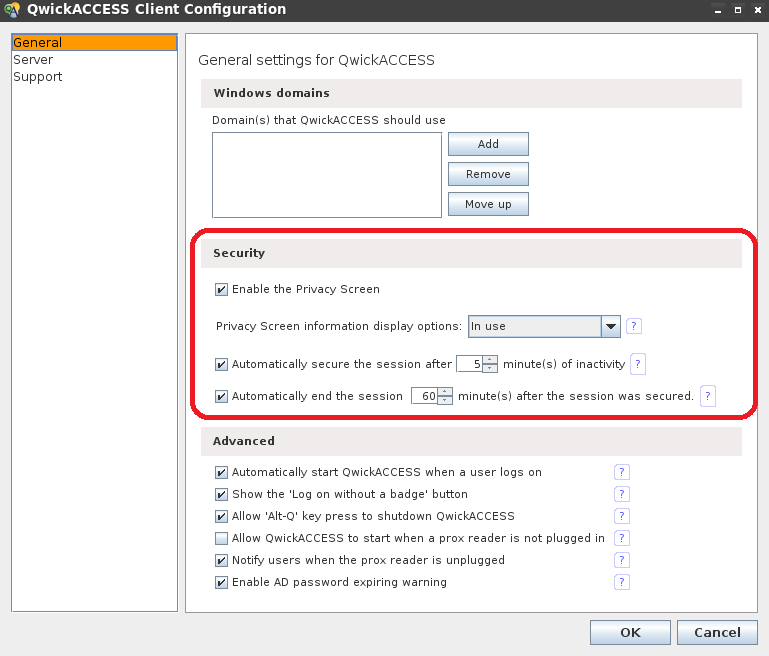
In the "Security" section of the the General tab of the QwickACCESS Client Configuration tool, you can configure the following security settings depending on whether the Privacy Screen is enabled.
What is the Privacy Screen? The Privacy Screen, secures the active session when the user taps their proximity card, but the session remains connected. And because the session is still connected, when the user returns and taps their proximity card the Privacy Screen is removed and the user is immediately taken to the active session without having to wait for the session to be re-connected. Therefore, the Privacy Screen enables a very smooth and fast workflow for the user who may need to step away from the computer for a few minutes and wants to get right back to their work when they return.
Enable the Privacy Screen - Check this setting to enable (turn on) the Privacy Screen. This setting is checked by default.
Privacy Screen ENABLED (Checked) - The following settings are available when the Privacy Screen setting is checked:
Privacy Screen information display options - Use this setting to determine what information will be displayed on the Privacy Screen by selecting one of these options:
In use - The Privacy Screen will display "IN USE".
User name - The Privacy Screen will display the domain user name for the user. For example, "JDOE".
User principal name - The Privacy Screen will display the user principal name for the user. For example, "JDOE@DOMAIN".
SAM account name - The Privacy Screen will display the SAM account name for the user. For example, "DOMAIN\JDOE".
Don't display anything - The Privacy Screen will not display any of the above information.
Automatically secure the session after x minute(s) of inactivity - The setting determines how long the user can be inactive (i.e., not moving the mouse or pressing any keys) before the Privacy Screen will be automatically displayed. For example, if this setting is one minute, and if the user is not pressing any keys or moving the mouse for one minute, then the Privacy Screen will be displayed and the session secured as if the user had tapped their card. If this setting is unchecked, then the session will remain active no matter how long the user is inactive.
Automatically end the session x minute(s) after the session was secured - This setting determines how long the Privacy Screen will be displayed before the session is ended and the system goes back to the starting state. For example, assume a user taps their badge to secure their session and the Privacy Screen is displayed. QwickACCESS will then begin to count down the amount of time specified in this setting and if the user doesn't return by the end of the count down, then the session will be disconnected and QwickACCESS will return to the starting state. If this setting is unchecked then there will be no count down and the Privacy Screen will remain up indefinitely or until another user taps over the current session.
Privacy Screen DISABLED (Unchecked) - The following setting is available when the Privacy Screen setting is unchecked:
Automatically end the session after x minute(s) of user inactivity - The setting determines how long the user can be inactive (i.e., not moving the mouse or pressing any keys) before the session will be automatically disconnected (ended). For example, if this setting is one minute, and if the user is not pressing any keys or moving the mouse for one minute, then the session will be disconnected as if the user had tapped their card. If this setting is unchecked, then the session will remain active no matter how long the user is inactive.