HealthCast EPCS Install on Enrollment Workstation
Installing the RapidIdentity MFA Client
The RapidIdentity MFA Client needs to be installed on the enrollment workstation so that the Enrollment Supervisor can obtain the fingerprint biometrics necessary for enrollment.
Follow these steps to complete this portion of the installation process.
Download, unblock RapidIdentity_Client_v4939.exe to the enrollment workstations.
Run RapidIdentity_Client_v4939.exe as an administrator.
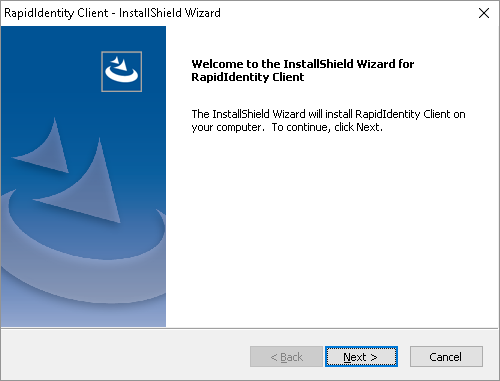
Click on the Next button.
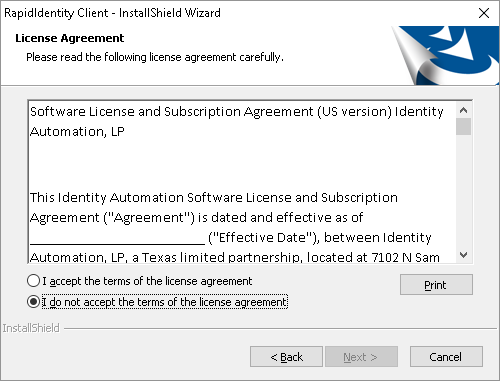
Click Next to accept the license agreement.
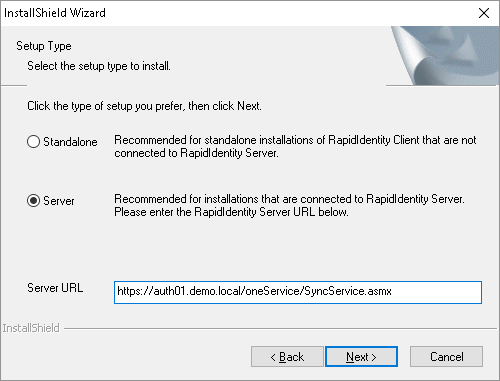
Select Server option and enter the Server URL and select Next.
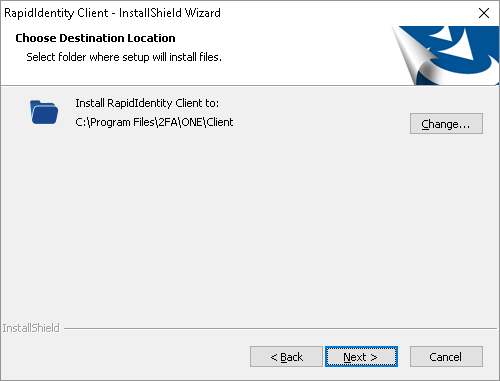
Select the Destination Location for the installation and then click Next.
The RapidIdentity Client is now ready for installation. Click the Install button to proceed.
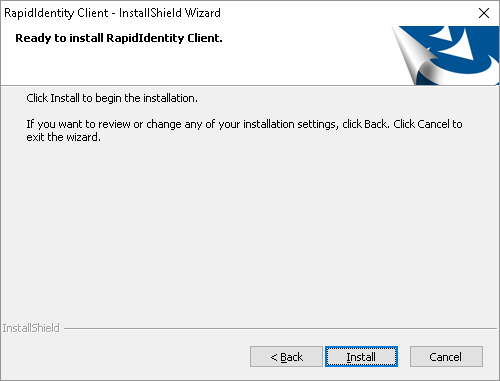
Wait for the installation to complete successfully.
When the installation is completed, click on the Finish button and restart the workstation.
Once the workstation is restarted, the installation of the RapidIdentity Client is complete.
Installing the Redistribution Drivers Application
The next step is to run the Redistribution Drivers for the U.are.U SDK Components used in the SDK to interact with the fingerprint reader.
Notice
Before proceeding, ensure that a fingerprint reader is plugged in and ready to use.
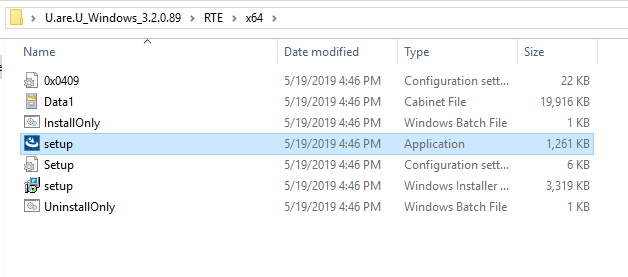
Locate and open the U.are.U workstations folder and Right-Click on the setup.exe file and select Run as administrator.
Notice
The U.are.U_Windows_3.2.0.89.zip extracted the files needed and can be located in the following folders:
64 bit Workstations: U.are.U_Windows_3.2.0.89\RTE\x64
32 bit Workstations: U.are.U_Windows_3.2.0.89\RTE\x86
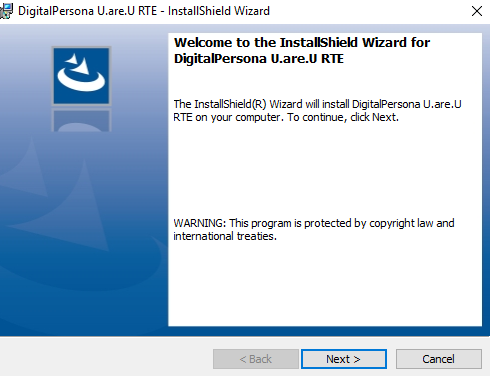
The InstallShield Wizard Welcome Screen will populate; click Next.
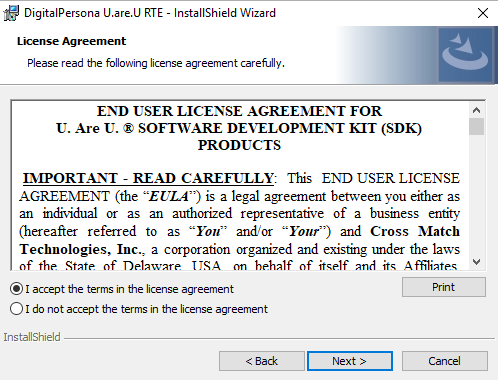
Read the License Agreement that appears, accept the terms of the agreement, and click Next.
The next screen that populates is the Destination Folder.
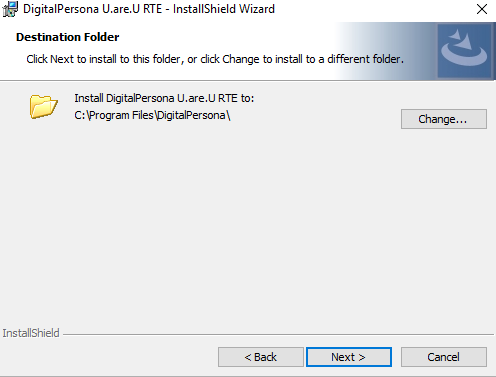
Click Next to continue or select the folder in which the plug-in will be installed and then click Next.
This generates the Setup Type window that includes a complete and a custom setup type.
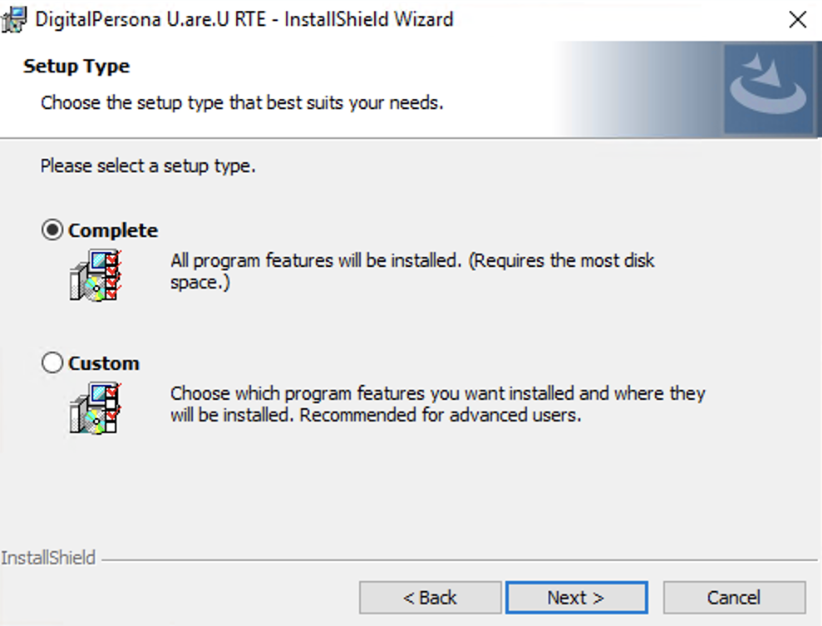
Select Complete and click Next.
The program is now ready for installation.
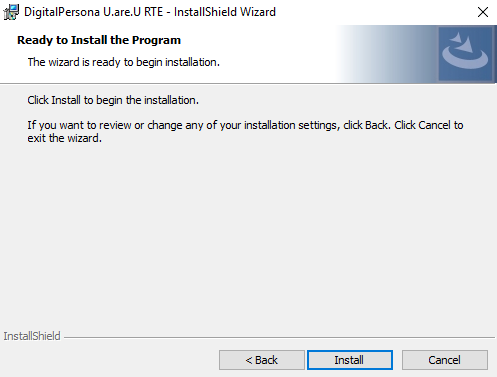
Click Install to begin this process.
Wait for the installation to complete successfully.
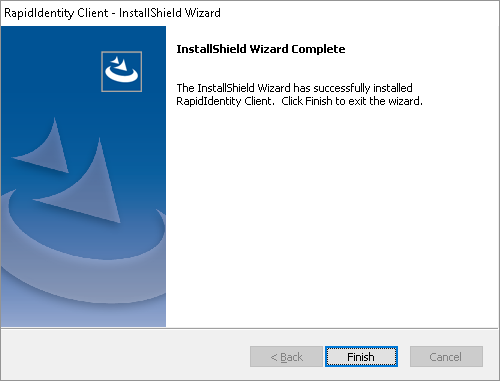
The InstallShield Wizard Complete screen will appear when installation is complete.
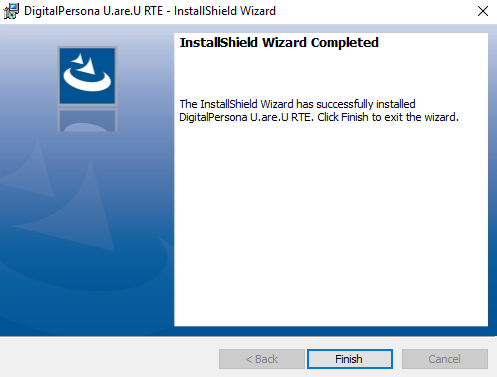
Click Finish.
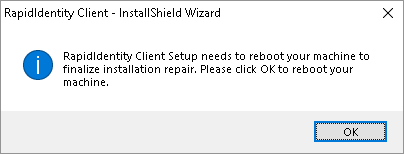
The system will need to be restarted to complete all of the updates to the HealthCast ExactAccess Server to take effect.
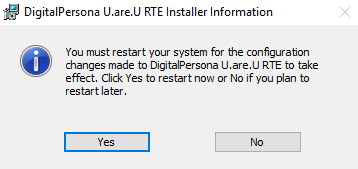
Click Yes to restart now.
The system will now restart for the configuration changes to take effect.