Screen Saver for XA Client
Enabling the screen saver on the XA client applies to versions 4.11.x and 4.12.x in Standard User Mode and Locking Kiosk Mode for Windows 10 environments.
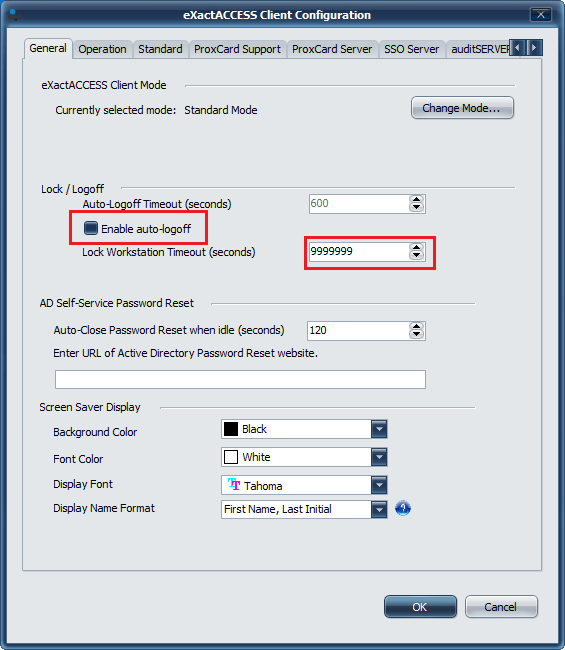
Standard User Mode
Configure the following Windows Screen Saver Settings:
Enable the Screen Saver with these settings:
Wait (desired number of minutes)
Check
On resume, display logon screen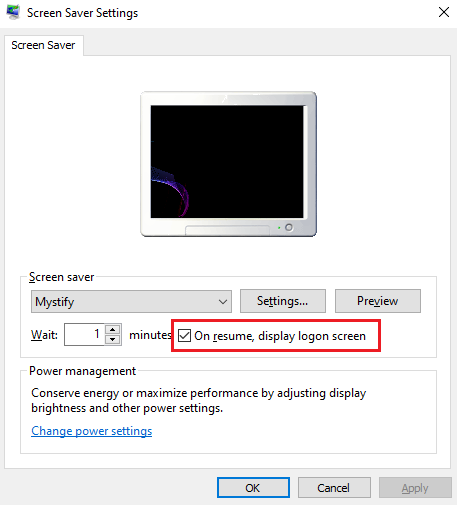
Configure the following XA Client Settings:
Set Lock Workstation Timeout setting to
9999999.Note
This value can be lower, but as soon as XA locks, the screen saver will stop.
Uncheck Enable auto-logoff.
Note
Auto-logoff can remain enabled, but the screen saver will stop as soon as the user is logged out of Windows.
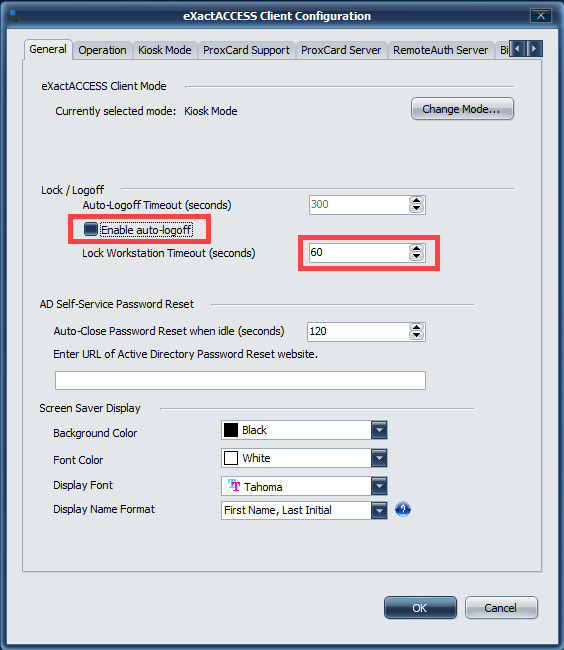
Locking Kiosk Mode
Configure the following Windows Screen Saver Settings:
Enable the Screen Saver with these settings:
Wait (desired number of minutes)
Note
The screen saver wait time must be set to a value higher than the XA LockTimeLimit value.
When XA locks the workstation, the XA Privacy Shield will display and Windows will launch the configured screen saver over the top of the XA Privacy Shield.
If the screen saver starts before the workstation is locked, the screen saver will not appear over the XA Privacy Shield.
Do NOT check
On resume, display logon screen.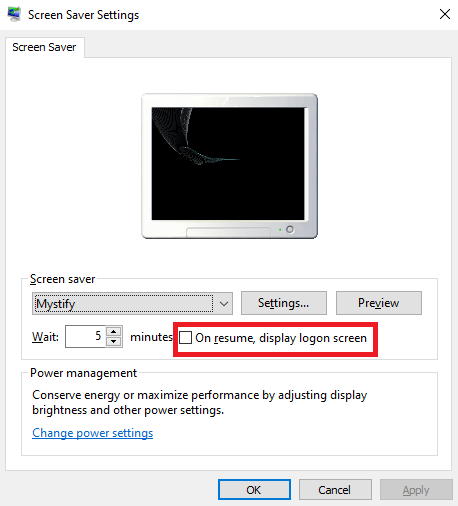
Configure the following XA Client Settings:
Set the following registry to
1:HKEY_LOCAL_MACHINE\SOFTWARE\HealthCast\eXpressAccessAutoStartScreenSavorOnTapOut=1
Set Lock Workstation Timeout setting to desired setting.
Note
This value must be equal to or less than the amount of time set in the Screen Saver's
Waitsetting.Uncheck
Enable auto-logoff.