HealthCast EPCS Server Installation and Configuration
HealthCast EPCS Server Core Infrastructure Installation and Configuration
Installation of the HealthCast EPCS Server requires numerous Microsoft® technologies to be previously installed.
These technologies are called the RapidIdentity Server Core Infrastructure and may include the following items as desired by the organization.
Microsoft Windows Standard or Enterprise Server 2008 R2 or higher running IIS 7.0 or higher
Microsoft Active Directory
Microsoft SQL Server or SQL 2016 or higher
Microsoft Windows Server 2008 Certificate Services or higher (Required for PKI contact smart card Only)
RapidIdentity MFA Server may be deployed on Windows® domain controllers and member servers. For the purposes of this installation guide, a non-domain controller server is joined to a pre-existing domain, MFAServer.local.
Once the required technologies are installed, proceed with the HealthCast EPCS Server core infrastructure installation steps.
Installing core infrastructure components will include the following steps:
Installing IIS
Installing SQL Server
Core Infrastructure Post-Installation Procedures
Installing IIS
In order to begin set up for HealthCast EPCS solution components, IIS must be installed to the RapidIdentity MFA Server.
Proceed with the following steps to install IIS.
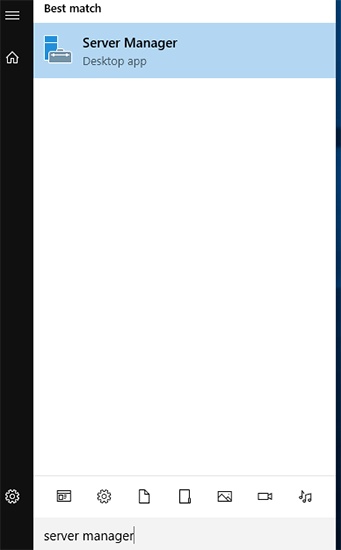
From the Start Menu, type Server Manager and select it.
Within the Server Manager Dashboard menu, click Add roles and features.

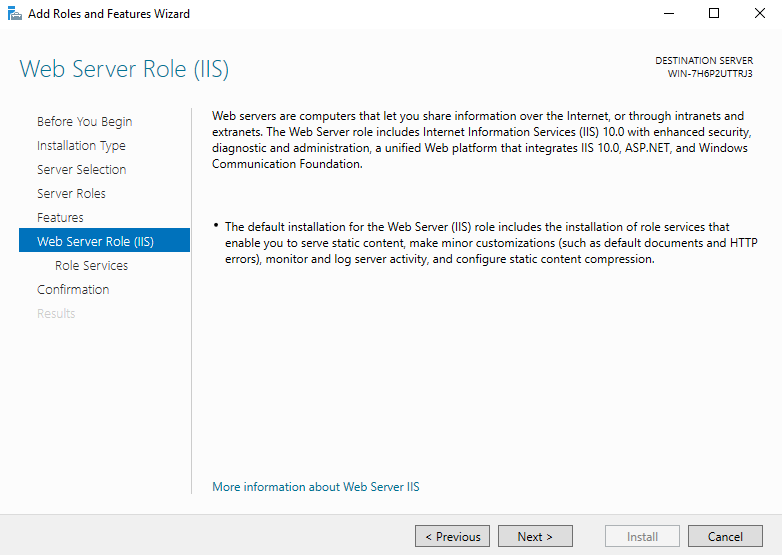
A wizard opens to explain roles, role services, and features. After reading the description, click Next.
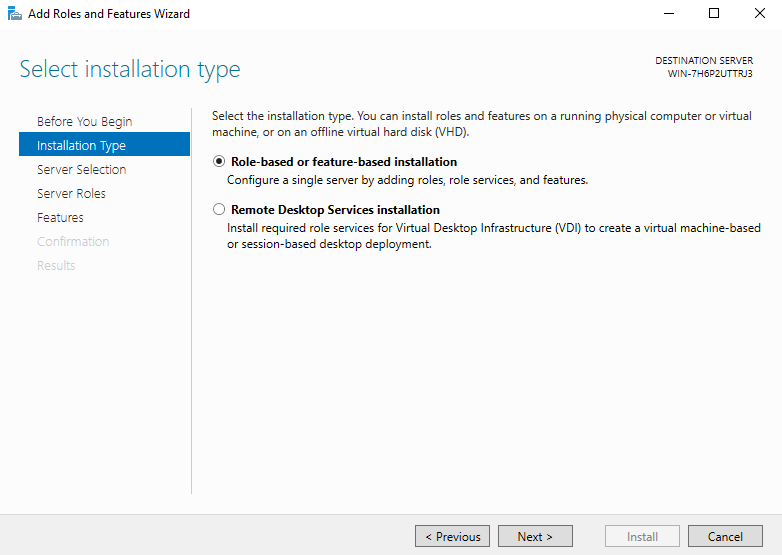
In the Installation Type menu, select Role-based or feature-based installation and click Next.
Within the Server Selection menu, click Select a server from the server pool.
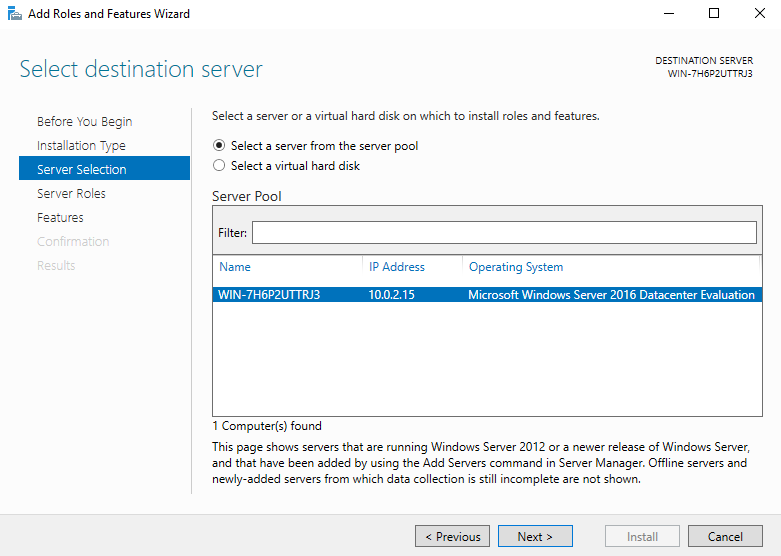
Verify the local server is selected and click Next.
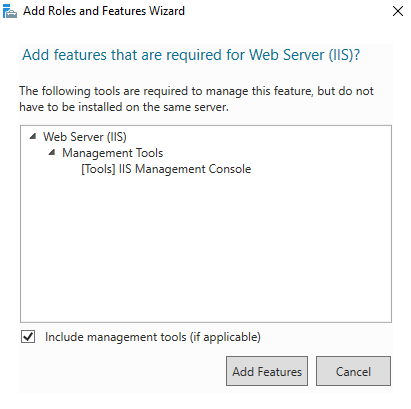
In the Server Roles menu, check the Web Server (IIS) box.
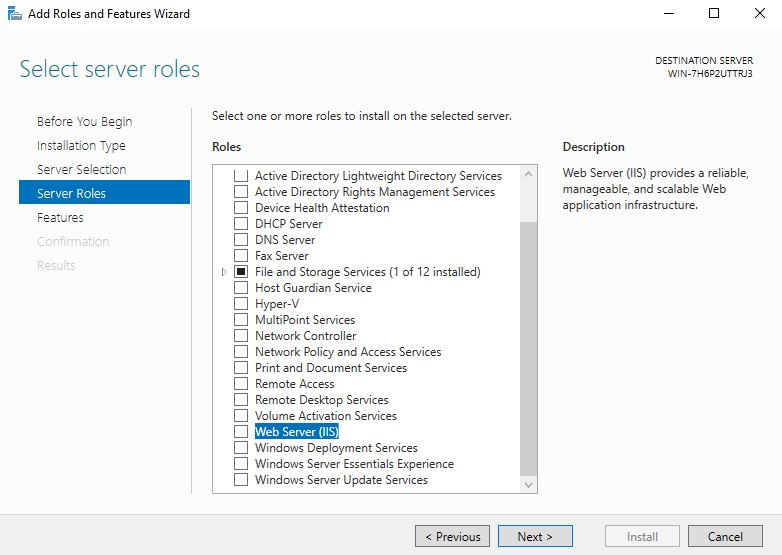
Checking the Web Server Box triggers an additional window to open. Click Add Features and then click Next.
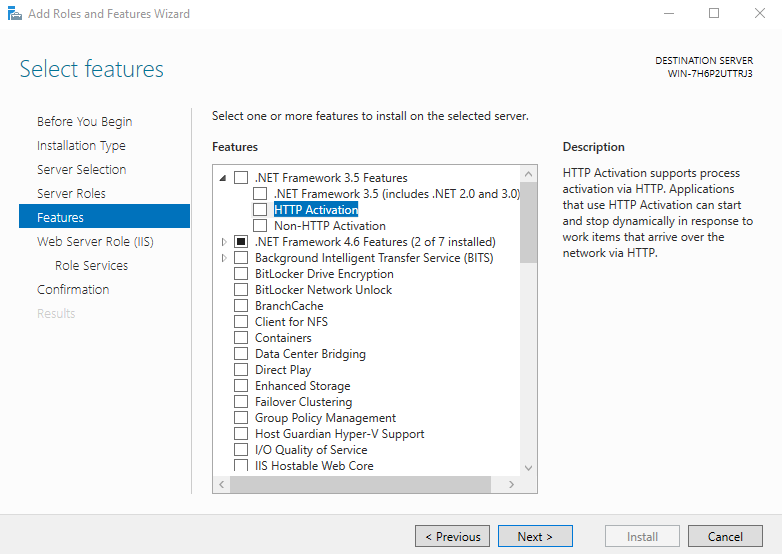
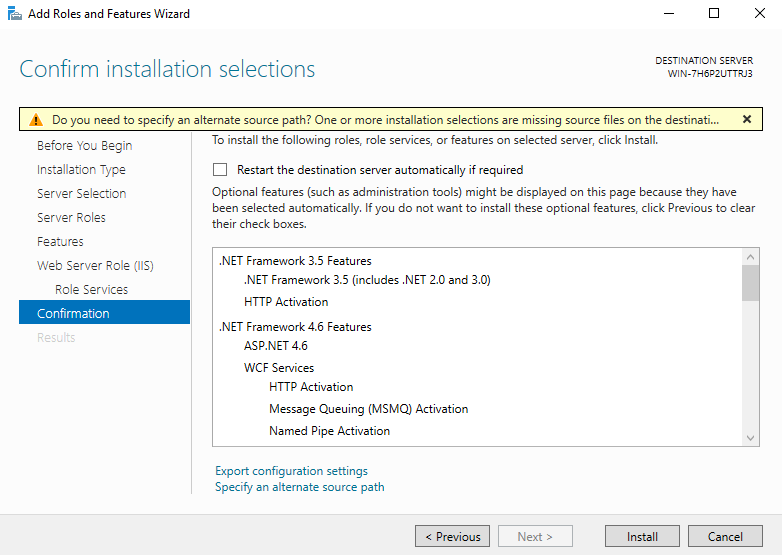
The Features menu requires two focus points.
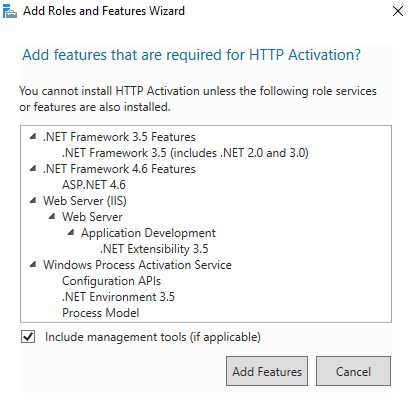
First, expand the .NET Framework 3.5 Features and click HTTP Activation.
This selection triggers a new window stating the requirements for HTTP activation. Click Add Features.
Second, expand the .NET Framework 4.6 Features and then expand WCF Services.

Check HTTP Activation, Message Queuing (MSMQ) Activation, Named Pipe Activation and TCP Activation.
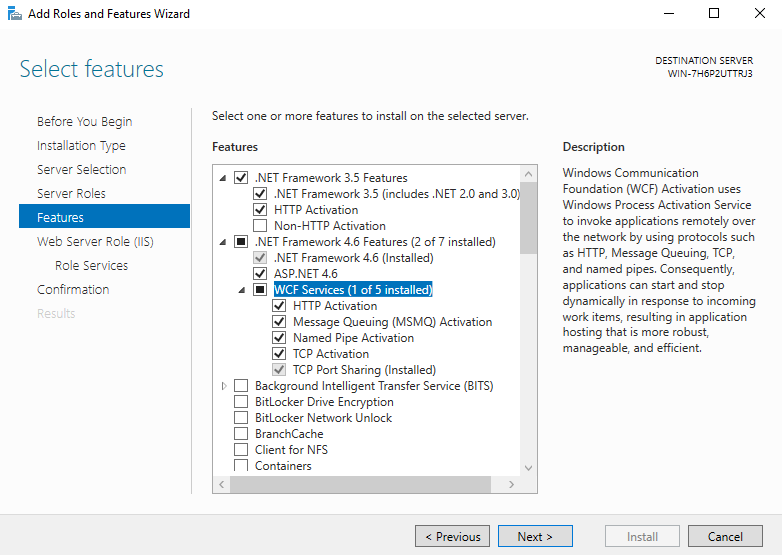
As additional dialog boxes open, click Add Features. After the additional four boxes are checked, click Next.
Read the Web Server Role (IIS) menu content and then click Next.
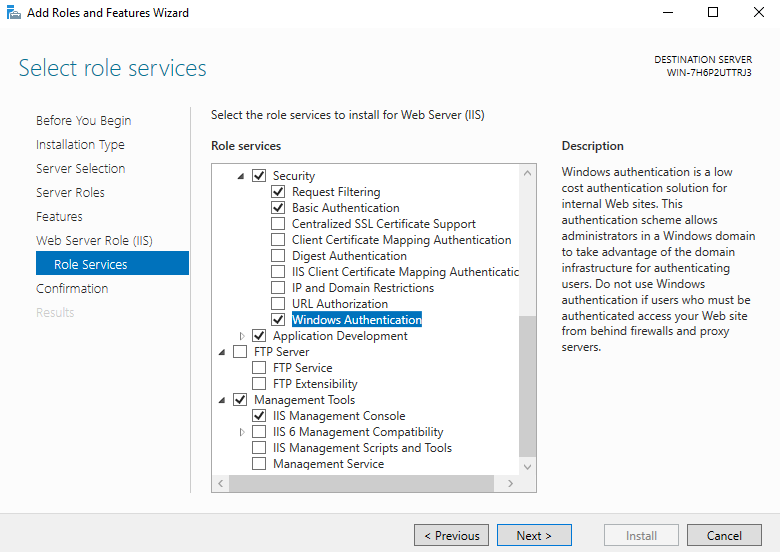
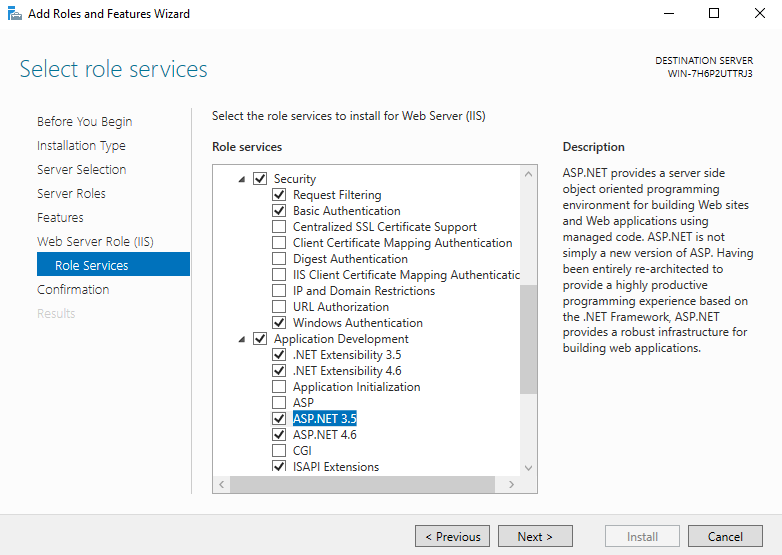
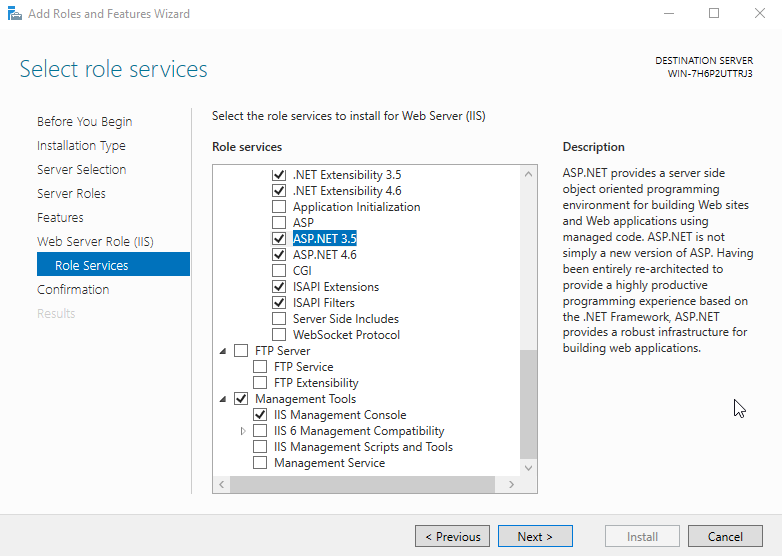
The Role Services submenu requires three focus points.
First, scroll to the Security category and check the boxes for Basic Authentication and Windows Authentication.
Second, expand the Application Development category and check the .NET Extensibility 3.5, .NET Extensibility 4.x, ASP .NET 3.5, and ASP .NET 4.x boxes.
Third, scroll to Management Tools and verify that the IIS Management Console box is checked.
Click Next.
Confirm the installation selections and then click Install.
Wait for the installation to complete successfully.
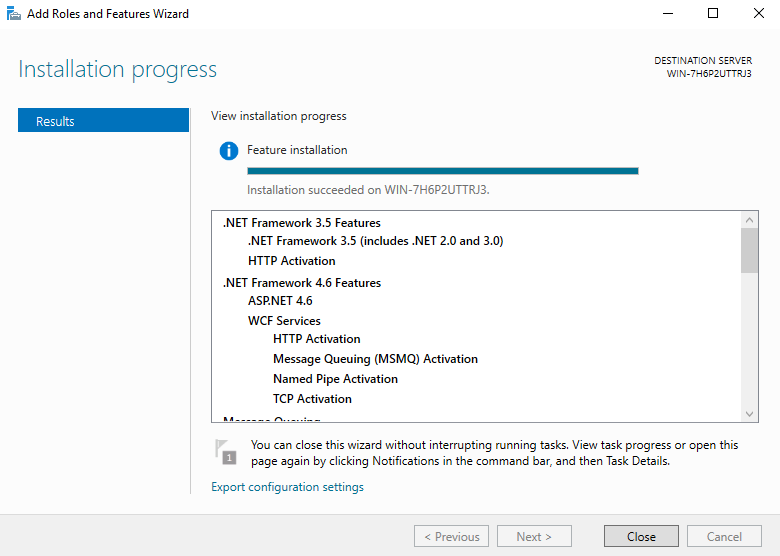
Click Close to complete the installation.
Installing the RapidIdentity MFA Server
In order to continue the setup, download the RapidIdentity MFA Server files and complete the proceeding steps.
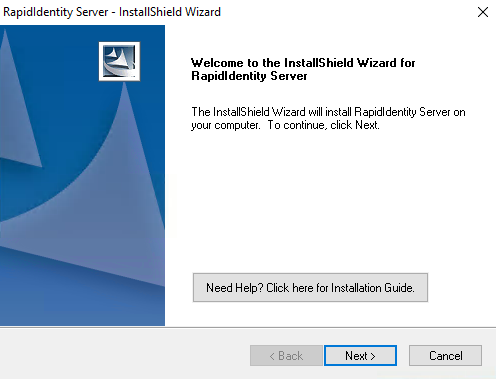
Right-click on the RapidIdentity MFA Server and select Run as administrator.
The RapidIdentity MFA Server – InstallShield Wizard will open, click Next.
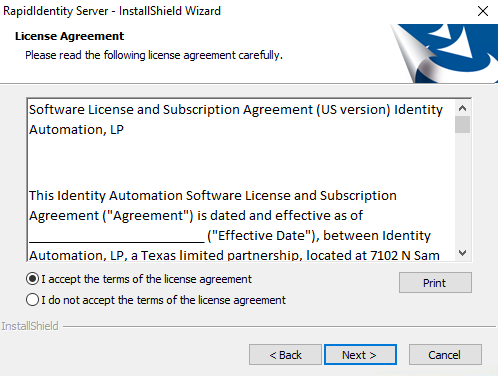
The License Agreement will appear. Read the License Agreement, accept the terms of the license agreement, and click Next.
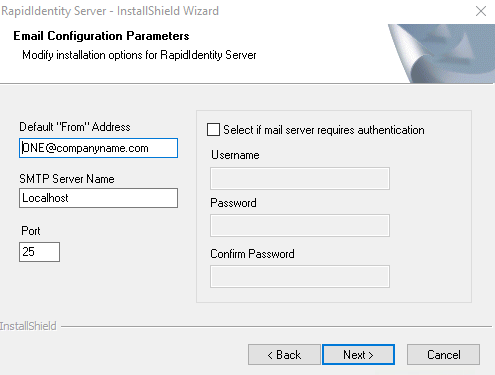
The next screen, Email Configuration Parameters, is related to email reporting. Complete if set-up is desired. If not setting this up at the time, leave it on the default information and click Next.
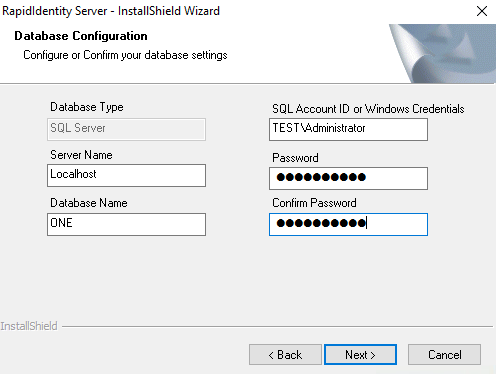
The Database Configuration window will appear. Enter the server and instance name into the proper fields. Leave the Database Name as is. Enter the SQL Account ID or Windows Credentials and the Password, along with Password Confirmation and click Next.
This will generate a new window that will confirm the new database creation; click Next.
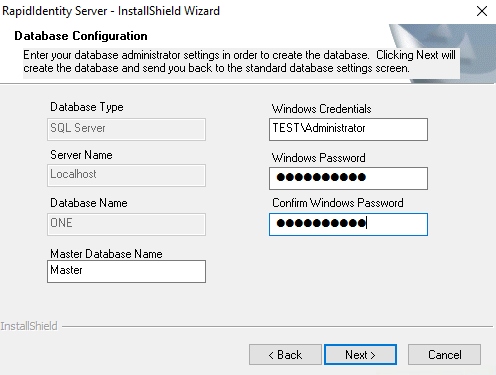
If a SQL Account ID was entered, the screen will now ask for Windows Credentials required for setup. Enter the Windows Credentials and the Password, along with Password Confirmation and click Next.
A window will generate to inform that the new database has been created; click Next.
The Database Configuration window will appear again to ensure the fields entered represent the account that will be used for connection in the RapidIdentity MFA Server. Click Next to confirm.
The Choose Destination Location will appear. Select a folder in which the setup will install the files through the Change button or maintain the recommended default server location. Click Next.

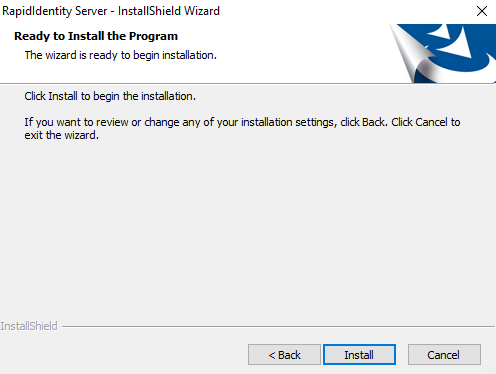
The server is now ready to install. Click Install to proceed with installation.
Wait for the installation to complete successfully.
The InstallShield Wizard Complete screen will appear when installation is complete. Click Finish.
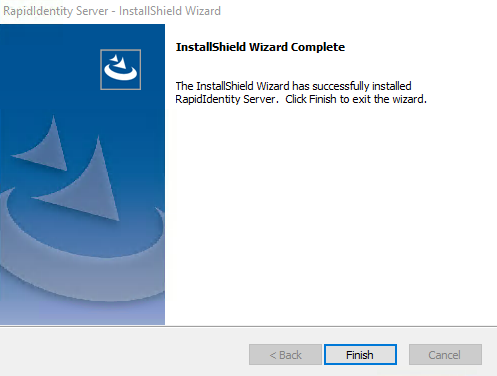
The RapidIdentity MFA Server is successfully installed. Proceed to the steps to install the client-side components.
Installing the RapidIdentity MFA Client-Side Components
To complete the RapidIdentity MFA Server installation, there are client-side components that require installation on the HealthCast EPCS Server.
Notice
Download the RapidIdentity MFA Client-Side Components files:
RapidIdentity_Client-Side-Components_v4939.exe - additional install use on the MFA server
Once downloaded, proceed with the following steps to install the components.
Right-click on the RapidIdentity Client-Side Components folder and select Run as administrator.
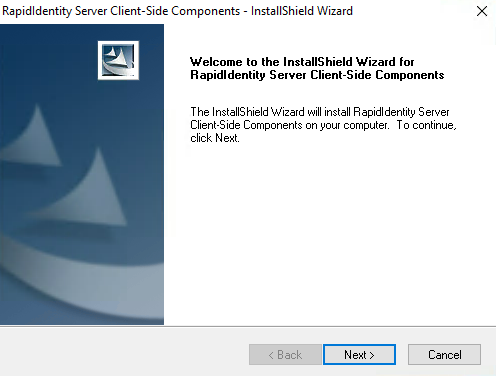
On the welcome screen, click Next.
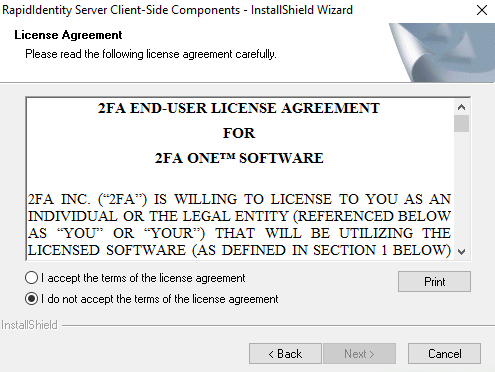
The License Agreement will appear. Read the License Agreement, accept the terms of the license agreement, and click Next.
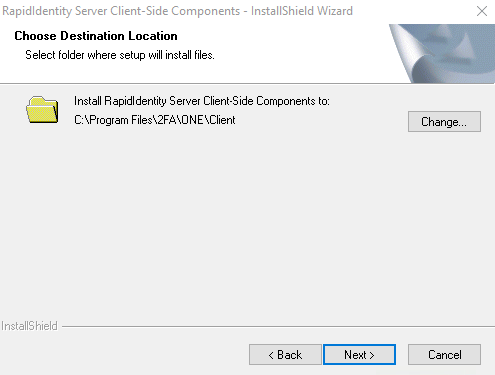
The Choose Destination Location window will appear. Select a folder in which the setup will install the files through the Change button or maintain the recommended default server location. Click Next.
The server is now ready to install. Click Install.
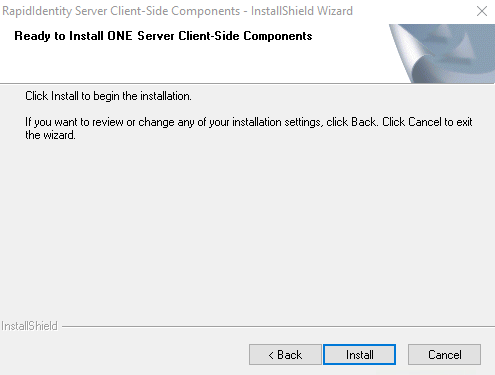
Wait for the installation to complete successfully.
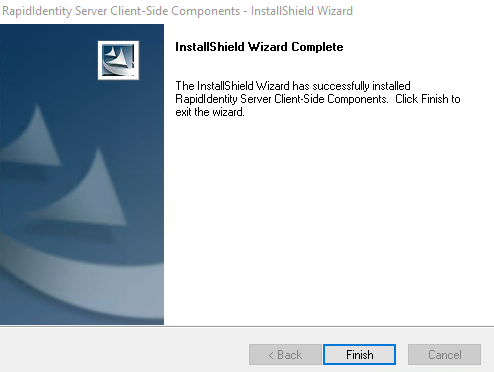
The InstallShield Wizard Complete screen will appear when installation is complete. Click Finish.
The installation steps for the RapidIdentity MFA Server are now complete.
Configuring the RapidIdentity MFA Server
Now that the installation steps for the RapidIdentity MFA Server are completed, it is necessary to configure the web services in IIS.
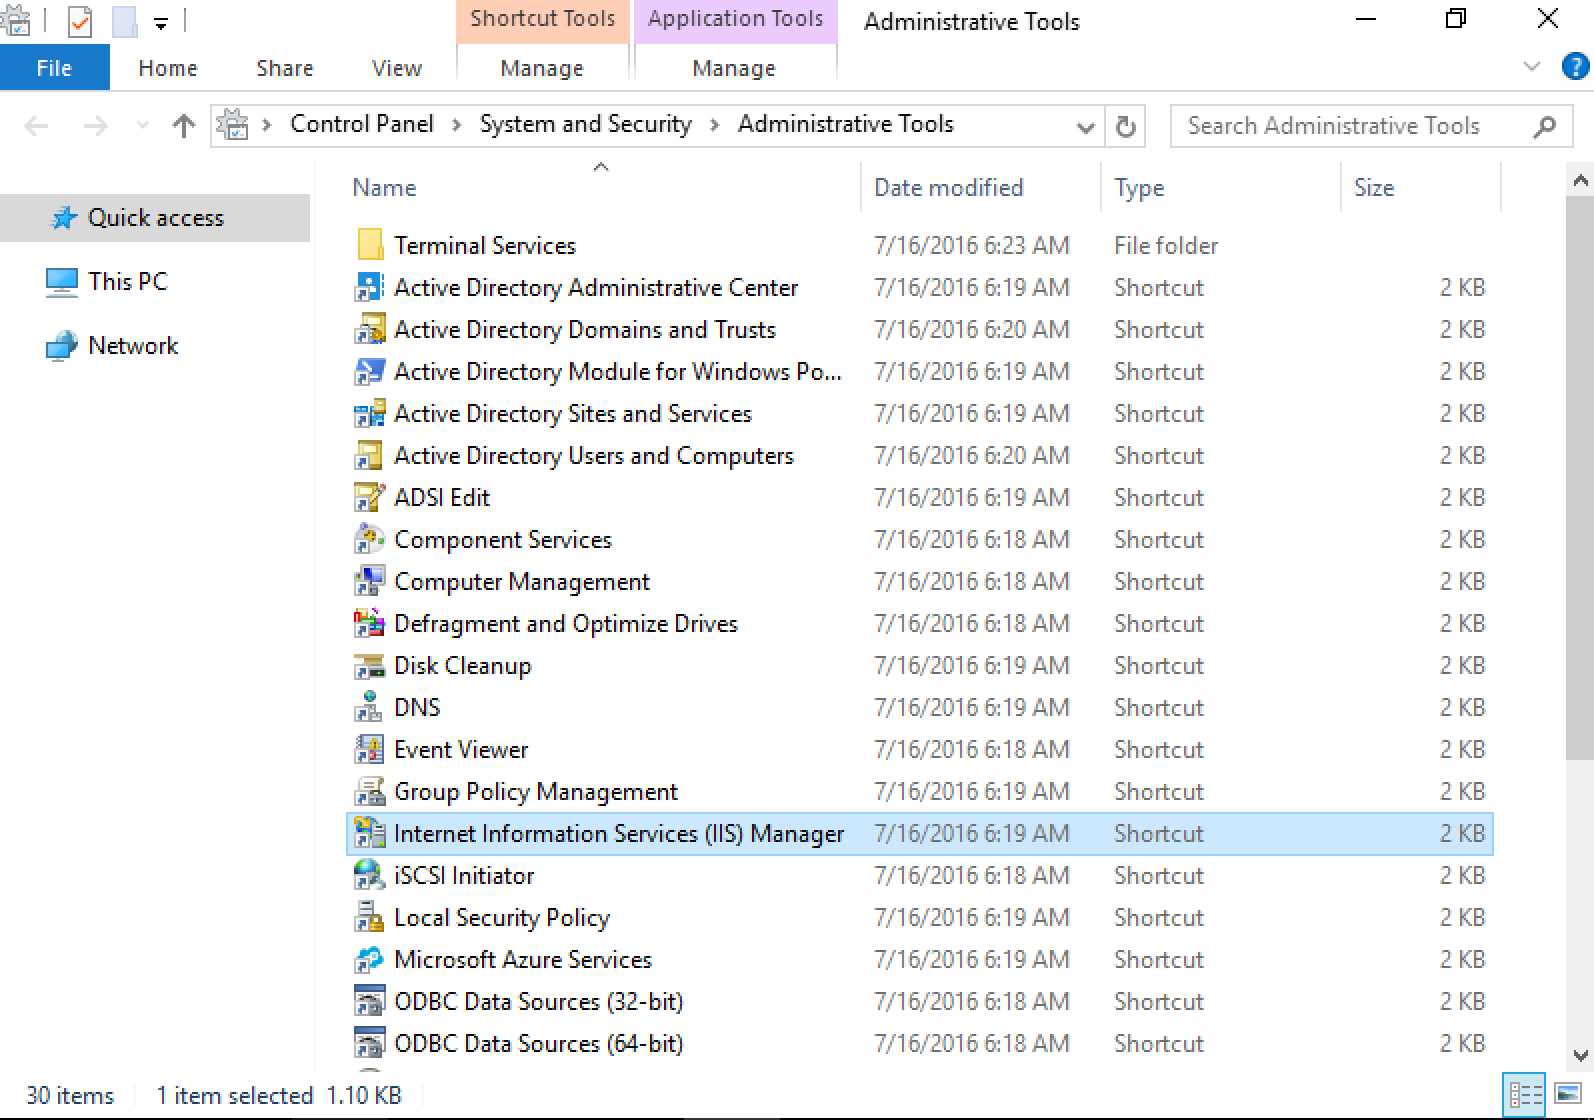
Go to Windows > Administrative Tools and locate and click on the Internet Information Services IIS Manager.
Within the Connections field, select where the RapidIdentity MFA Server was installed.
This generates a window that offers notification of the latest Web Platform Components. Select Yes to opt in.
Within the Connections field, select Application Pools and right-click on oneAppPool to go to the Advanced Settings.
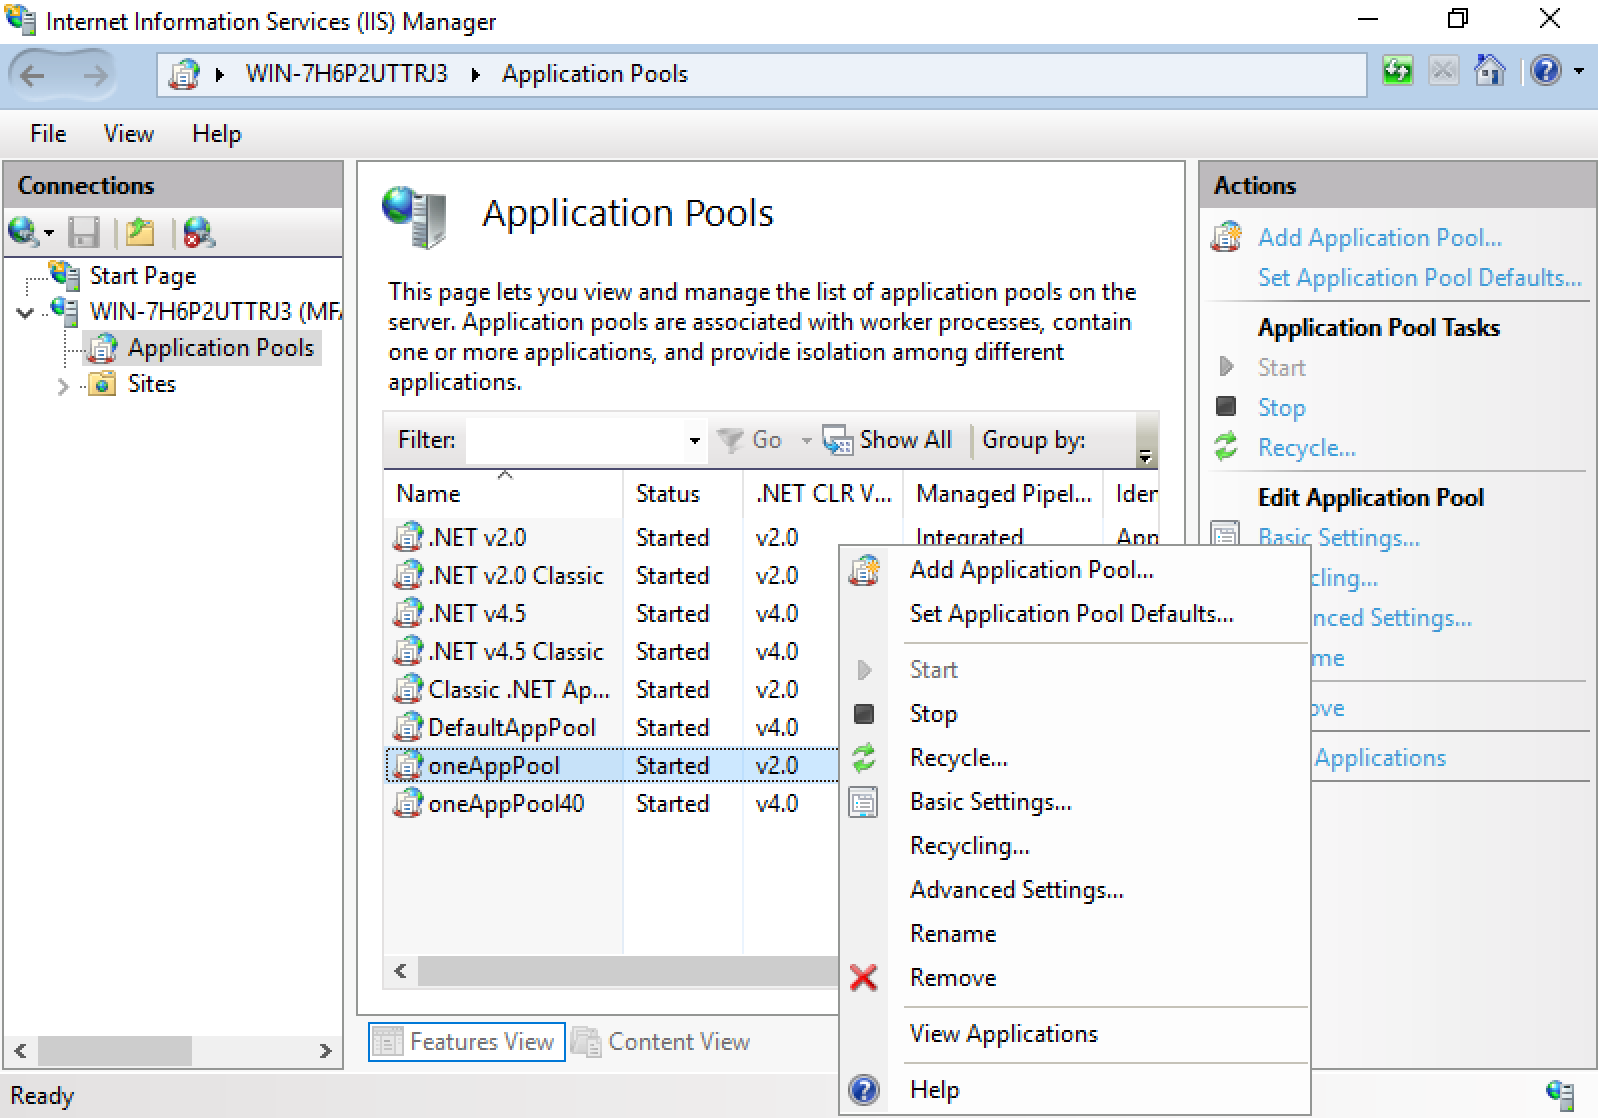
Under the General section, change the .NET CLR Version to v2.0.
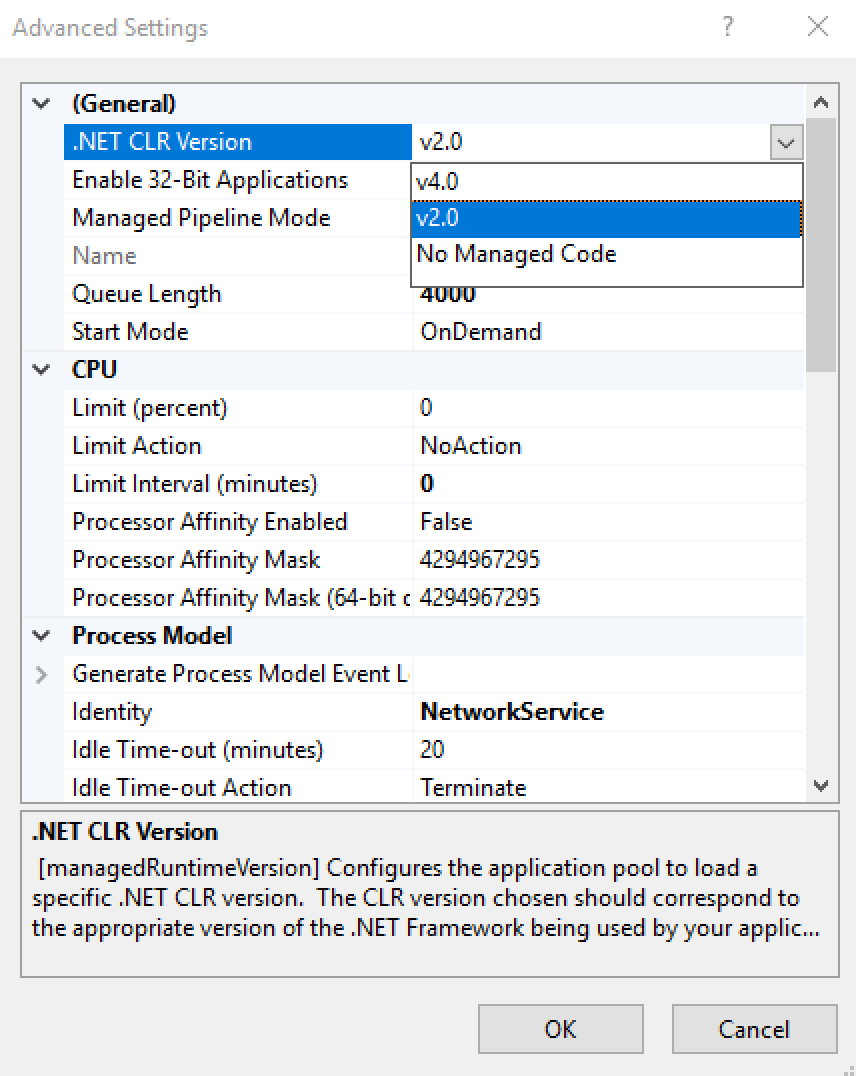
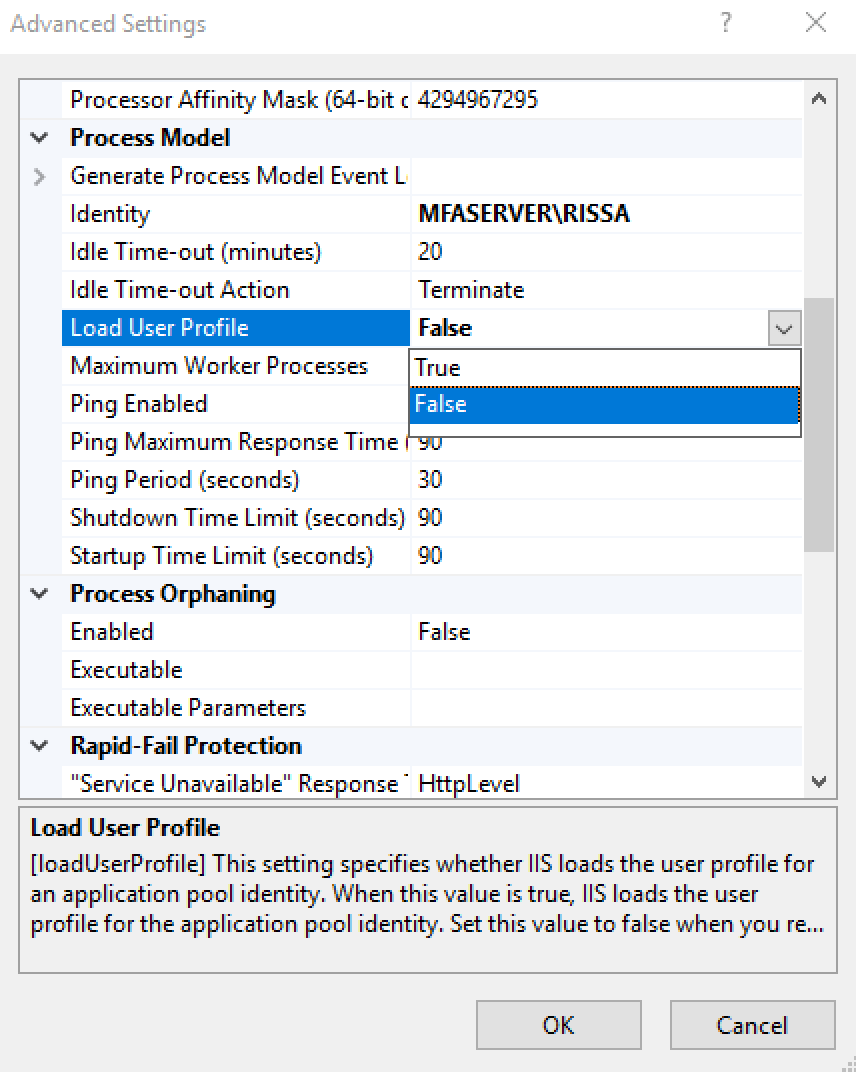
Under the Process Model section, ensure that the Identity is set to Network Service.
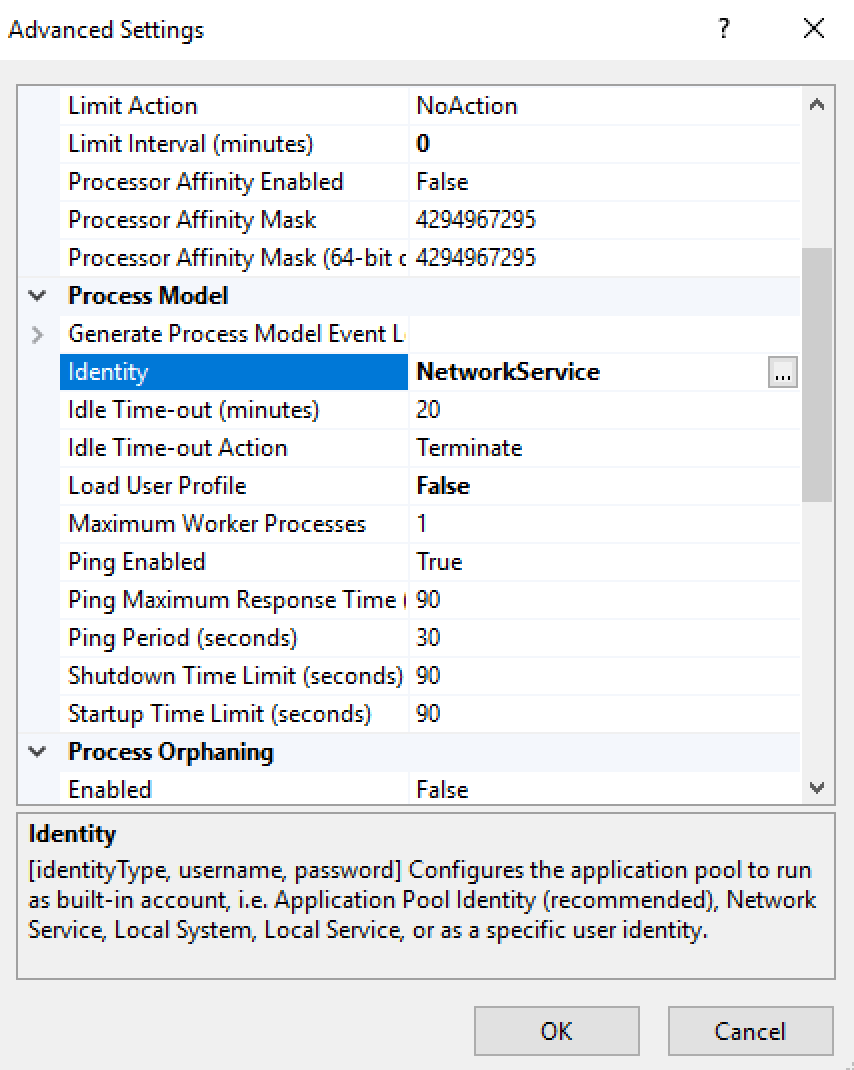
Change Load User Profile status to True.
Click OK.
Minimize windows and go to Windows Explorer. Open Control Panel and navigate to C:\Program Files\2FA.
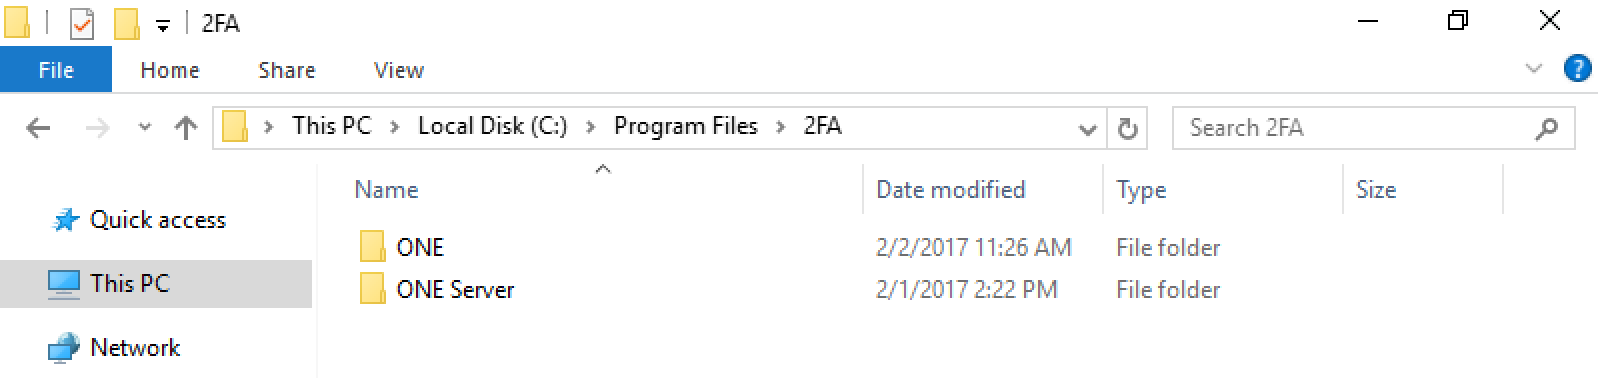
On the local disc drive, go to Program Files > 2FA Server and right-click on the downloaded RapidIdentity MFA Server to go to Properties.

In the Security tab, click on Edit to change permissions.
Then, click on Add when the permissions for the server window generates.
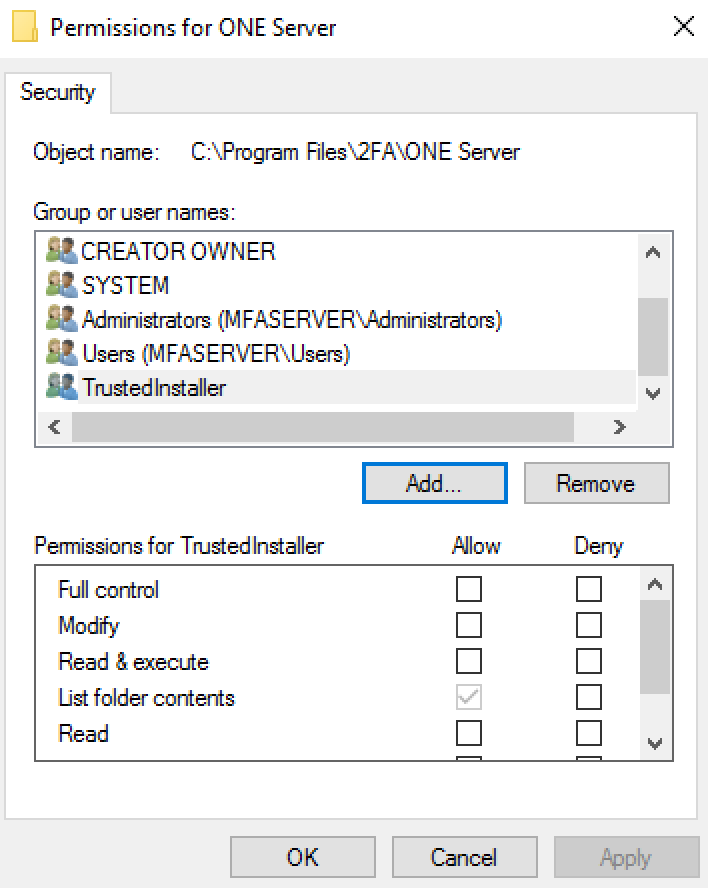
In the Enter the object names to select field, type in network and click the Check Names button.
This generates a window that will display multiple files with the same name, select NETWORK SERVICE and click OK.
Within the Permissions for NETWORK SERVICE, check the box under Allow for Full Control.
Click Apply and then OK.
Click OK on the server properties window.
Open a command window and right-click and select Run as administrator.
Type in iisreset and press enter to restart the web server.
A return command will state, “Internet services successfully restarted,” which completes the server configuration.
Configuring the Data Tables for the RapidIdentity MFA Server
Complete these seven steps to create the RapidIdentity MFA Server Database tables.
On the RapidIdentity MFA Server, open a browser and navigate to http://[servername]/One/install/build_cm_tables.aspx
The servername is the name of the server instance created previously and the authentication credentials are those configured for that server instance.
Note
The first attempt to access the newly created RapidIdentity MFA Server may require more time than anticipated. This experience is normal.
Once the RapidIdentity MFA Server configuration sequence below is completed, the access time should be faster.
After authentication, leave the SysAdmin Role Name, Username, and LDAP Unique Identifier as the default ONE_sys_admin – do not input a different Role Name, Username, or LDAP Unique Identifier.
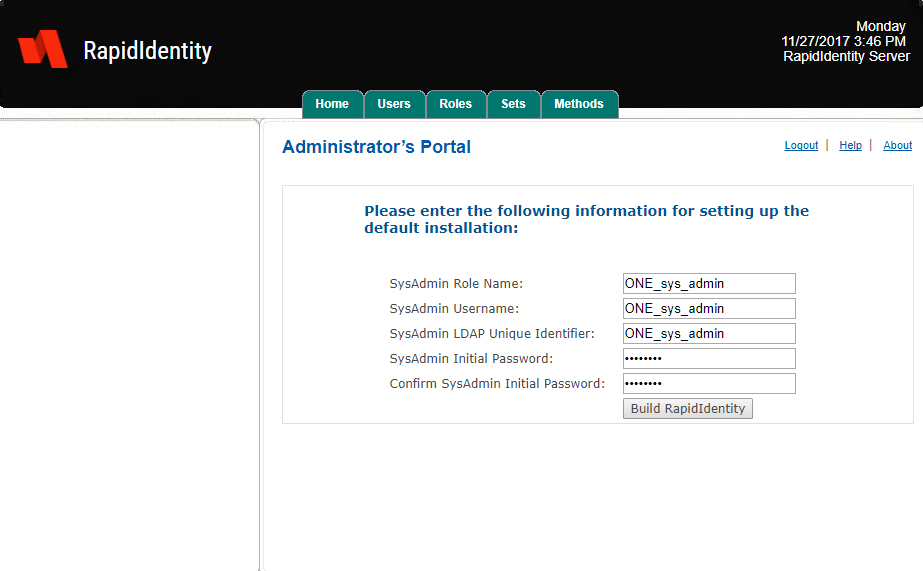
Complete the password fields as shown and then click Build RapidIdentity.
A pop-up message will appear stating that all the data in the repository will be replaced with the default settings.
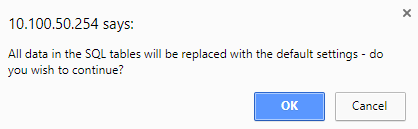
Important
During the first RapidIdentity MFA Server installation, click OK.
During subsequent RapidIdentity MFA Server upgrades, click Cancel.
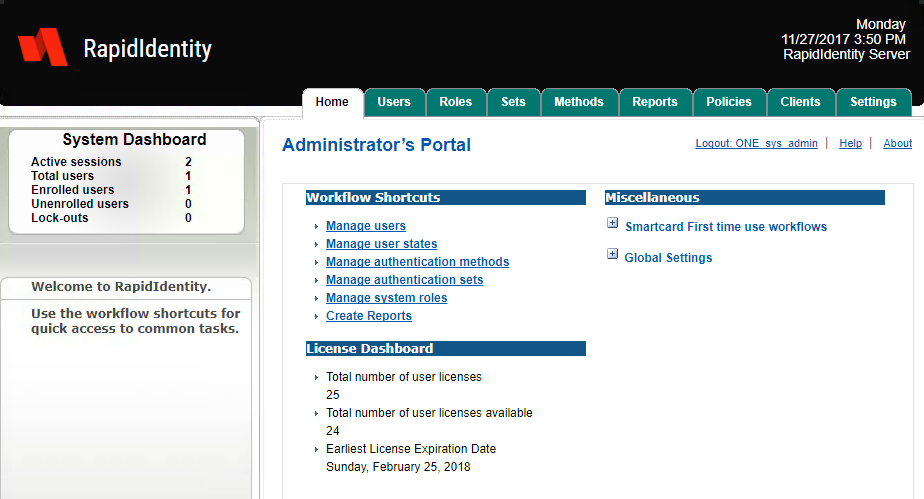
When the server tables are completed, a confirmation message appears.

Click Home.
It is necessary to authenticate to RapidIdentity MFA Server using the credentials created in Step 2. In the Username field, enter ONE_sys_admin.
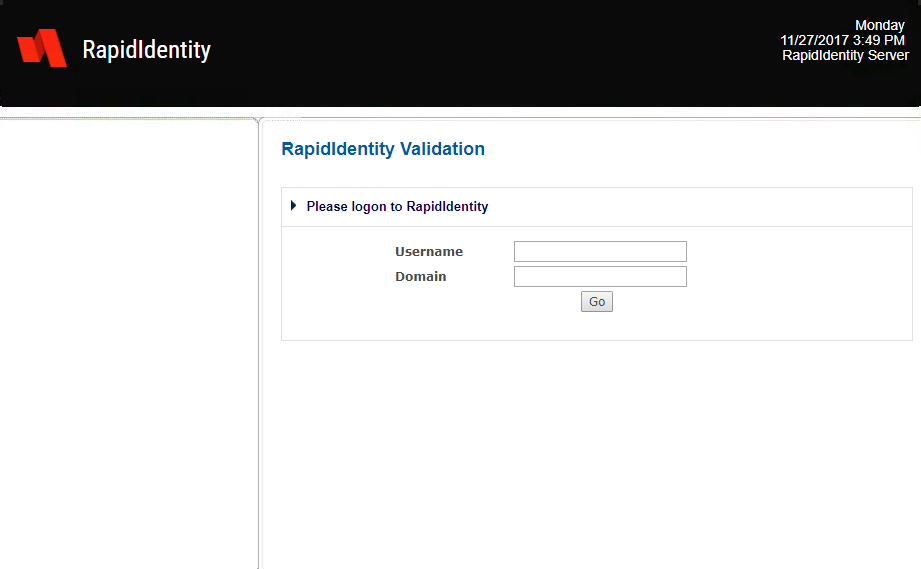
Leave the Domain field blank. Click OK.
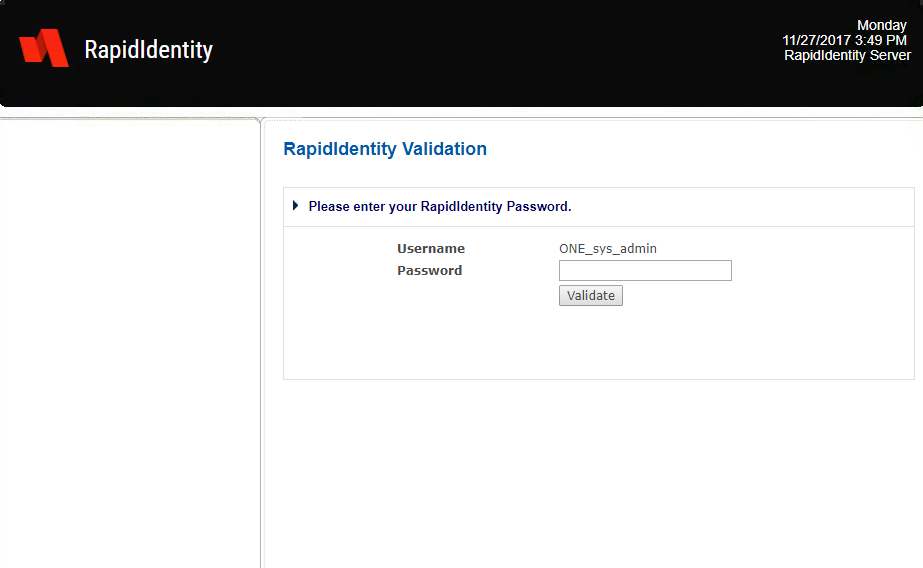
Enter the password chosen in Step 2 in the Password field and the click Validate.
A successful authentication to RapidIdentity MFA Server directs users to the Home screen.
 |
Configuring Authentication Device in Hyperspace for EPCS
To create and configure Identity Automation's authentication devices in Hyperspace please have your Hyperspace and Desktop TS user follow the directions in the "3rd Party Authentication Setup" section in the "Authentication Setup and Support Guide". This Guide is maintained and supported by Epic and has directions on setting up a 3rd party authentication device E0G record and configuring it in Authentication Administration to allow Hyperspace to use an authentication device.
These ProgIDs can be used to support an EPCS workflow authentication in Hyperspace:
Use RIBiometric.riBio ProgID to support Fingerprint authentication.
Use RIPingMe.RIToken ProgID to support PingMe and OTP authentication.
The following sections are provided for clarity and may be covered in the Epic documentation.
After configuring our EPCS-supported Program IDs in the Epic back-end system, customers will need to configure the following two contexts in Hyperspace's Authentication Administration:
E-prescribing Controlled Medications - First Context [41]
E-prescribing Controlled Medications - Second Context [42]
Note
Although Hyperspace has the functionality to require multiple authentication devices for a single context using Primary and Secondary device settings, this is not used for the EPCS workflow configuration. Instead, the two contexts listed above are used to configure the two-factor authentication needed.
In Hyperspace's Authentication Administration, after selecting the above context for the needed level (system, workstation, etc.), add RIBiometric.riBio and RIPingMe.RIToken devices - in that order - to the Primary Device setting. Leave the Secondary Device setting empty, as it is not used. One of the devices configured will be the first authentication factor that the user will have to pass to complete a controlled medication order.
In this configuration, the user has to authenticate with one of the devices configured, but not both. This configuration allows the user to use the Fingerprint reader to authenticate, if available, or use PingMe if Fingerprint is not available or the user cancels.
After selecting the above context for the needed level (system, workstation, etc.), add Hyperspaces Default Login[0] to the Primary Device setting, leaving the Secondary Device setting empty. This will be the second authentication factor the user will have to pass to complete a controlled medication order.
Note
If you want to require the user to use both Fingerprint and PingMe authentication, then add only one device like RIBiometric.riBio for Fingerprint in the Primary Device setting for the first context, and then add RIPingMe.RIToken device in the second context's Primary Device setting.
Tip
Use the “Change Challenge Questions” Context for proof of concept setup to test using the above authentication devices.
Contact your Epic Client Systems – Hyperspace and Desktop TS for detailed instructions and more information about adding authentication devices.
Installing the HealthCast ExactAccess Server
To continue the HealthCast EPCS setup, download the HealthCast ExactAccess Server msi file and proceed with the following steps.
Notice
These instructions are for installing and configuring the Audit Server where the full ExactAccess Server is not being used.
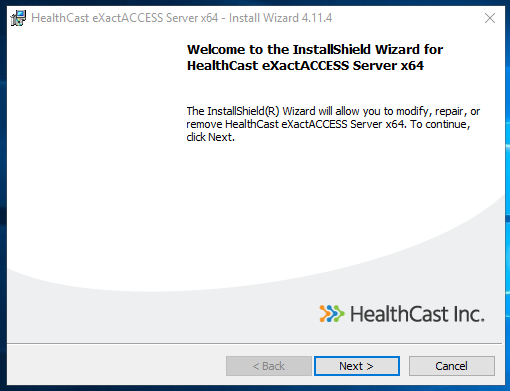
Right-click on the HealthCast ExactAccess Server and select Run as administrator.
When the InstallShield Wizard appears, click Next.
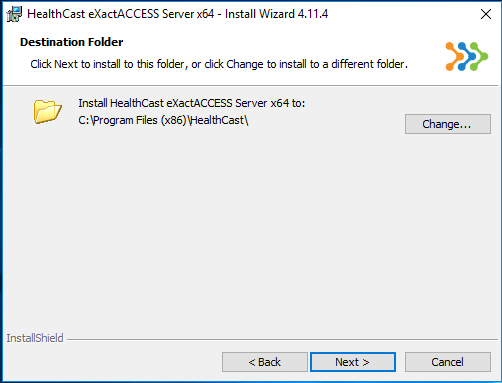
In the Choose Destination Location window, select a folder in which the setup will install the files through the Change button or maintain the recommended default server location. Click Next.
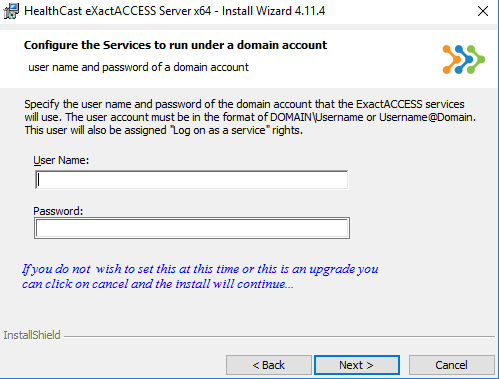
At this point, services can be configured to run under a domain account. This step can also be skipped at this time by clicking Next.
Notice
If skipped, a window will be generated to notify of an invalid username or password entry. Click Cancel to proceed with the setup without the username and password.
The program is now ready to install.
Press Install.
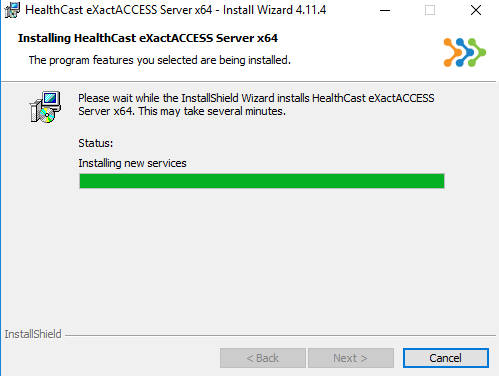
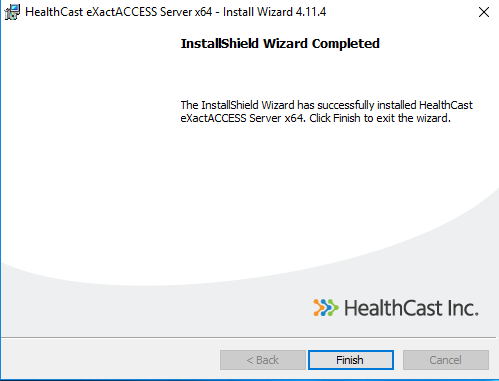
Wait for the program to install, configure, and process. Click Finish on the generated completion screen.
The system will need to be restarted for the configuration changes to be made to the HealthCast ExactAccess Server to take effect. Click Yes to restart now or No to restart later.
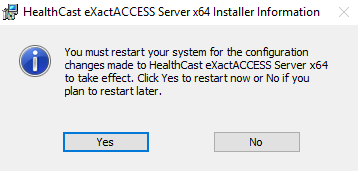
Continue to follow the steps on creating and configuring the database for auditSERVER. Once completed, it will be recommended to restart the system at that time.
Creating the ExactAccess Server Database for auditSERVER
Now that the HealthCast ExactAccess Server is set up, follow these steps to create the database for the auditSERVER.
Access the database server by going to Microsoft SQL Server Management Studio and under the Object Explorer section, click on Databases and select New Database.
Name the database and click Enter.
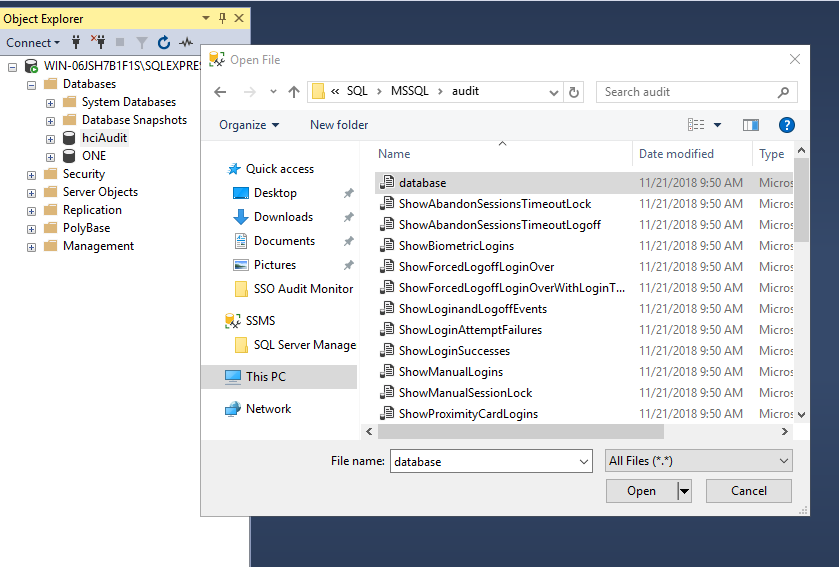
Go to File > Open > File and locate the database script that was created through the downloaded of the HealthCast ExactAccess Server msi file. Click Open.
The default location is PC > Local Disk (C:) > Program Files (86) > HealthCast > ExactAccess > SQL > MSSQL > audit > database.sql under the coordinating server it was installed in.
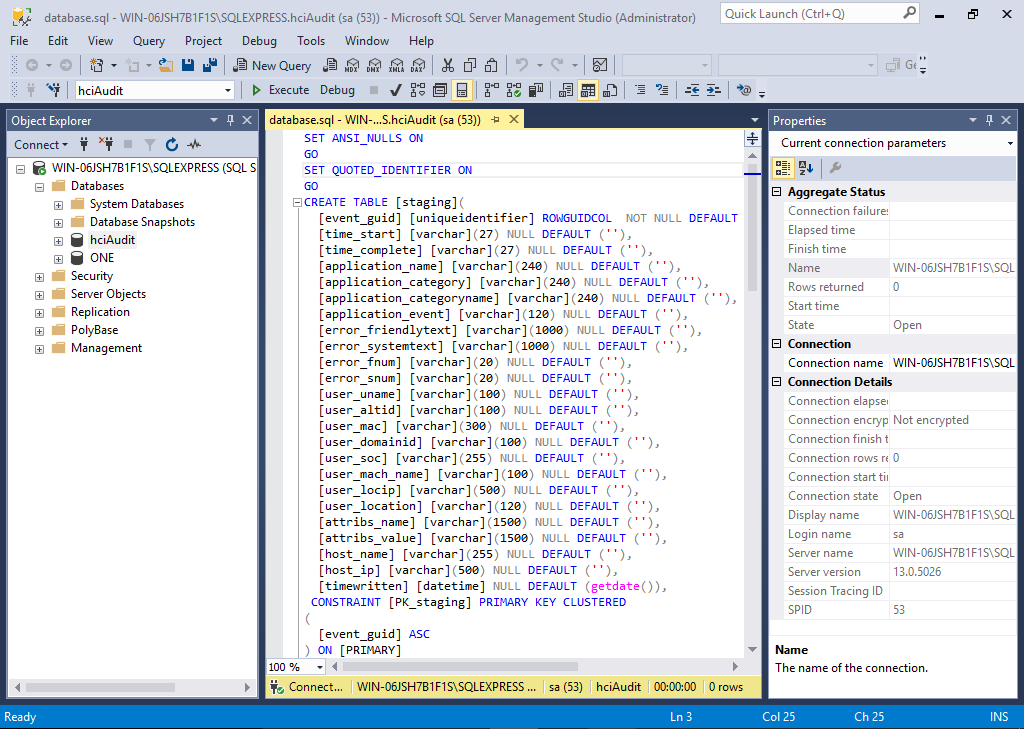
In the workstation of the opened script, select Execute.
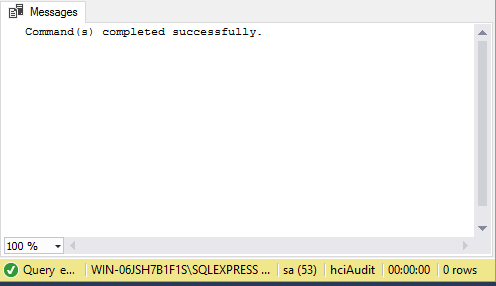
A command will return in the message section indicating a successful completion.
In the Object Explorer menu, click on the + sign next to the Security folder to expand the directory. Repeat for the Logins folder and right-click on hcisql to click on Properties.
Note
This step assumes that the domain service account in the active directory of the environment for SQL setup is preexisting.
This generates The Login Properties window. Select User Mapping in the Select a Page menu to ensure that the box is selected under Map for the hciAudit Database.
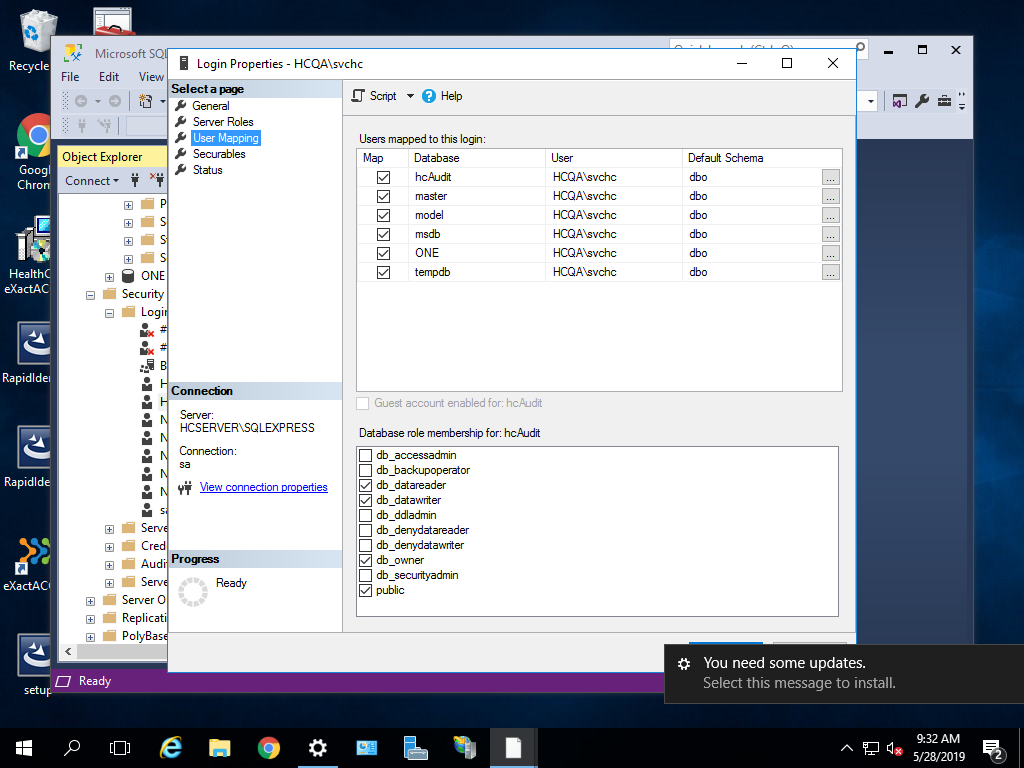
Click OK.
The database is now created.
Configuring the ExactAccess Server Database for auditSERVER
Once the database is created, configure it for the auditSERVER with these steps.
Go to Windows > HealthCast and locate and click on ExactAccess Server Configuration.

This populates the HCI Server Configuration Window populates. Click on the Database tab.
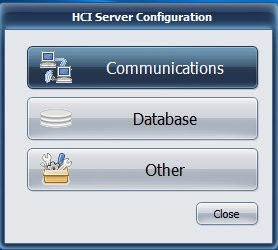
This generates a Database window. Select Audit Server.
Click the + button on the right-side of the screen.
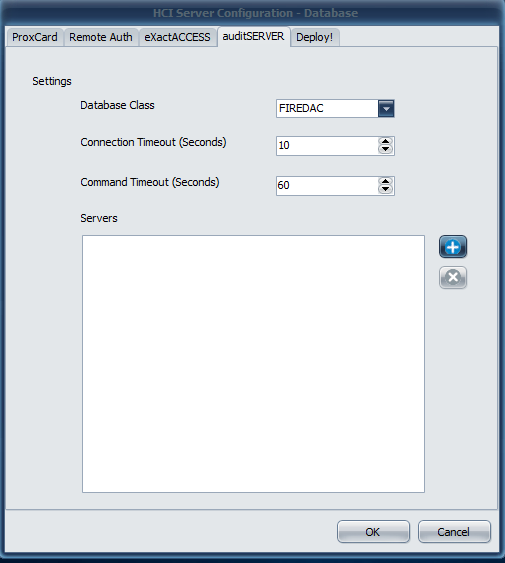
This populates the Data Link Properties (FireDAC) window. Using the drop-down menu for the Select a driver section, select SQL Server Native Client 11.0.
Select or enter the server name and use the dropdown to select it.
Enter information to log on to the server.
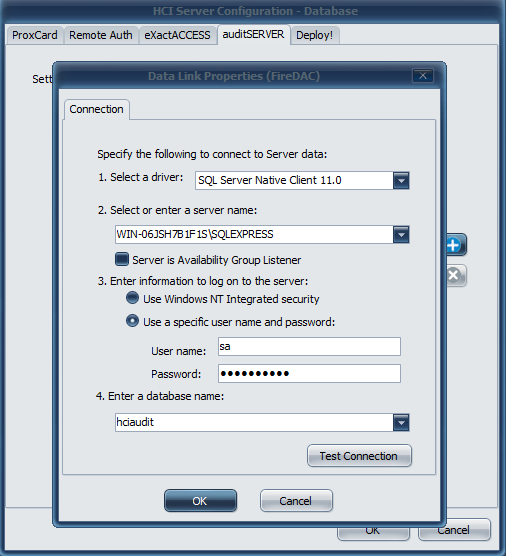
Use the dropdown menu to select the hciAudit database and click Test Connection.
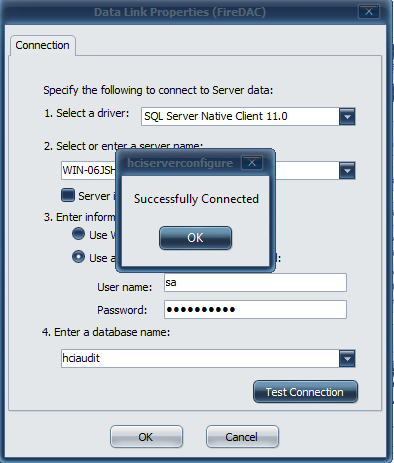
Click OK once successfully connected.
Click OK on the Data Link Properties (FireDAC) widow.
Click OK on the HCI Server Configuration Window.
Now, complete the service restart that was required previously and click Yes to confirm.
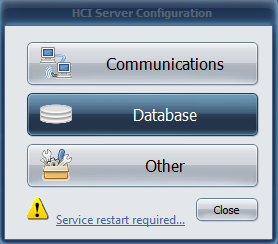
Select Close on the HCI Server Configuration Window.
The system will need to be restarted to complete all of the updates to the HealthCast ExactAccess Server to take effect. Click Yes to restart now.
From the Start menu, Run services.msc.
Find the entry for HCI auditServer Service, right-click on it , and click on File Properties.
On the logon tab, Select the service account by clicking on Browse....
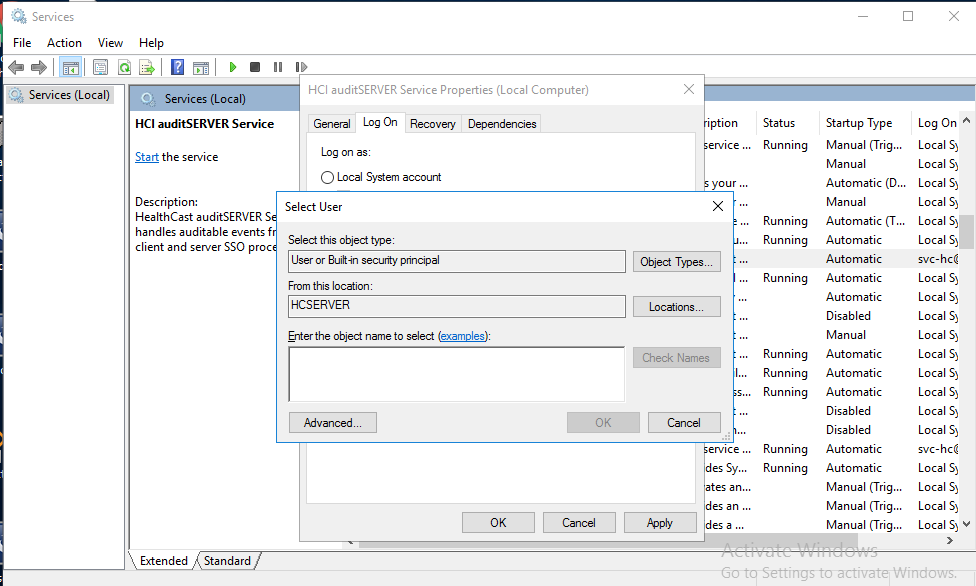
Type in the password for the service account.
Click Apply and then, click the Ok button.
In services window, right-click on HCI auditSERVER Service and select restart.
The system will now restart and this will conclude the HealthCast ExactAccess Server.
Installing the SSO Audit Monitor
To ensure the HealthCast SSO Audit Monitor Reporting Tool is ready to use, follow the proceeding steps to install and set up this tool.
Important
Install the server certificate or verify that the certificate is present. (The certificate must have the Full Qualified Doman Name as the subject field.)
Notice
User and Admin Groups should be created on the AD and users added.
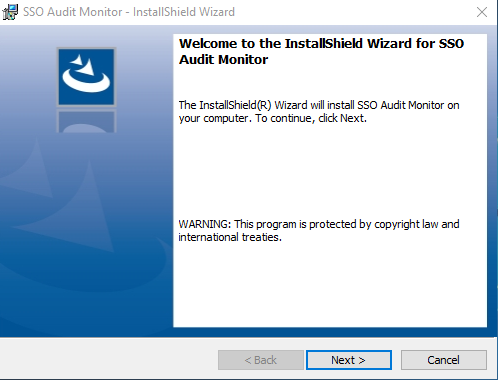
Right-click on the setup.exe file and Run as administrator.
Click Next on the InstallShield Wizard for SSO Audit Monitor Welcome screen.
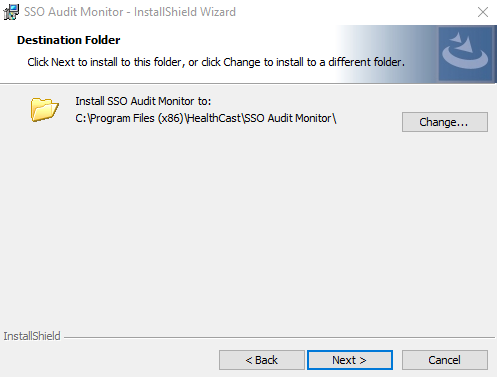
Click Next on the Destination Folder screen that populates to utilize the default folder for installation or configure to preferred folder and then click Next.
The program is ready to install; click Install. Wait for the program to successfully install.
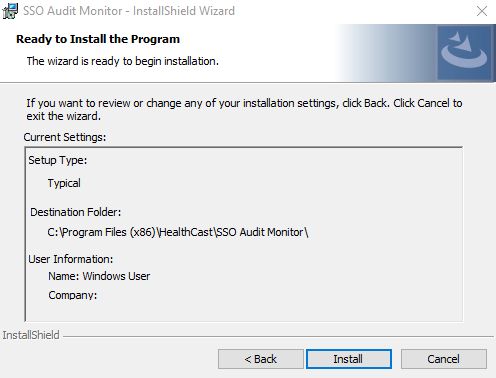
Click Finish on the install completion screen.
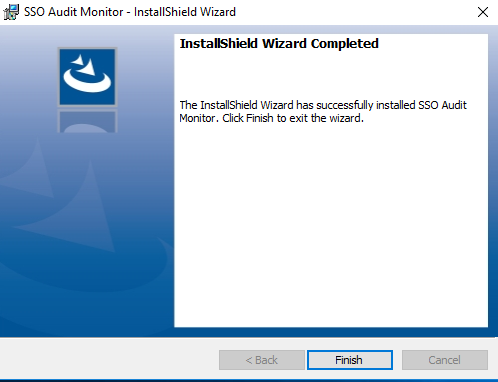
The SSO Audit Monitor is now installed. Proceed with the post-installation procedures to complete setup of the tool.
Setting up the SSO Audit Monitor
To ensure the HealthCast SSO Audit Monitor Reporting Tool is ready to use, follow the proceeding steps to properly set up this tool.
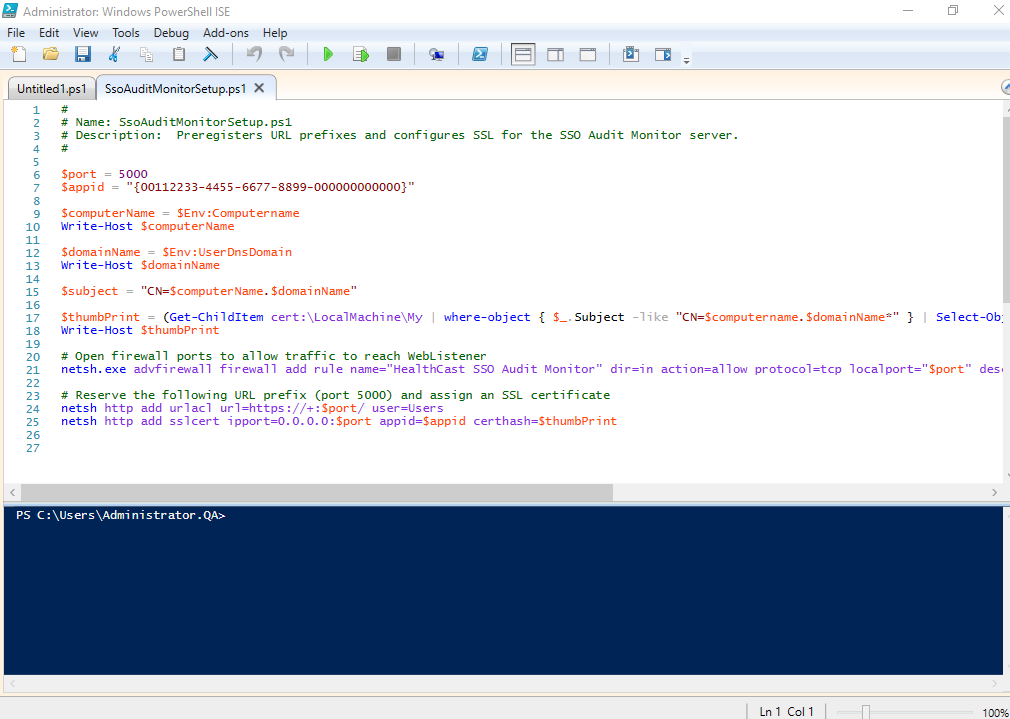
Open PowerShell as Administrator.
Execute the following script: (C:\Program Files (x86)\HealthCast\SSO Audit Monitor\Config\SsoAudit- MonitorSetup.ps1) on the server that will be hosting the SSO Audit Monitor application.
Exit PowerShell
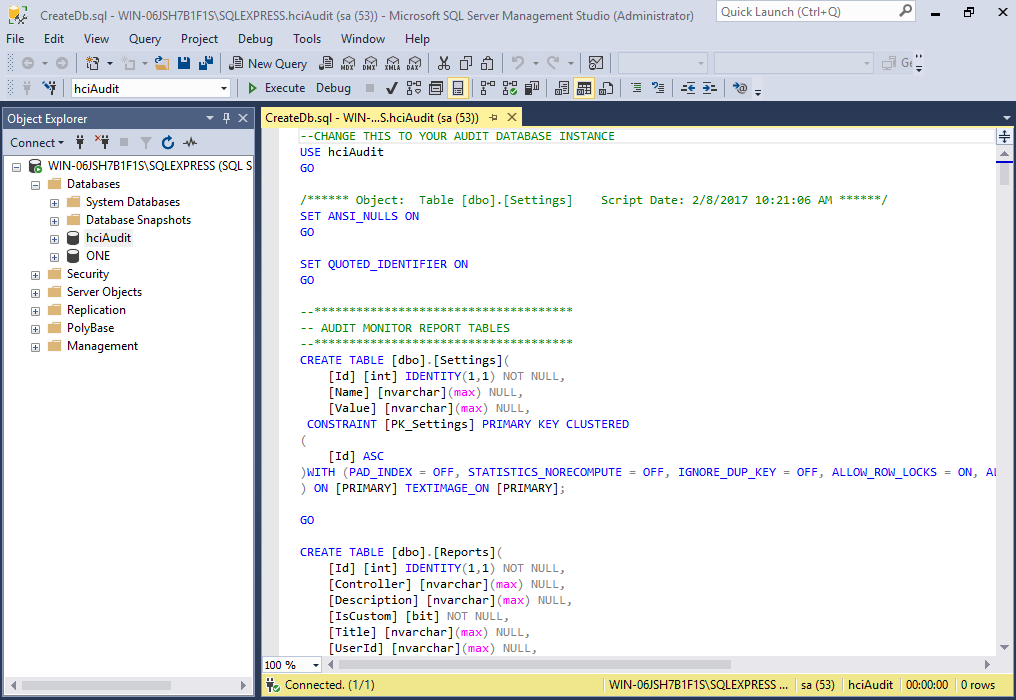
Navigate to C: > Program Files (x86) > HealthCast > SSO Audit Monitor > Config and use Notepad to open CreateDb.sql.
On the second line, replace the content of [your_audit_db] with the name of the database to be used and save the file.
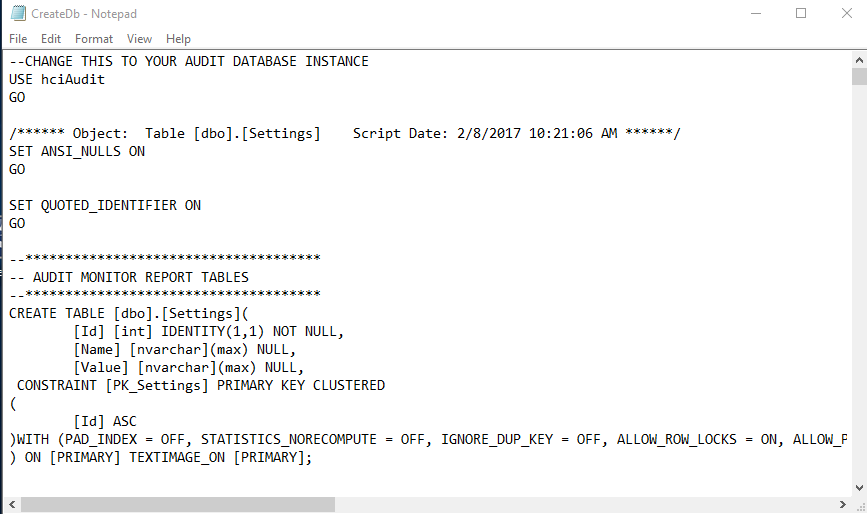
In SQL Server, navigate to and open the script you just edited. Click Execute to apply the script to the database.
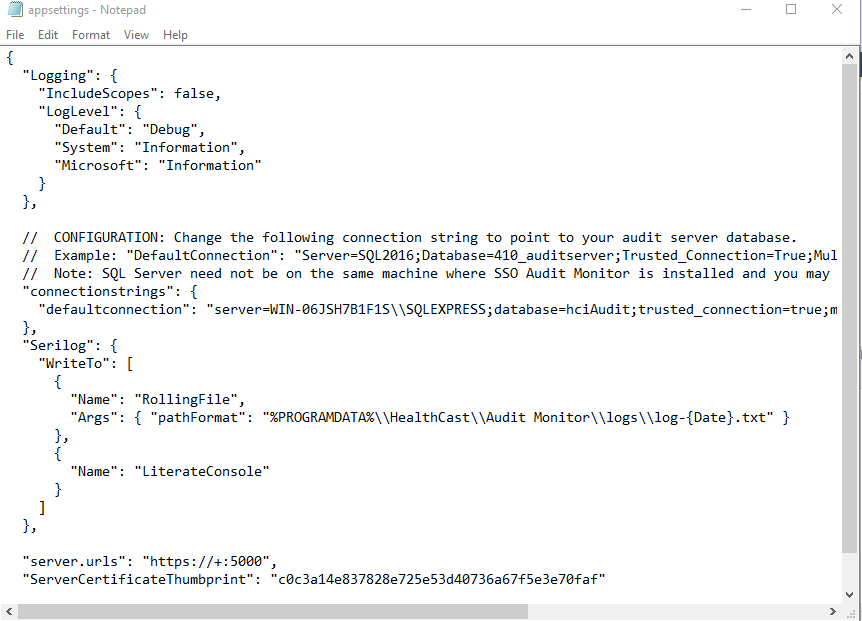
Navigate to C: > Program Files (x86) > HealthCast > SSO Audit Monitor and open appsettings.json.
On the "defaultconnection" line, change (localdb) to the name of the server, MSSQLLocalDB to the name of the instance, and database= to the name of the database. Save and close the file.
From the Start menu, Run services.msc.
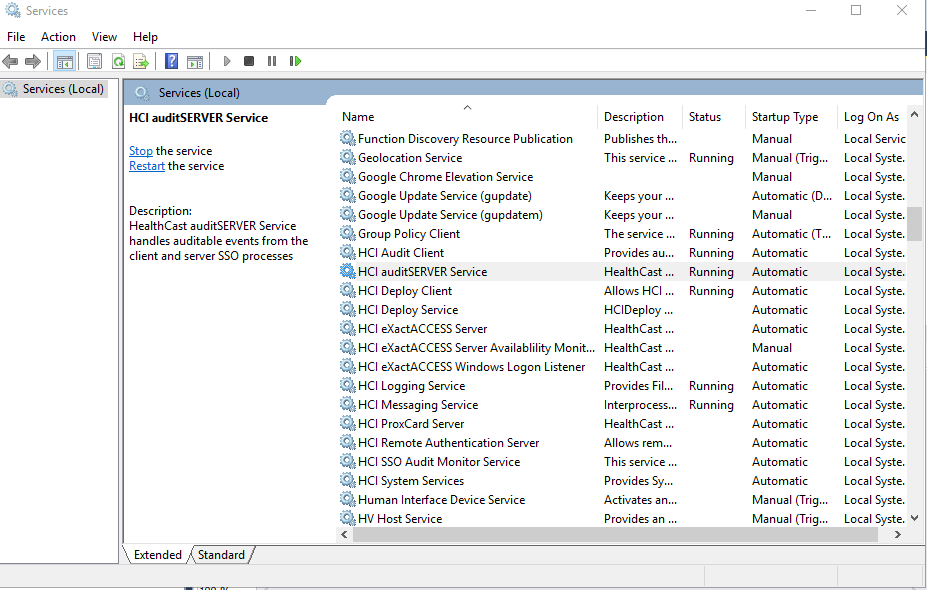
Find the entry for HCI SSO Audit Monitor Service, right-click on it, and click File Properties.
On the Log On tab, Select the service account by clicking on Browse....
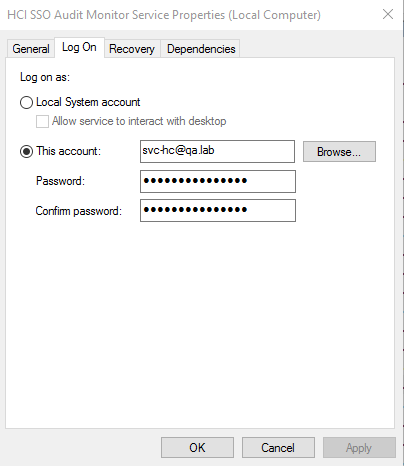
Type in the password.
Click Apply and then, click the OK button.
In a browser, navigate to the URL of the audit reporting website: https://computername:5000.
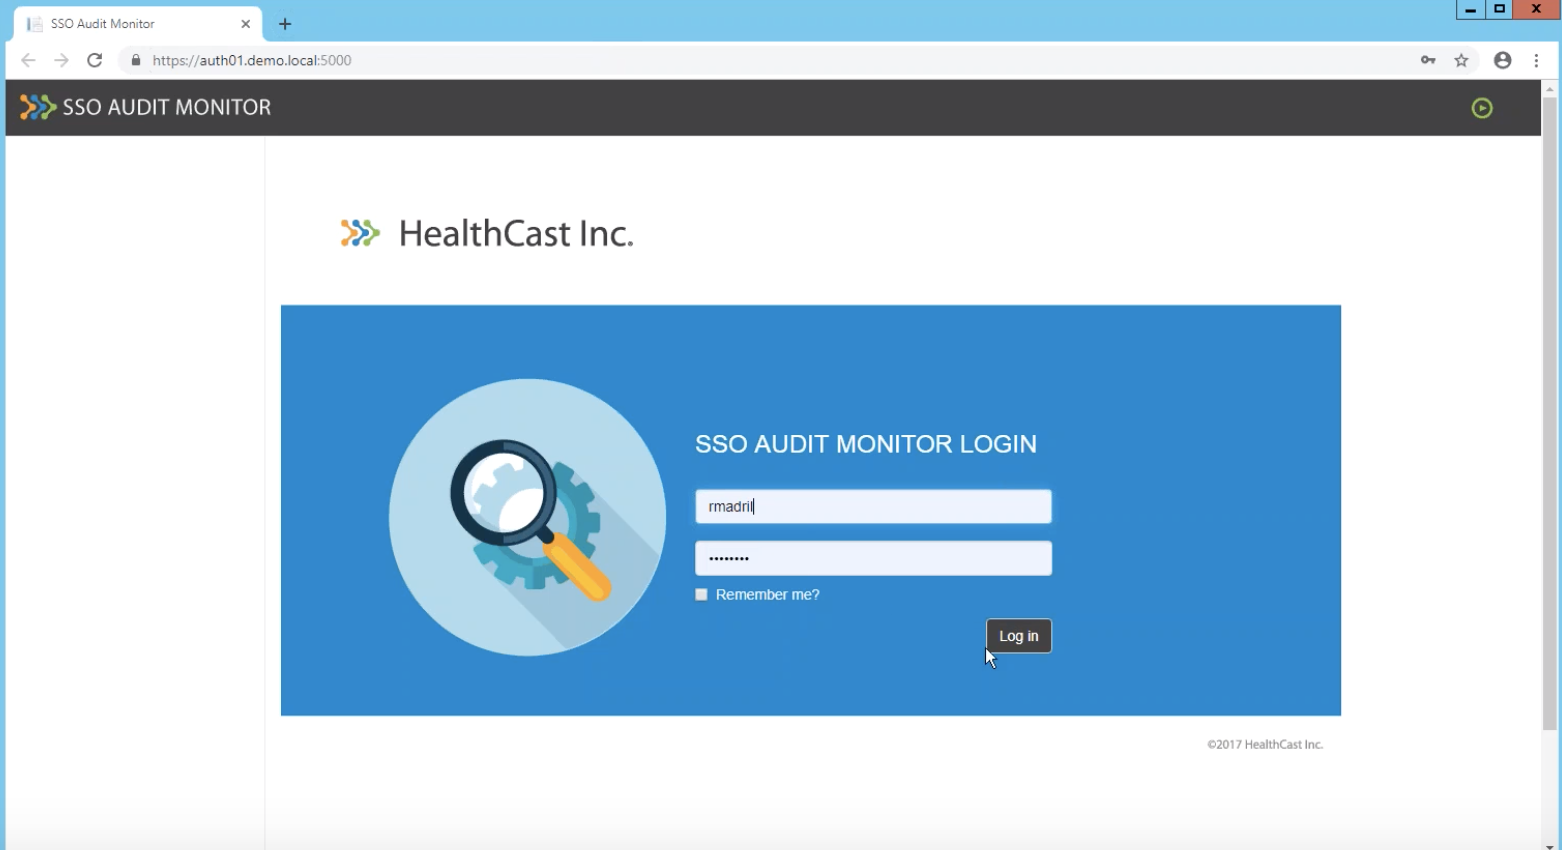
Log in with your system credentials to see the different audit reports available. There is a search functionality within the audit report site which can be used to find users that did an authentication for an EPCS transaction.
The installation and setup of the SSO Audit Monitor is now complete.