Settings
API
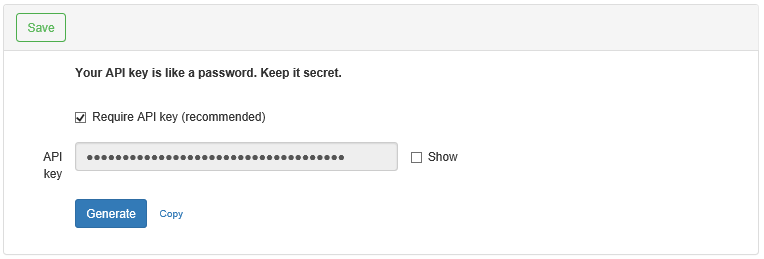
Lynx clients which use the Lynx Web API can be required to provide an API key to Lynx. This helps to ensure that only authorized client systems can call the Lynx API. The API Settings page is found under the Settings menu item.
Generate API Key
An API key is automatically generated when you first install Lynx. You will need to distribute this key to any client systems that need it. If you wish, although it is not recommended, you can turn off the API key requirement. This may be helpful in the case where you have a client system that cannot provide an API key.
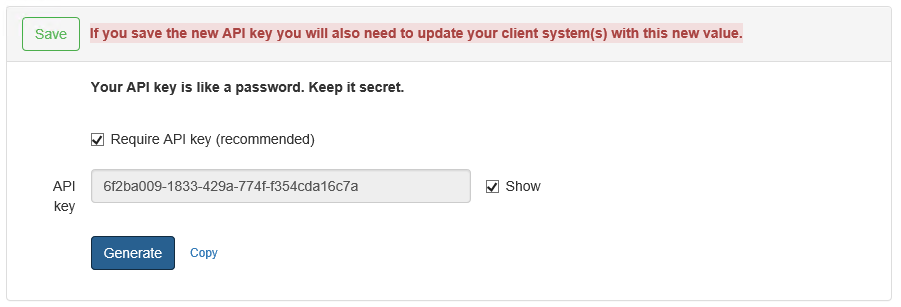
Change the API Key
Click the Generate button. *a new key is automatically generated for you.
Check “Show” to display the new value. *it is not necessary to do this and is only provided for convenience.
If you are satisfied, click Save to overwrite the current key with the new one. *as the status message indicates, you will need this new value for your Lynx client.
Proceed to the next step to use the new API key (copy the key value).
Click the Copy link. *the value will be stored in your windows clipboard, assuming your browser is compatible. If not, then manually select and copy the key.
Paste the API key into your code (or however you deal with sending a key value in your request header).
Database
The Lynx database offers data encryption and decryption. This capability is available and ready upon installation. In the case where you might have more than one Lynx server pointing to the same database you will need to export the encryption key from the one server instance so that you can import it on the other one. The procedure for doing this is as follows:
Note
To import or export a file you will need to choose a password for the key file when exporting and remember that password when doing an import.

Import Encrypted Key File
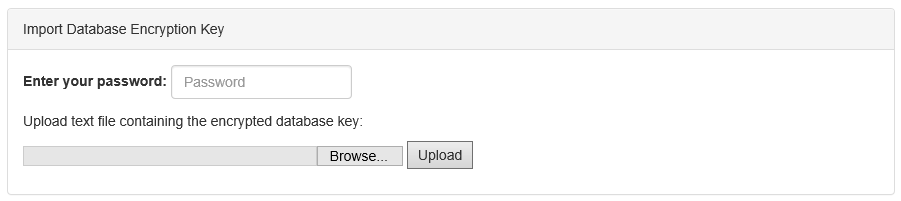
Click the Import button.
Enter the required password for the key.
Click the Browse button to select the text file containing the encrypted database key.
Click the Upload button.
Export Encrypted Key File

Click the Export button.
Choose a password (remember to keep track of it, as you will need this password to import the file).
Click OK.
The file will be downloaded to your machine’s default download folder, and you are free to copy/import it to another Lynx server instance. Note: You will not be able to import this file into the XA server. Neither will you be able import a file that came from the XA server.