Setup
Getting Started
Successfully completing the following steps will make your Lynx deployment go smoother:
Ensure that your environment meets the Lynx solution requirements.
On the machine on which you will install Lynx, ensure that you have an SSL certificate installed in the Local Computer, Personal folder certificate store.
If you will be configuring Lynx to use a Microsoft SQL Server instance, you must have the username and password of a domain user that can read and write to the database. IMPORTANT: You must set the password of this user to never expire and you must not restrict the logon hours of this user.
Installation/Upgrade/Uninstall
Install
Follow the proceeding steps to complete installation.
Run the installation file, "Lynx-1.5.x-Setup.exe" (available from HealthCast). Note: The actual file name may be slightly different depending on which version you are installing.
Choose to accept or decline the End-User License Agreement. You must accept the license agreement to proceed with the install.
Allow the installation wizard to run to completion. Click Finish to exit the wizard.
Perform the Lynx configuration procedure.
Upgrade
Note
It is recommended to perform a Lynx database upgrade if using Lynx version 1.5.0 or below, to ensure the quickest Lynx upgrade procedure.
See Database Upgrade for the proper steps.
You can upgrade a previous version of Lynx by simply following the same instructions in the "Install" section above. This will automatically uninstall the previous version of Lynx and then install the new version.
Important
Lynx 1.5.x uses a different encryption key than previous versions. Because of this, existing Lynx 1.4 (or below) database data cannot be decrypted by Lynx 1.5. This means that existing users will be prompted for their password the first time they tap-in after Lynx has been upgraded to 1.5. They won’t need to re-register their cards, only provide their password.
Uninstall
Follow these steps to uninstall.
Note
A reboot of the system may be needed at the end of this procedure.
Open the Windows Programs and Features app.
Search for the "HealthCast Lynx" item and select it.
Click "Uninstall" or "Remove".
You may receive a warning that says, "The setup must update files or services... a reboot will be required to complete the setup." Choose "OK" to continue.
Note
In our experience a reboot does not actually need to occur despite the warning message. However, you should be prepared to reboot your system after the uninstall is finished.
Configuration
Step 1: Edit and run the PowerShell script
Locate the PowerShell script (C:\Program Files (x86)\HealthCast\Lynx\Lynx.Config.ps1) on the server on which the Lynx software is installed. Edit the following two lines to provide values specific to your environment:
$certificateThumbprint = "your-cert-thumbprint"   *mandatory
$port = 443  **change this value if needed. If you change this value you’ll also need to change it in the config.ini file (see below).
Note
The certificate thumbprint can be found by opening the certificate you previously installed and clicking the Details tab. However, please be aware that (depending on your operating system version) you will most likely need to remove any and all spaces (hint: if you are having problems running the Powershell script, we suggest manually typing in the thumbprint).
Info: the PowerShell script binds the certificate to the port you choose to make it possible to enforce the SSL requirement. It also creates the necessary firewall rule.
Step 2: Edit the INI file
Lynx comes with a default configuration which may be suitable for your situation. However, if you need to configure any Lynx parameters, you may do so by following these steps:
Stop the HealthCast Lynx service.
Make a copy of the sample-config.ini file in the C:\ProgramData\HealthCast\Lynx folder. Save the copy in the same folder but call it config.ini.
Edit config.ini to change settings (see example config.ini file below).
Save the settings.
Start the HealthCast Lynx service.
(Example) Lynx Configuration Settings:
ServerPort=443 * the same port configured in the Powershell script
DatabaseType=0 * 0=Embedded database, 1=SQL Server database (see below)
DatabaseServer=SqlServerName * if using SQL Server, the name of your database server
DatabaseName=MyDatabase * if using SQL Server, the name of the database
RequireAdminRole=true * if true, then membership in the admin role will be necessary (see below)
AdminRoleName=Lynx Admins * the name of the Lynx admins group (see below)
ProxCardTableType=0 * 0=Lynx proxcard table, 1=pre-XA 4.11, 2=XA 4.11 and above
RequireAdminRole and AdminRoleName
When RequireAdminRole is set to true, then Lynx will only allow those users who are members of the Windows group specified in the AdminRoleName setting to log into the Lynx Admin web app. If the RequireAdminRole setting is false, then anyone with a valid Windows login will be able to login to the Lynx Admin web app. These two settings only affects who can login to the Lynx Admin web app. They do not affect who can use their prox card, etc.
Embedded database | Lynx comes with an embedded database that is suitable for smaller deployments, PoC and demo environments. When you use this option there is no need to have a separate database server because Lynx will instead store data in its embedded database file. This makes deployment easier and less expensive, but does not provide a highly-available environment and may be at risk of data loss if the embedded database file is corrupted or deleted. All that is necessary to use this option is to set the DatabaseType setting (in the config.ini file) to 0. |
SQL Server database | Lynx will also work with SQL Server (see Requirements). If you are installing Lynx to use in conjunction with ExactAccess (XA) then Lynx should be configured to use the same database as XA. To configure Lynx to use the same database as XA, use these settings in config.ini: DatabaseType=1DatabaseServer=<XA database server name>DatabaseName=<XA database name>ProxCardTableType=1 or 2 depending on XA version |
Note
If you will be using the embedded database, you can skip steps 3, 4, and 5.
Step 3: Configure the SQL Login
If you are using SQL Server, you will need to create a new Login for the Lynx service account logon, if you haven’t already done so. (note: if you don’t have admin privilege you will need to enlist the help of your sysadmin or DBA).
Select the Security folder, Logins, and right-click "New" Login.
Fill in the Login name using the Lynx service account.
Select User Mapping and check the Proximity Card Database you’re going to use.
Check the db_datareader and db_datawriter roles (unless you’re using Windows Authentication, in which case the db_owner permission is set with the eXactAccess configuration and the account will not require the additional permissions).
Step 4: Run the SQL script to create the database tables
Locate the Proximity Card Database for your installation of ExactAccess on the SQL server. (Note the name of the Proximity Card Database).
Open the SQL script (C:\Program Files (x86)\HealthCast\Lynx\CreateDB.sql) and change the name of the database in the first line to the name of the Proximity Card Database.
Execute the script (and refresh the tables list to make sure the tables were created).
Step 5: Configure the Lynx Service ‘Log On As’ Account
Open the Services Console (Control Panel, Administrative Tools, Services).
Locate and double-click the HealthCast Lynx service to open the Properties dialog box.
Click the Log On tab, then select “This account”.
Enter the name and password of the account you are going to use to connect to the database.
Important
If you are planning on configuring Lynx to enable Self-Service Password Reset (see the “SSPR” section under Settings for more detail) you will also need this account to be one with sufficient domain privilege to be able to reset passwords.
Restart the service. If everything has been configured correctly to this point, then the service should start and will indicate a status of “Running”.
Test
Once you have successfully installed and configured the Lynx Server software (and the services are running) you may open a browser and use the Lynx administration tool.
Open any supported browser (IE 10+, Chrome, Edge, Firefox) and enter the following URL: https://(ServerFQDN):(ServerPort)
Note
'ServerFQDN' will be the fully-qualified domain name of the server on which you installed Lynx. 'ServerPort' will be the port you specified when running the PowerShell configuration script during configuration. You don’t have to include ServerPort if you are using port 443.
Important
You should not receive any certificate errors or warnings. If you do you should resolve these before continuing.
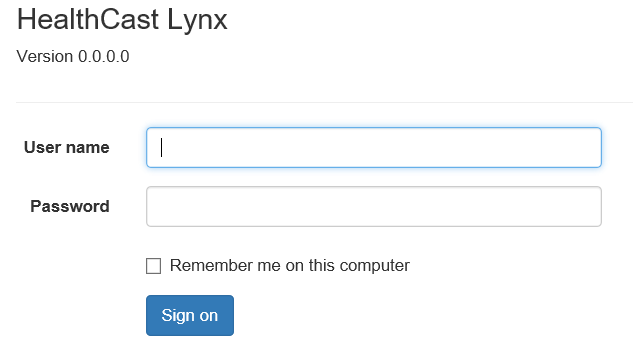
You will be prompted to log into the system using your Windows credentials.
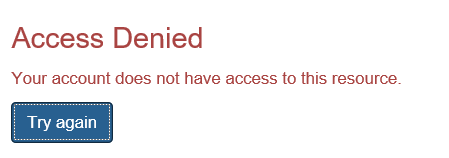
If you are able to successfully authenticate (but not a member of the Lynx admins group) and you attempt to access an area of the site that requires admin privileges you will see the following screen:
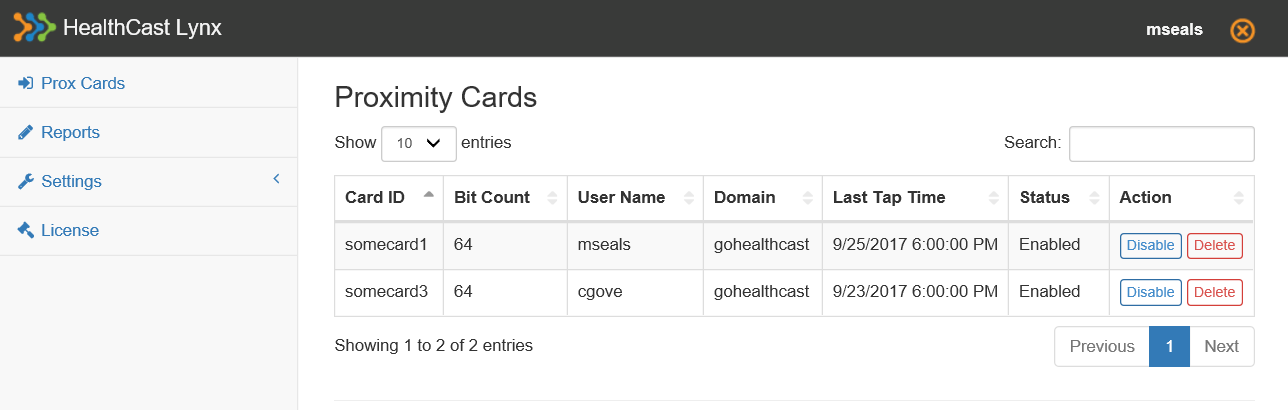
If you are able to authenticate successfully you will see the following menu and screen: