Obtaining Records and Reports
Reporting from the RapidIdentity MFA Server
The administrator can utilize the RapidIdentity MFA Server to generate user reports.
There are various methods in which the administrator can utilize as a means of searching:
by user's state, authentication set, or role
by audit logs
by event logs
cross-role permissions
token lookup
card lookup
Generating Audit Log Reports
The following steps will walk the administrator through the process of generating an audit log report for user enrollment and management.
On the RapidIdentity MFA Server, go to Administrator's Portal > Reports.
Click on Audit Logs in the left-side panel.
Click to generate a check mark in the box next to "Show Time in Local Time."
Under Function, use the drop-down arrow to select the desired, generated function.
Note
This step is only necessary in narrowing down the list that is generated.
Click on the Generate Report button.
 |
The data will display the enrollment supervisors and the users who have been added to the system, along with the date, time, and result of each log.
Note
To generate reports with different data results, utilize the Function drop-down list.
Generating Reports on Lists of Users Enrolled in HealthCast EPCS
Follow these steps to enroll the list of users in HealthCast EPCS.
On the RapidIdentity MFA Server, go to Administrator's Portal > Reports.
Select Click on By User in the left-side panel and then select "By Auth Set."
Check EPCS.
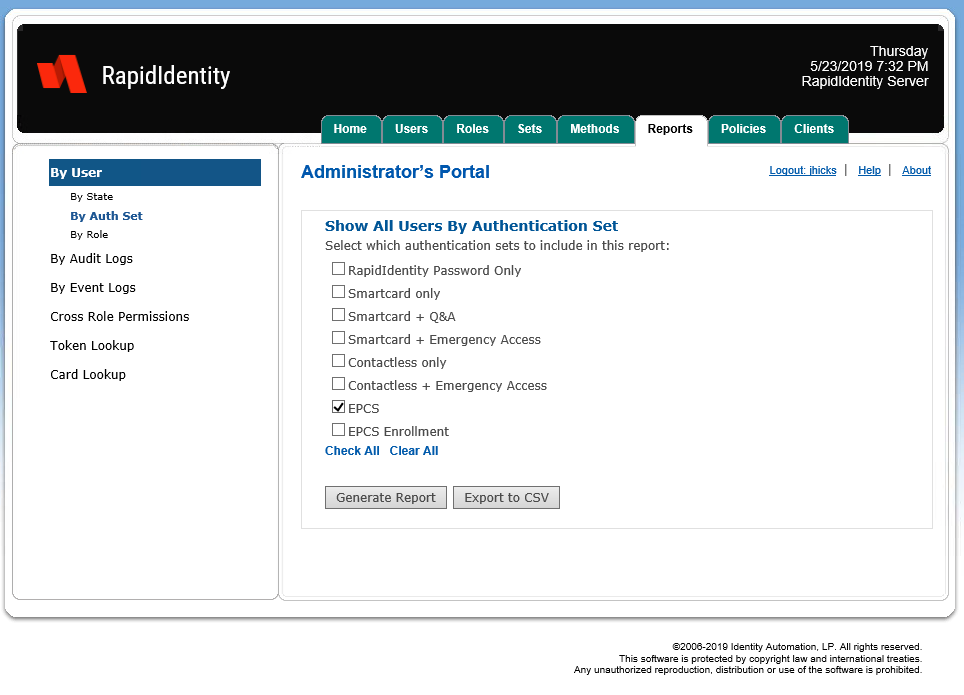
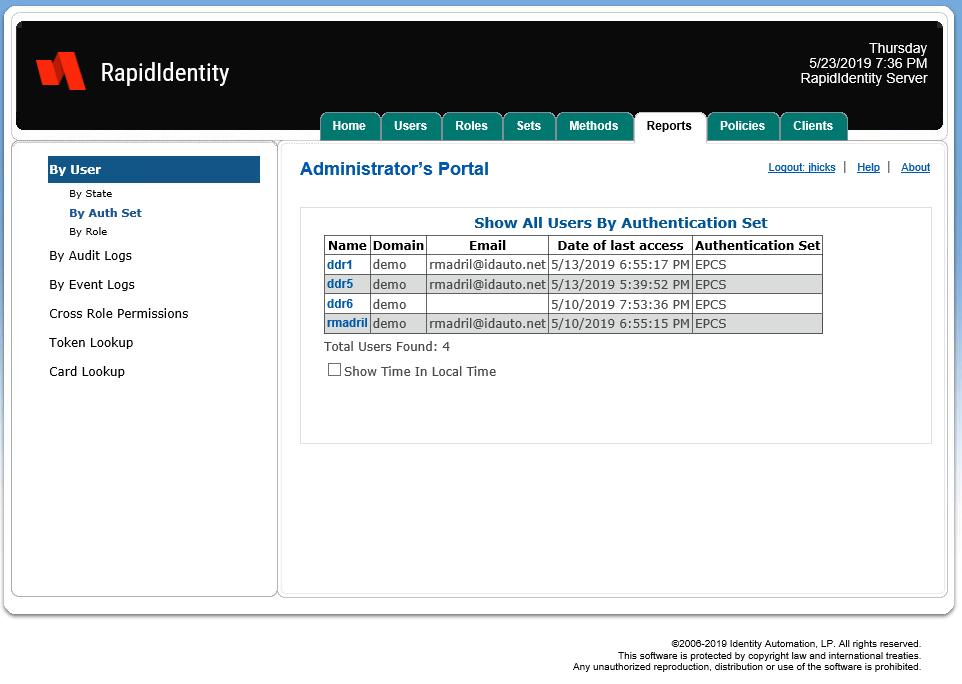
Click on Generate Report or Export to CSV.
Verifying Enrollment Supervisor Status
These steps allow a user at the administrative level to check which users have their status labeled as enrollment supervisor.
On the RapidIdentity MFA Server, go to Administrator's Portal > Reports.
Select Click on By User in the left-side panel and then select By Role.
In the Show Users By Role panel, check the box next to "EPCS Enrollment Supervisor."
Notice
Other roles can be verified by this method. In the Show Users By Role Panel, the administrative user can select from a list of various roles to include in the report.
Click Generate Report.
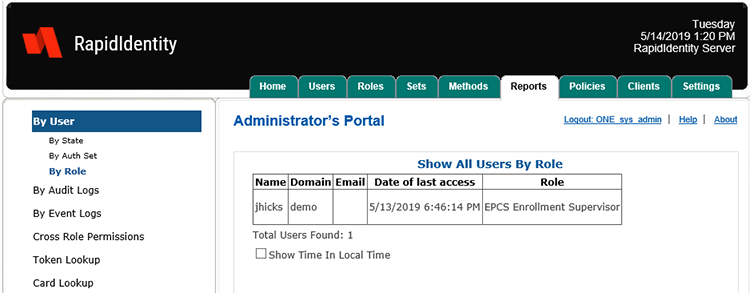
A list of users will then be generated showing the names of the users who are performing enrollments in that environment. The report will also display the date the user last accessed the system and the user's email address, if originally entered.
Reporting from the ExactAccess Server
The administrator can utilize the ExactAccess Server to generate reports based on audited information from the SSO Audit Monitor.
Generating SSO Audit Monitor Events
The user authentication events can be obtained by selecting the desired title of results from the Audit Reports in the SSO Audit Monitor.
Notice
The following is a list of examples of created reports:
The search will generate a log of all audited events with the searched criteria. The report can also be saved by Extracting SSO Audit Monitor Reports.
SSO Audit Monitor Events for All PingMe Attempts
Follow the proceeding steps to obtain user authentication events for all PingMe attempts.
Log into the SSO Audit Monitor on the ExactAccess Server.
Click on Audit Reports on the left side panel.
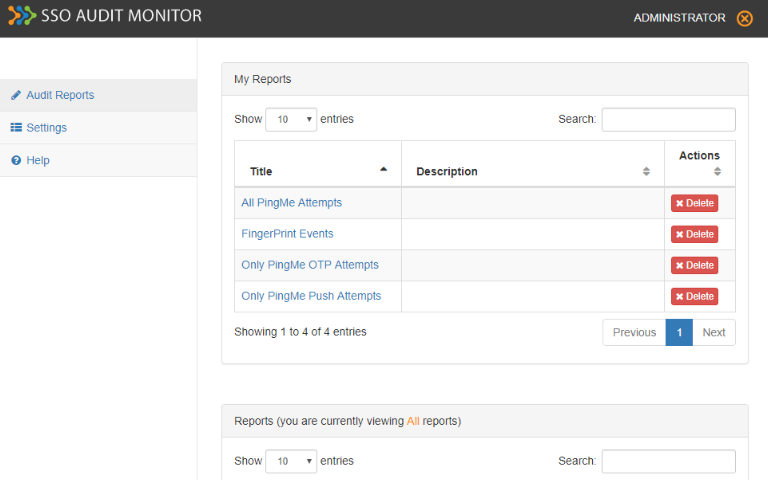
In the Report title section of the Report Parameters, select All PingMe Attempts and press Save as new report....
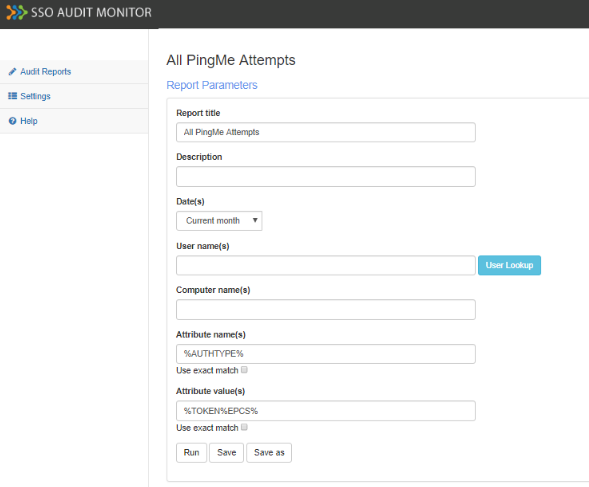
Enter any parameter information necessary to the search, if needed.
Click the Run button.
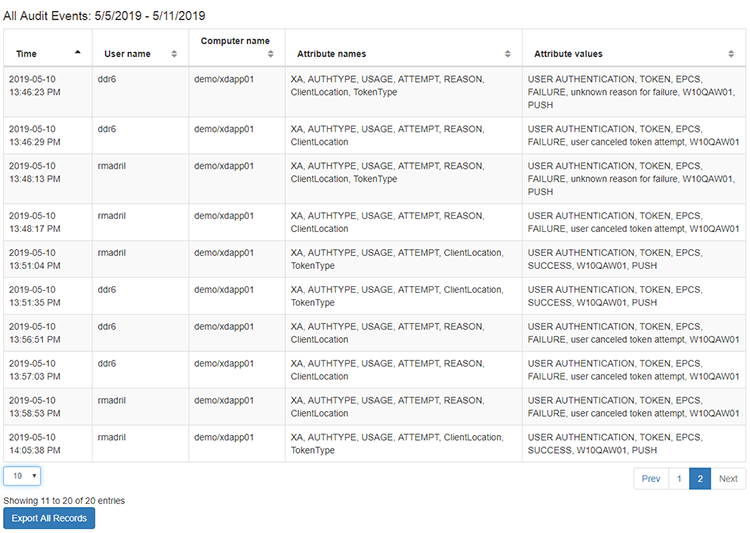
This will generate a log of all of the PingMe attempts, along with the corresponding details that pertain to them.
SSO Audit Monitor Events for Fingerprint Attempts
Follow the proceeding steps to obtain user authentication events for fingerprint attempts.
Log into the SSO Audit Monitor on the ExactAccess Server.
Click on Audit Reports on the left side panel.

In the Report title section of the Report Parameters, select "Fingerprint Attempts."
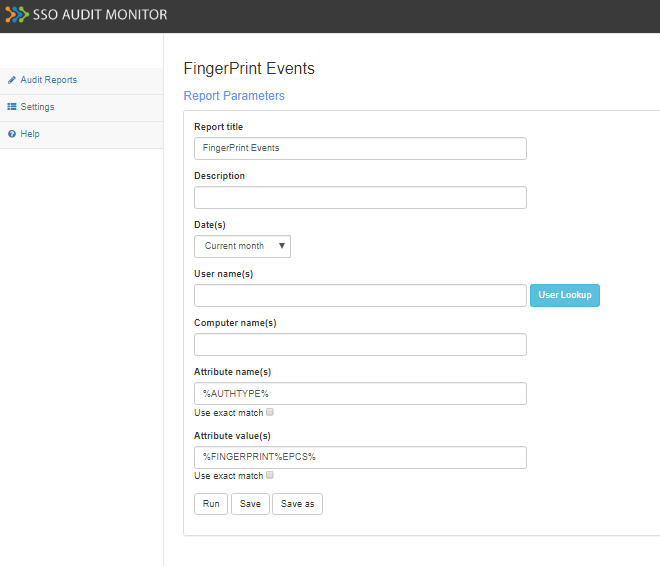
Enter any parameter information necessary to the search, if needed.
Click the Run button.
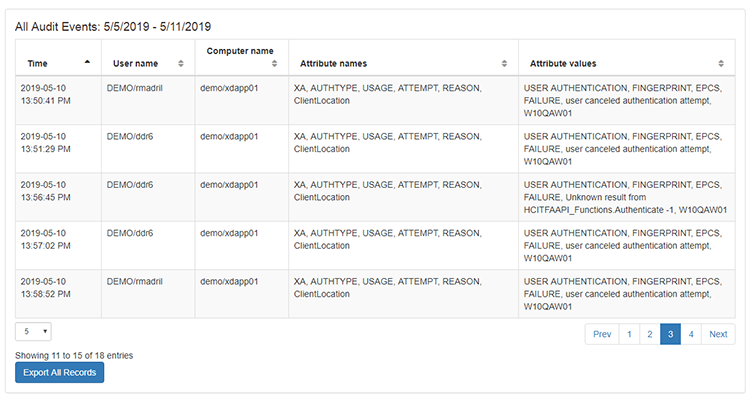
This will generate a log of all audited events with the fingerprint attempts criteria, along with the corresponding details that pertain to them.
SSO Audit Monitor Events for PingMe OTP Attempts
Follow the proceeding steps to obtain user authentication events for PingMe OTP attempts.
Log into the SSO Audit Monitor on the ExactAccess Server.
Click on Audit Reports on the left side panel.

In the Report title section of the Report Parameters, select "Only PingMe OTP Attempts."
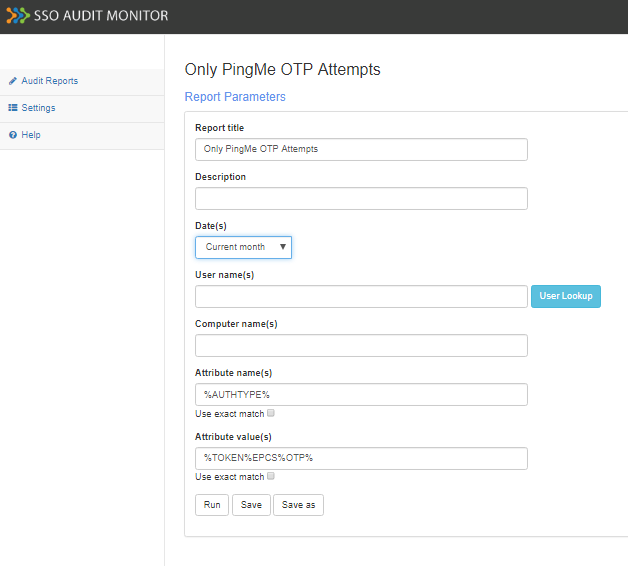
Enter any parameter information necessary to the search, if needed.
Click the Run button.

This will generate a log of all audited events with the PingMe OTP attempts criteria, along with the corresponding details that pertain to them.
SSO Audit Monitor Events for PingMe Push Attempts
Follow the proceeding steps to obtain user authentication events for PingMe Push attempts.
Log into the SSO Audit Monitor on the ExactAccess Server.
Click on Audit Reports on the left side panel.

In the Report title section of the Report Parameters, select "Only PingMe Push Attempts."
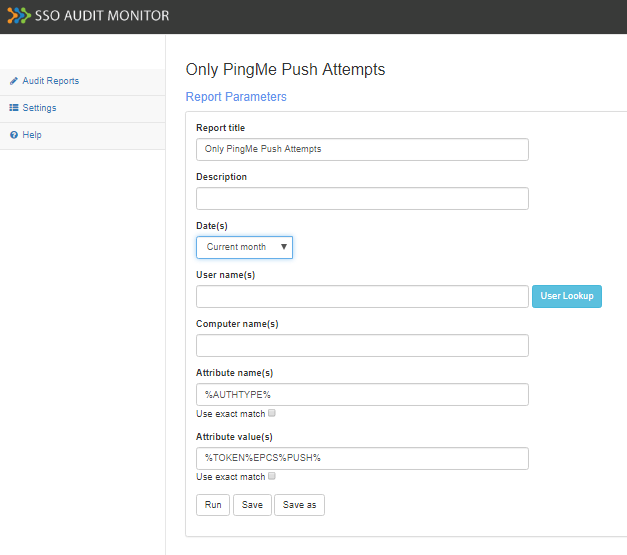
Enter any parameter information necessary to the search, if needed.
Click the Run button.
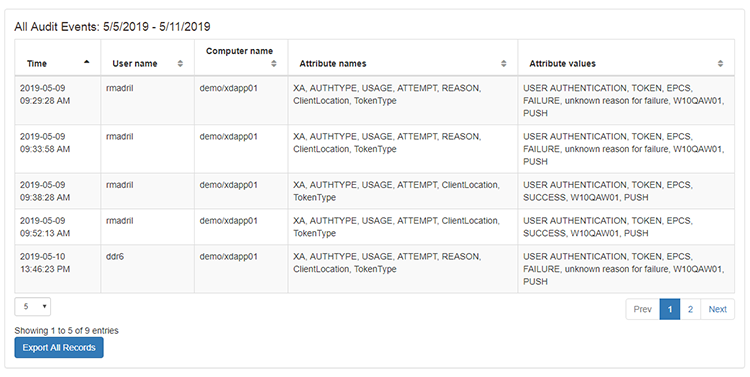
This will generate a log of all audited events with the PingMe Push attempts criteria, along with the corresponding details that pertain to them.
Extracting SSO Audit Monitor Reports
After Generating SSO Audit Monitor Events, the administrative user has the option of extracting the generated report.
In the generated report, scroll down to the All Audit Events section and click the Export All Records button.
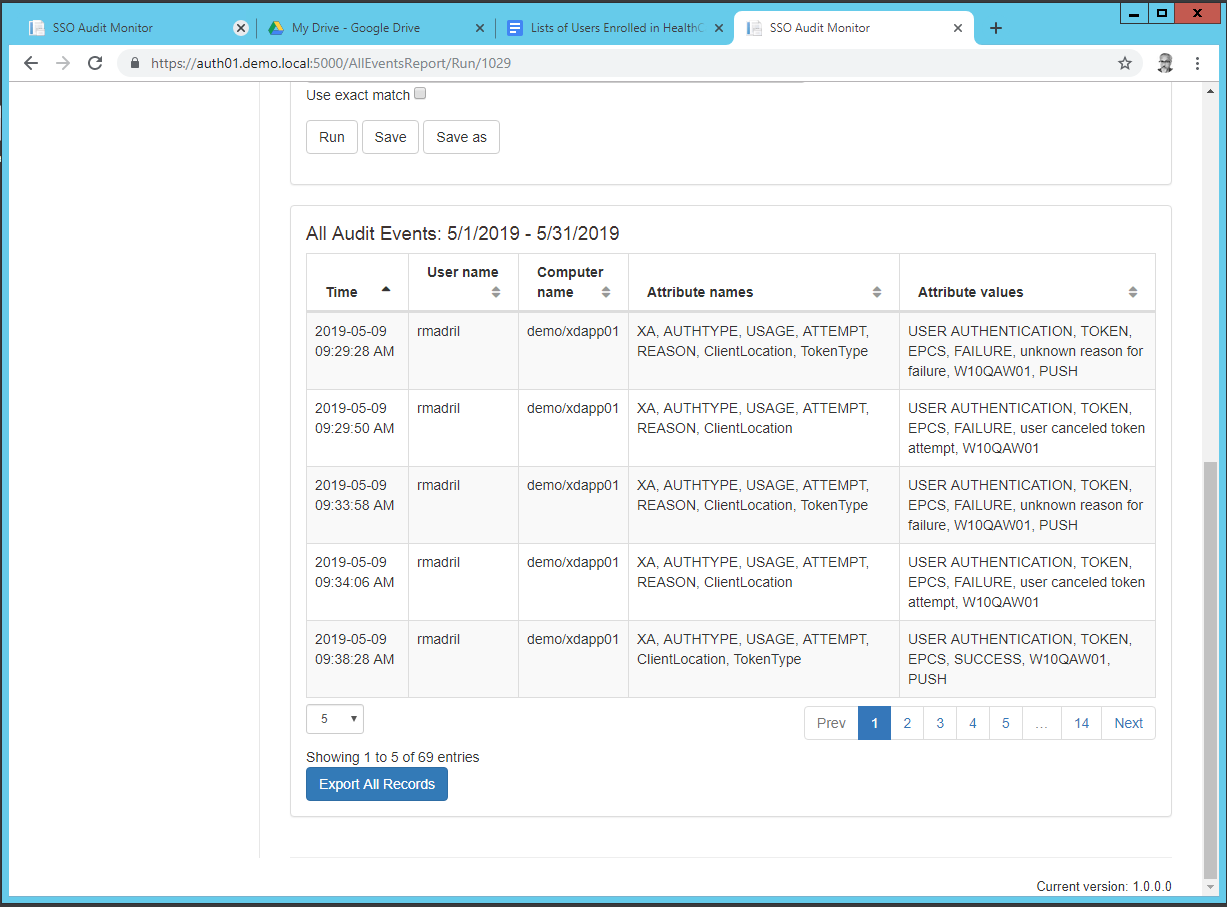
Open the file to view.
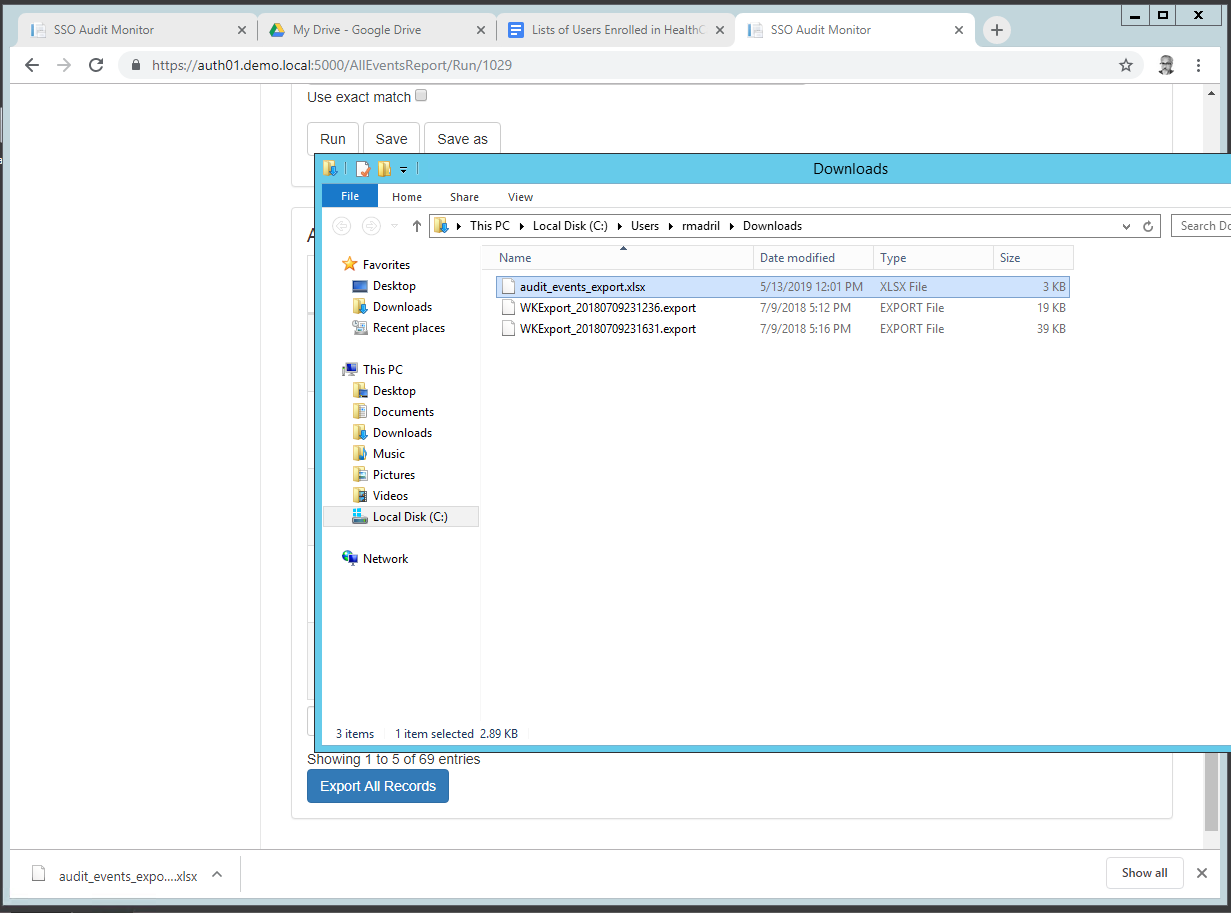
The report will be created as a Microsoft Excel file with the audit report information.