Getting Started
Successfully completing the following steps in the order presented will make your QwickACCESS deployment go smoother. In addition, please note the following:
QwickACCESS for Chrome Devices (QACD) only supports User and Single-App Kiosk end-points. It doesn't support Public Session Kiosk devices.
If using Single-App Kiosk devices, then QACD must be auto-launched. It won't work if QACD is manually launched into Single-App Kiosk from the Google sign-on screen.
Enroll your Chrome device(s) into your organization’s Chrome management (see https://support.google.com/chrome/a/answer/1360534?hl=en)
Using Google Admin console, whitelist the RFIDeas reader (see https://support.google.com/chrome/a/answer/1375678?hl=en)
In Google Admin console, click Devices > Chrome Management (located on the left) > Device settings.
On the left, select the organization that contains the Chrome devices that you want to configure.
Under the Device Settings tab, scroll to “USB Detachable Whitelist” (located near the bottom of the page).
Enter: c27:3bfa
Save the setting.
Using Google Admin console, add Citrix Workspace to your organization’s Google Account and configure it to allow communications from QwickACCESS:
In Google Admin console, click Devices > Chrome Management (located on the left) > Apps & extensions.
On the left, select the organization that contains the Chrome devices that you want to configure
Select the tab(s) from the top in which the app will be added to: Users & Browsers and/or Kiosks.

Note
Repeat the remainder of the steps under each tab that the app will need to be added to.
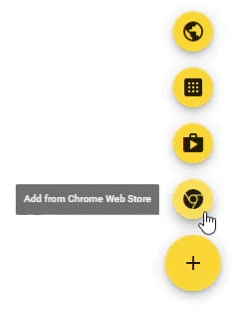
Click the yellow plus icon located at the bottom right of the screen and then select the manner in which the app will be added.

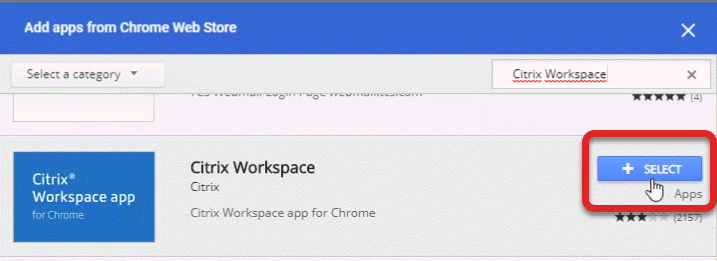
Type Citrix Workspace in the Search the store search box and press Enter on the keyboard.
Click on the Select button for the Citrix Workspace app from the populated app list.

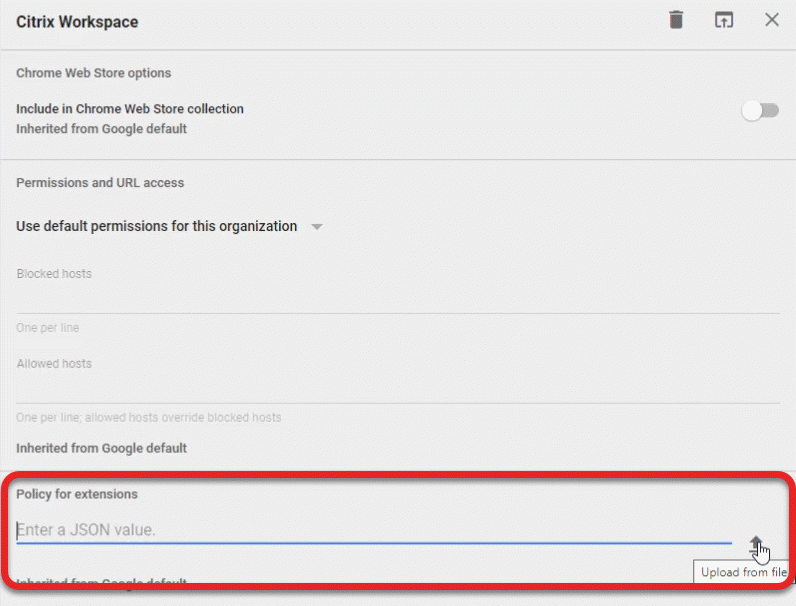
Using the receiver-whitelist-policy.txt file (available from HealthCast), upload the contents to the Policy for extensions section by clicking the Upload from file icon.
Note
If you already have configured Citrix Receiver with a policy file you’ll need to merge the contents of your existing policy file with the content of the policy file obtained from HealthCast.

Upload the receiver-whitelist-policy.txt file (or your merged policy file if applicable)
SAVE changes.
Ensure your Citrix server environment meets the following requirements:
StoreFront
version 2.6 or greater
delivered over HTTPS
StoreFront Web API
version 3.0
delivered over HTTPS
with HTTP Basic Auth enabled
XenApp XenDesktop
version 7.6 or greater
On your StoreFront server, whitelist the Citrix Receiver for Chrome app with StoreFront:
See https://docs.citrix.com/en-us/receiver/chrome/current-release.html
On the StoreFront server, use a text editor to open the web.config file. This file is typically located in the C:\inetpub\wwwroot\Citrix\storenameWeb directory (where storename is the name specified for the store when it was created).
Update the value of “chromeAppOrigins” to add the following value:
chromeAppOrigins="chrome-extension:// haiffjcadagjlijoggckpgfnoeiflnem"
On a Chrome device, ensure you can connect to your Citrix environment with at least two users to test that it is working correctly:
Launch the Citrix Receiver app and configure it to connect to your Citrix environment
After it connects, login as a user who has access to a resource
Launch the resource
Disconnect from the resource and log off of the Citrix Receiver app
Now repeat these steps with a second user
(Optional) Configure Citrix Idle Disconnect/Logoff timers to auto disconnect after certain amount of activity:
Details on how Citrix configuration options work with Windows Server Session Time Limits: (https://technet.microsoft.com/en-us/library/cc753112(v=WS.10).aspx)