Kiosk Mode Appearance
The Kiosk Mode can be configured to mirror the organization's brand through icon and logo displays and through various display settings and themes.
The following sections highlight customization options available for the Kiosk Mode.
Authentication
Themes and displays can be set for the various authentication options available for the Kiosk Mode.
Proximity Card
The user interface of the Proximity Card may be customized by changing the background images, the font face, color and size for various prompts, as well as the layout of the dialog utilizing a mask image.
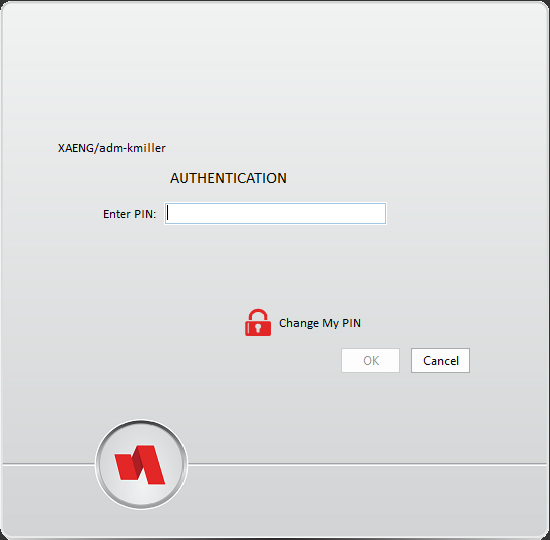
PIN Prompt Dialog
There are several registry keys associated with the display of the privacy shield and its contests. The values below describe those intended to be changed for the Login display PIN dialog.
The font color, size, and face can be customized for the login directions, login fields, the change PIN text, and the error text.
HKEY_LOCAL_MACHINE\SOFTWARE\HealthCast\ExactAccess\display
Login Directions - e.g. tap your card, enter your username, enter your PIN, etc.
Registry Key
Value Description
LoginDirectionsFontColor
reg_dword - the NBGR (none,blue,green,red values from left to right) color the text for the login directions will be displayed in.
LoginDirectionsFontSize
reg_dword - the size of the font in points for the login directions.
LoginDirectionsFontFace
reg_sz - the font face name of the login directions display.
Login Fields - e.g. username, password, PIN, etc.
Registry Key
Value Description
LoginFieldPromptFontColor
reg_dword - the NBGR (none,blue,green,red values from left to right) color the text for the field prompts will be displayed in.
LoginFieldPromptFontSize
reg_dword - the size of the font in points for the field prompts.
LoginFieldPromptFontFace
the font face name of the field prompts.
Change PIN - e.g. instructional text for changing PIN if the user desires to choose a new PIN.
Registry Key
Value Description
ChangePINFontColor
reg_dword - the NBGR (none,blue,green,red values from left to right) color the text for the "change pin" text will be displayed in.
ChangePINFontSize
reg_dword - the size of the font in points for the "change pin" text.
ChangePINFontFace
reg_sz - the font face name of the "change pin" text.
Error text - e.g. In the case of a PIN error, text describing the problem.
Registry Key
Value Description
ErrorFontColor
reg_dword - the NBGR (none,blue,green,red values from left to right) color the text for error.
ErrorFontSize
reg_dword - the size of the font in points for the error text.
ErrorFontFace
reg_sz - the font face name of the error text.
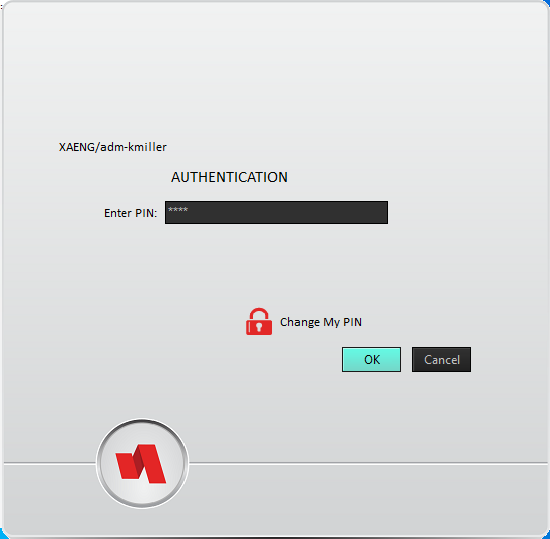
Setting a Style/Theme
Display styles will apply color to the input boxes and the login buttons. Other colors must be configured with the settings listed on this page.
To set a particular style or theme for display:
HKLM\Software\HealthCast\ExactAccess\Display
LoginFormStyle: reg_sz = "<a valid style file name or full path and file name, including .VSF extension>"
Tip
For a full list of available styles, look in the following installation folder:
C:\Program Files (x86)\Common Files\HealthCast\themes
 |
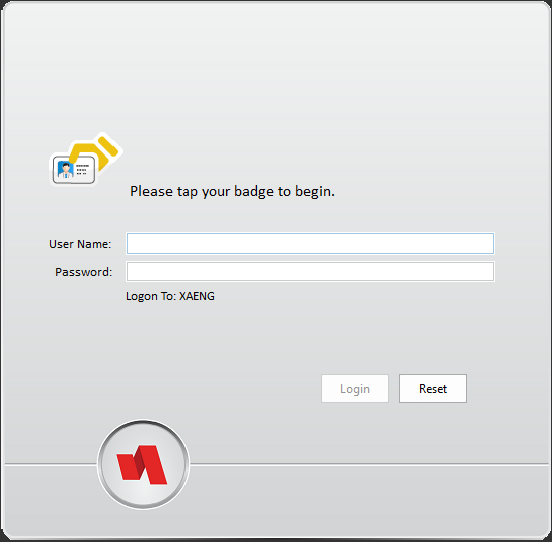
Here are some of display examples that can be configured.
Amakrits.vsf
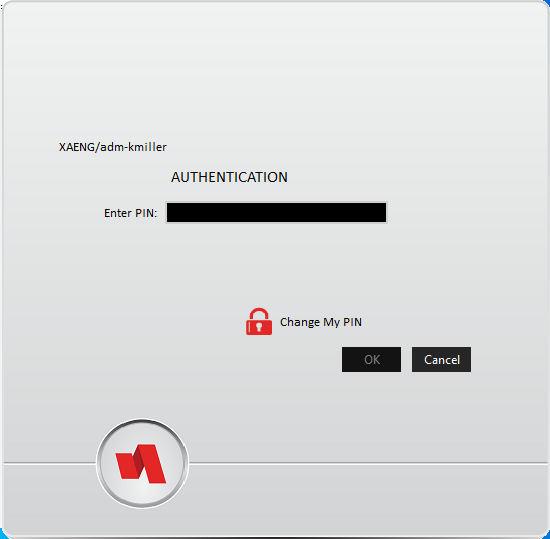
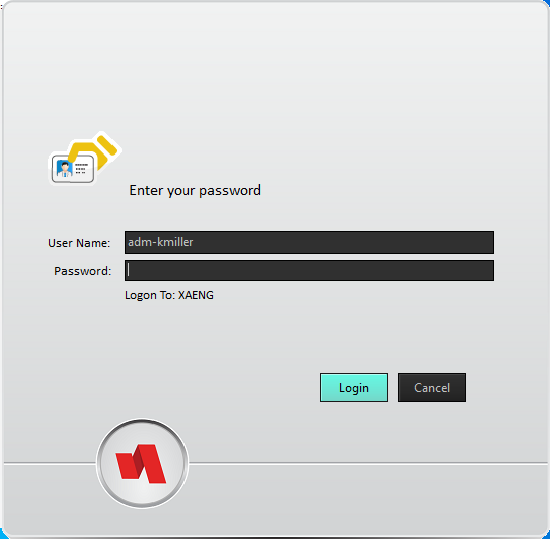
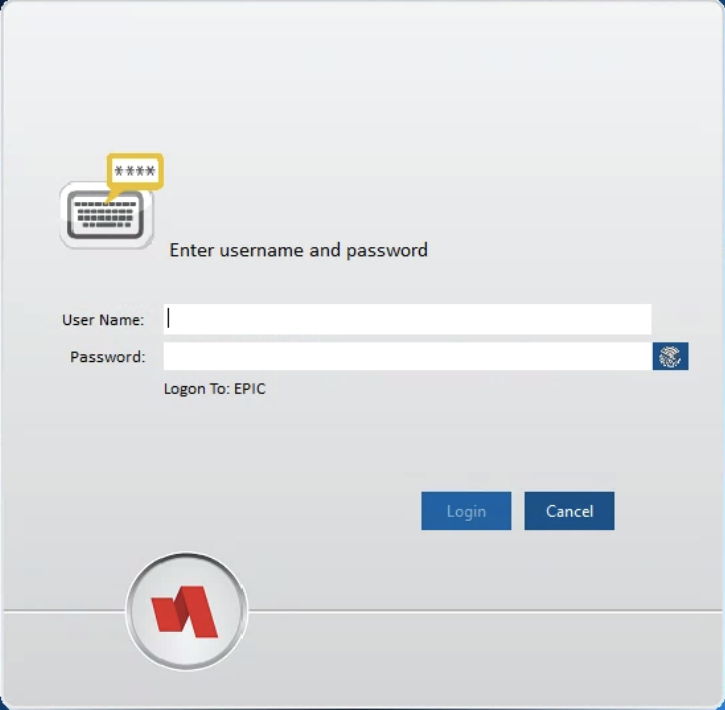
Windows10Blue.vsf
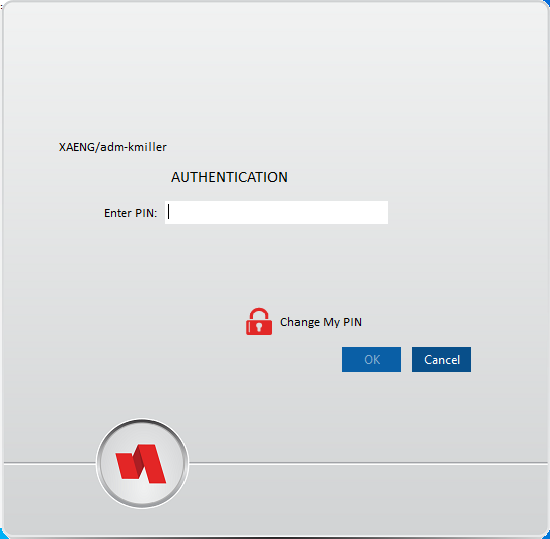
Windows10Dark.vsf
Changing the PIN Background Image
When customizing the Kiosk Mode PIN background image, there are two image files to note:
PinBackground_FORE.png
The fore image will take the place of the entire background image, including the border. The default image size is 500 x 311 pixels.
PinBackground_MASK.bmp
This image is used to position the user interface elements to accommodate the layout of the *_FORE image graphic.
Tip
Both images must be the same size for proper operation of the PIN dialog.
The simplest method of designing a new image
Copy the PinBackground_MASK.bmp to a file named PinBackground_FORE.bmp
Convert it to a PNG image.
Open the PinBackground_FORE.png and make desired changes, taking into account the positioning of the elements.
The design can now be placed over any open, white space around the element location sections as found in PinBackground_MASK.bmp.
The default login dialog background is a PNG image:
 |
Note
When editing and saving the _MASK file, be sure that pure colors are used and no anti-aliasing is performed on the image. Tools other than Microsoft Paint automatically blend borders into the background color, effectively shrinking the desired display area.
User Interface Elements Corresponding RGB Values
These sections correspond to the following user interface elements:
Note
The numbers in ( ) correspond to Red, Green, Blue (RGB) values in that order.
Magenta (255,0,255) - Holds the title of the PIN prompt (either indicating enrollment or verification)
Yellow (255,255,0) - Help text describing what the user should do (such as tap a proximity card)
Black (0,0,0) - Holds the entry fields for both enrollment and verification.
It is important that the dimensions of this box remain relatively unchanged so as to not inadvertently clip the user interface elements to be displayed in this area.
Gray (128,128,128) - The position and size of the "Change PIN" button (both for UP [ChangeButtonUp.png] and DOWN [ChangeButtonDown.png])
Plum (128,0,128) - The title/text for changing PIN.
Aqua (0,255,255) - The position and size of the warning icon (WarningImage.png) in the case of an error.
Green (0,255,0) - The text describing the error condition.
Blue (0,0,255) - the Login button position.
Red (255,0,0) - the Cancel/Reset button position.
The mask determines where the login elements will be displayed over the top of the login background.
 |
Warning
The mask colors should not overlap one another, as the coordinates of the top-left and bottom-right are used to calculate the location and size of the elements they represent.
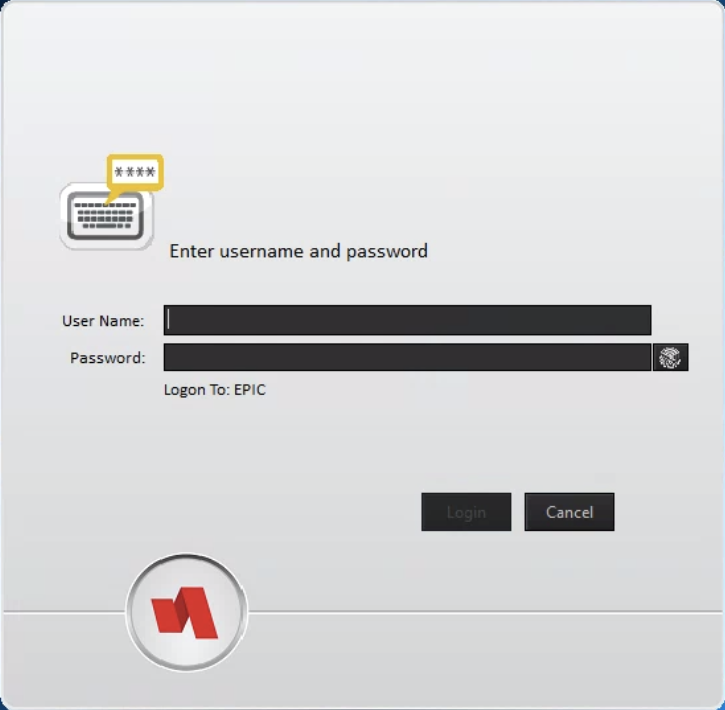
Username and Password
The user interface of the manual login process can be customized by changing the background images, the font face, color and size for various prompts, as well as the layout of the dialog utilizing a mask image.
See Setting a Style/Theme for directions on how to change the username and password prompt layout and to view various display examples.
Changing the Password Reset Text
The Password Reset text can be modified to fit the organization's needs by changing the following:
HKLM\Software\HealthCast\PasswordReset
ResetLinkText: reg_sz = "new reset text"
If the key does not exist, or is not set, and a password reset URL is present, the default text "Forgot your password? Click here to reset it." will be used.
Setting a Style/Theme
Display styles will apply color to the input boxes and the login buttons. Other colors must be configured with the settings listed on this page.
To set a particular style or theme for display:
HKLM\Software\HealthCast\ExactAccess\Display
LoginFormStyle: reg_sz = "<a valid style file name or full path and file name, including .VSF extension>"
Tip
For a full list of available styles, look in the following installation folder:
C:\Program Files (x86)\Common Files\HealthCast\themes
 |
Here are a variety of display examples that can be configured.
Amakrits.vsf
Windows10Blue.vsf
 |
Windows10Dark.vsf
 |
Display Settings
The text, background image, RGB values, and the login dialog can be customized. See the corresponding sections below.
Login Dialog
When editing and saving the _MASK file, be sure that pure colors are used and no anti-aliasing is performed on this image. Tools other than Microsoft Paint automatically blend borders into the background color, effectively shrinking the desired display area.
HKEY_LOCAL_MACHINE\SOFTWARE\HealthCast\ExactAccess\display
Login Directions - e.g. tap your card, enter your username, enter your PIN, etc.
Registry Key | Value Description |
|---|---|
LoginDirectionsFontColor | reg_dword - the NBGR color (none, blue, green, red values from left to right) of the login directions display |
LoginDirectionsFontSize | reg_dword - the point font size of the login directions display |
LoginDirectionsFontFace | reg_sz - the font face name of the login directions display |
Login Fields - e.g. username, password, PIN, etc.
Registry Key | Value Description |
|---|---|
LoginFieldPromptFontColor | reg_dword - the NBGR color (none, blue, green, red values from left to right) of the login directions display |
LoginFieldPromptFontSize | reg_dword - the point font size of the login directions display |
LoginFieldPromptFontFace | reg_sz -the font face name of the field prompts |
LoginFormStyle | reg_sz: the file name of the style to apply to the login display |
To enable biometrics as an alternate authentication method, the following registry key can be set.
HKEY_LOCAL_MACHINE\SOFTWARE\HealthCast\ExactAccess\Override\AlternateLoginEnabled: reg_dword = 1 to enable alternate login button, 0 to disable alternate login button.Changing the Kiosk Mode PIN Background Images
When customizing the Kiosk Mode PIN background images, there are two image files in C:\program files\HealthCast\ExactAccess.
PinBackground_FORE.png
The fore image will take the place of the entire background image, including the border. The default image size is 500 x 311 pixels.
PinBackground_MASK.bmp
This image is used to position the user interface elements to accommodate the layout of the *_FORE image graphic.
The simplest approach to designing a new image is to copy the LoginBackground_MASK.bmp to a file named LoginBackground_FORE.png
Open the LoginBackground_FORE.png and make desired changes, taking into account the positioning of the elements. The design can be placed over any open, white space around the element location sections as found in the LoginBackgroun_MASK.bmp.
The default login dialog background is a PNG image.
 |
Note
When editing and saving the _MASK file, be sure that pure colors are used and no anti-aliasing is performed on this image. Tools other than Microsoft Paint automatically blend borders into the background color, effectively shrinking the desired display area.
User Interface Elements Corresponding RGB Values
These sections correspond to the following user interface elements:
Note
The numbers in ( ) correspond to Red, Green, Blue (RGB) values in that order.
Black (0,0,0) - this is the login portion of the dialog prompt, and will include the domain user name, domain password, and potentially, the domain drop down list. It is important that the dimensions of this box remain relatively unchanged so as to not inadvertently clip the user interface elements to be displayed in this area.
Blue (0,0,255) - the Login button position
Red (255,0,0) - the Cancel/Reset button position
Aqua (0,255,255) - the ProxCard indicator image position and size (both the prox [ProxImage.png] and keyboard [NoProxImage.png] images should be the same size, and match this dimension)
Yellow (255,255,0) - Help text describing what the user should do (such as tap a proximity card)
The mask determines where the login elements will be displayed over the top of the login background.
 |
Once the design is created around the user interface elements, remove those element markers by filling the rectangles with the chosen background color (it does not have to be white) to match the presentation.
To deploy this updated background, include it in a transform. If HCIDeploy is configured, the updated background can be added to the a deployment package instead.
Other deployment methods (such as Microsoft SMS) may also be used. Simply deploy the updated bitmap or PNG to the correct location for the operating system (C:\Program Files\HealthCast\ExactAccess\)
Warning
The mask colors should not overlap one another, as the coordinates of the top-left and bottom-right are used to calculate the location and size of the elements they represent.
Privacy Shield
The privacy shield display contains various elements that indicate the system is in use. It can also display how long until the system will automatically log off the inactive session once the system has been locked. When the system is locked, the privacy shield also displays the login prompt, allowing for a user to return, or another user to log in over the current session, causing the current session to be logged off.
Display Settings
Log-in as a Local Administrator to the workstation that will be changed.
Note
The Client Configuration Tool will only run under an account with Local Administrator privileges.
Navigate to the Windows® Start menu> All Programs > HealthCast > ExactAccess > Utilities > Configuration > Client Configuration.
and choose Kiosk Mode.
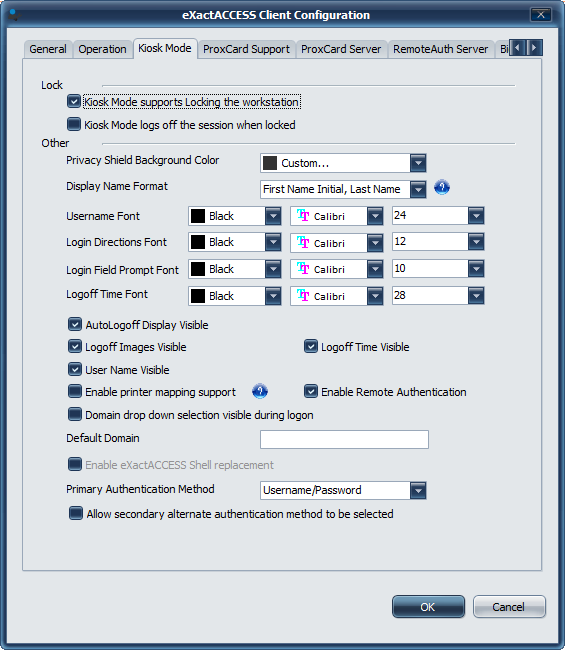
In the Other section select the options to configure for font color, font name, and font size.
Click OK to save the changes.
Privacy Shield Display Registry Keys
There are several registry keys associated with the display of the privacy shield and its contests. The values below describe those intended to be changed for the Auto-Logoff display. To position the overall display, change the values of: PSAutoLogoffPosX, PSAutoLogoffPosY
HKEY_LOCAL_MACHINE\SOFTWARE\HealthCast\ExactAccess\display
Registry Key | Value Description |
|---|---|
PSAutoLogoffVisible | reg_dword - flag indicating if the Autologoff display will be visible. (1 to enable, 0 to disable the display of auto-logoff) |
LogoffDisplayTimeVisible | reg_dword - flag indicating if the time field will be displayed. (1 to enable, 0 to disable display of logoff time) |
LogoffDisplayTimeImagesVisible | reg_dword - flag indicating if the progress indicator images will be displayed. (1 to enable, 0 to disable display of the images) |
PSLoginNameVisible | reg_dword - flag indicating if the current session user name should be displayed for auto-logoff. (1 to enable, 0 to disable display of session name) |
PSAutoLogoffPreFix | reg_sz - the text that will appear to the left of the time display |
PSAutoLogoffPostFix | reg_sz - the text that will appear to the right of the time display |
PSAutoLogoffPosX | reg_dword - the horizontal Pixel position of the upper left of the complete auto-logoff display as sized by the images ALDisplay_* |
PSAutoLogoffPosY | reg_dword - the vertical Pixel position of the upper left of the complete auto-logoff display as sized by the images ALDisplay_* |
PSLogoffTimeFontColor | reg_dword - the NBGR (none,blue,green,red values from left to right) color the text for the time will be displayed in. |
PSLogoffTimeFontSize | reg_dword - the size of the font in pixels for the time display. |
PSLogoffTimeFontFontFace | reg_sz - the font face name of the time display. |
PSLoginNameFontColor | reg_dword - the NBGR (none,blue,green,red values from left to right) color the text for the login name will be displayed in. |
PSLoginNameFontSize | reg_dword - the size of the font in pixels for the login name. |
PSLoginNameFontFontFace | reg_sz - the font face name of the login name display. |
Changing the Username Display Format
Log-in as a Local Administrator to the workstation that will be changed.
Note
The Client Configuration Tool will only run under an account with Local Administrator privileges.
Navigate to the Windows® Start menu> All Programs > HealthCast > ExactAccess > Utilities > Configuration > Client Configuration.
Click the General tab to show the customization options available. The option also appears on the Kiosk Mode tab.
Using the drop-down arrows of Display Name Format (at the bottom of the dialog), select the options that are appropriate for your environment, and click OK to finish.
The new settings should now show when your XA screen saver, privacy shield, or Active User List is displayed. A reboot may be necessary in some environments. If prompted, please reboot your workstation.
Choose the appropriate Username display format by using the following server-side instructions for LDAP Privacy Shield Settings:
It is recommended that the Use Given Name (First name) and SN (Last name) fields option be chosen. This setting affects the privacy shield display name settings.
Tip
If you are connecting this client version to a server older than 4.8.3, the LDAP provider must be configured for the XA server instead of the WinNT provider in order to use the First Name, Last Name fields, instead of Display Name.
Note
If you are using Kiosk Mode Passthrough Authentication only, the following Username Settings are available:
3. Directory Service Name
7. In use only
8. No username display.
Registry Settings for Display Name Format
HKEY_LOCAL_MACHINE\SOFTWARE\HealthCast\ExactAccess
KMLockDisplayMode: reg_dword = 0
0 - Full Name
1 - Last Name only
2 - First Name only
3 - Directory Service Name
4 - Initials Only
5 - First Name, Last Initial
6 - First Name Initial, Last Name
7 - System In Use
8 - No user name (can also be set on the privacy shield independently)
Setting a Style/Theme
The auto-logoff image, as well as the full background image can be customized to suit the branding of the organization. To set up a style or a theme,
When customizing the Kiosk Mode auto-logoff background image, there are two image files to note:
PinBackground_FORE.png
The fore image will take the place of the entire background image, including the border. The default image size is 500 x 311 pixels.
PinBackground_MASK.bmp
This image is used to position the user interface elements to accommodate the layout of the *_FORE image graphic.
Open the ALDisplay_FORE.png and make desired changes, taking into account the positioning of the elements. The design can be placed over any open, white space around the element location sections found in the ALDsiplay_MASK.bmp.
Tip
Both images must be the same size for proper operation of the PIN dialog.
The default login dialog background is a PNG image that matches the color of the privacy shield background.
 |
Note
When editing and saving the _MASK file, be sure that pure colors are used and no anti-aliasing is performed on this image. Tools other than Microsoft Paint automatically blend borders into the background color, effectively shrinking the desired display area.
These sections correspond to the following user interface elements:
Note
The numbers in ( ) correspond to Red, Green, Blue (RGB) values in that order.
Black (0,0,0) - this is the display for the User Name.
Aqua (0,255,255) - this is the progress indicator (lockedUser[1-5].png) images will appear
Yellow (255,255,0) - this is the display for the Prefix + logoff time + Postfix values.
The mask determines where the login elements will be displayed over the top of the background.
 |
Warning
The mask colors should not overlap one another, as the coordinates of the top-left and bottom-right are used to calculate the location and size of the elements they represent.
Setting a full background image
The privacy shield will now load a background image to display. This background image can contain any optional information to display when the system is secured.
To set the display image, the display needs to be generated, configured, and pinned. The following drop down sections will guide in this procedure.
This display may be a static image, or it may be created automatically by a program such as Microsoft's (SysInternals) BGInfo. Simply configure a path for the image to be saved, and follow the steps below to enable loading of this image.
Open regedit.exe
Navigate to HKEY_LOCAL_MACHINE\SOFTWARE\HealthCast\ExactAccess\Display
Edit the SysInfoImage registry value and set it to the full path of the image to load.
Optionally, set the StartX / StartY registry keys to the X,Y coordinates of where the upper left of the image should start.
This is only necessary if the image to be displayed is smaller than the current screen resolution, or to only display the image on a second monitor in a multi-monitor configuration.
Optionally, set the UseTransparency value to 0.
If you want the image to not be transparent - meaning, the entire image is drawn, set the value to 0. If you have generated the image with BGInfo, it is recommended to set UseTransparency to 1, so the currently configured background color is used to display behind the text.
Tip
If the file path entered in the SysInfoImage changes, or if the file date/time of the file specified in the SysInfoImage changes, the image will be reloaded. This allows administrators to script changes to the registry to display multiple images, or dynamically update the image to provide a rotating display of information if desired.
Open regedit.exe
Navigate to HKEY_LOCAL_MACHINE\SOFTWARE\HealthCast\ExactAccess\Override
Edit the PSUserDisplayPositionLocked: reg_dword registry value - set the value to 1 to pin the location so that it cannot be modified by dragging it with the mouse.
Network Status
The network status contains its own set of display options. The network availability display can be configured so that it cannot be closed by the end user. The positioning and status images of the display status, along with disabling it altogether, can be achieved by editing settings of the following registry keys.
Customizing the Display Status
Included in the XA client install is the application hciNetStatus.exe. This application displays the current network connectivity status of the workstation, either connected or disconnected. The display can be customized in the following ways.
The positioning of the display can be changed by setting the following registry keys:
HKEY_LOCAL_MACHINE\SOFTWARE\HealthCast\
ExactAccess\display
NetStartX: reg_dword = the horizontal pixel position of the upper left of the image for network connectivity.
NetStartY: reg_dword = the vertical pixel position of the upper left of the image for network connectivity.
The network status display can be changed by replacing the images listed below. The images should be 64x64 pixels or smaller.
The background image for connected can be modified by replacing the image netavail.png
The background image for disconnected can be modified by replacing the image netdown.png
The network status display location can be changed by dragging and dropping the network status display on the Privacy Shield. The NetStartX and NetStartY values will be updated for easy visual positioning.
Tip
To make it easier to find the correct location for placement of the network status for a particular screen resolution, simply left-click and drag the image to the appropriate location on a workstation with the correct screen resolution settings, then export the registry key values above to set them for additional workstations. The default placement at install time is designed for a screen resolution of 1920x1080.
If this appears off the screen for low resolution displays, modify the values NetStartX = 0 and NetStartY = 0. Logoff the workstation and log back in - the display should appear in the upper left corner of the screen. Proceed to drag the display to the appropriate location.
To disable the display of the network status, remove the hciNetStatus.exe from the following registry key:
HKEY_LOCAL_MACHINE\SOFTWARE\Microsoft\Windows\
CurrentVersion\Run
Log off the kiosk workstation and login with the generic user for this setting to take effect.
Note
If you have enabled the shell replacement, the above registry key will not exist. To enable the display on the privacy shield with shell replacement, add the value to the following key:
HKEY_LOCAL_MACHINE\SOFTWARE\HealthCast\
ExactAccess\startup
04: reg_sz = "c:\program files (x86)\healthCast\ExactAccess\hcinetstatus" hcikmlock
Open regedit.exe
Navigate to HKEY_LOCAL_MACHINE\SOFTWARE\HealthCast\ExactAccess\Override
Edit the NetPositionLocked: reg_dword registry value - set the value to 1 to pin the location so that it cannot be modified by dragging it with the mouse.
The network availability display will remain open if the following steps are followed to remove the close button that allows the user to close it.
Open regedit.exe
Navigate to HKEY_LOCAL_MACHINE\SOFTWARE\HealthCast\ExactAccess\Override
Edit the NetRemoveCloseButton: reg_dword registry value - set the value to 1 to remove the close button so the network availability display cannot be closed by the end user.